Wednesday 19 June 2024

Quilting With Invisafil - To Do Tuesday #78

Last week I planned for:
- to sew up a cover for my label for the wholecloth and also prepare the hanging sleeve✅
- maybe make a start on my next background filler project
- seriously look at a new pattern for my Etsy shop (which I have neglected over the last few months). - Well, I did look at it, but that's about all!

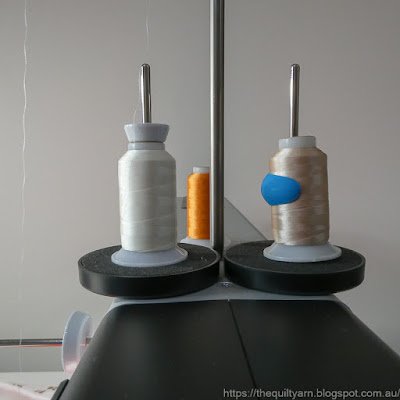
I started on my background filler project with the rather tedious task of quilting in the ditch. As this is an improvisational piece the quilting in the ditch has to be done largely freehand. A definite skill to practice! I am using Invisafil 100wt from Wonderfil Threads for the most invisible stitch in the ditch Using three different colours:
Antique White on the left, Orange (in the background) and Nude on the right (Yep, started another thread collection). I could have used just the nude colour...this would have blended nicely with everything as Invisafil does blend into the colour you are quilting, but given that I had the other colours as well, I used them for the most invisible finish.
Many people find Invisafil fiddly. Must say I don't...I have my tension on the lower end (on the Bernina Q20 on 2.25), use Decobob prewounds (80wt) in the bobbin and go in manual mode rather slowly. Never had any issues with that.
The thread just sinks in and virtually becomes not noticeable. Gives a really nice finish. Also made use of my new foot, the 72 S...a ruler foot with a slit, so you can switch between sewing feet if you need to without cutting your thread. Actually forgot that I got this...I have a couple of straight lines in this piece and only remembered when I was about to change the foot. 

So, I am working away at this, hoping that I can start the freemotionquilting some time next week.

For the remainder of the week I am going to
- finalise my quilt show entry ...only need to put a cover on the label, prepare my bag and that's it!)
- finish the quilting-in-the-ditch on my background filler project
- continue to knit in the evenings ( currently trialing a raglan jumper and also need to make a start on a second sock)
- keep looking at my Etsy shop until the pressure becomes so great that I will actually start on a new pattern.

Linking up to To Do Tuesday #78 over a Quilt Schmilt.

Happy Quilting

Karin

Tuesday 11 June 2024

The Nude Quilt

Finished the quilting on another charity quilt which I ended up calling 'The Nude Quilt'. It is an exceptionally well made quilt top...the seams mainly line up and the maker has taken great care in painstakingly cutting out a motif to put into the corner stones for the sashing. Those little corner stones are just 1-1/2in squares, so that would have taken a lot of patience to cut out. The motifs then re-appear in the striking border. 
The corners are neatly mitered. Love the muted colouring of this quilt and am assuming that the fabrics are quite old. Love doing these charity quilts. When I am quilting these, I am always wondering who made this, for what purpose...was it meant to be a gift or did somebody just love the colours of the fabric.

Anyway, initially I was going to do some ruler work in the charm squares, however then decided that this quilt would look best if I just ditched it. It is wonderfully flat and having just stitched in the ditch lets the fabric choices shine. I decided that this is what the maker must have had in mind.
See those little corner stones...too cute! Like little diamonds all over the quilt.

I have not done stitching -in-the-ditch for a while and thought I practice cutting my thread tails off rather than burying them. Well, that did not work for me...I did cut a few off but went straight back to burying my threads. Not that it does not work...it does, I just find it really difficult to trust that and straight away fall back into burying those threads.

A little bit about my machine. I am stitching on a Bernina Q20 and was reminded the other day that some people might find it useful to read about the settings and how I use this machine.

I stitched in the ditch with my favourite ditch ruler from Handiquilter (the right one in the photo below)
I like it because it has the quarter inch notch on both sides, so I can easily switch between stitching on top of the seam or next to it which is handy when you are stitching down a quilt and the ditch side of the seams of each block alternate as you go down the quilt.
In terms of settings, I do all my ruler work in BSR2 (which is the Precision Mode on HQ), i.e. the needle stops moving when I stop moving the fabric in contrast to BSR1 where the needle keeps going when you stop moving the fabric. Find that just a bit precarious with a ruler next to the needle.
For this quilt I had just the right coloured thread, in fact it was a perfect match with the red of the sashing.
It is one of the small Aurifil spools that I acquired a long time ago when I was still stitching on the DSM. I have a side spool for the machine, however the thread is wound crosswise, so I put it on the top as per normal and it worked just fine. No problem at all.
Also used a different thread in the bobbin as the backing was multi-coloured. Chose a soft pink that just sunk into the fabric. Had no pokies either top or bottom as both threads were Aurifil 50/2 weight. With a little bit of care when setting the bobbin and top tension you can absolutely avoid pokies. The domestic sewing machine needles that this machine uses of course helps with that. I stitched this with an 80/12 Jeans needle. Strong needle with a fine point and good to use when you quilt with some speed.

What next for me?

Missed out on the To Do Tuesday Link Up again for 2 weeks, I think. Since then I finished my wholecloth and am currently preparing it for the show. Will show photos of the wholecloth in July once the show is happening as my entry is a juried one so you cannot have photos of it circulating. Am I happy with it? I am, however it does look rather plain so not sure how it will go. Always interesting at quilt shows...you must be interested in FMQ to recognise the amount of work and effort that goes into a wholecloth even a seemingly plain one.

For the week ahead I am planning
- to sew up a cover for my label for the wholecloth and also prepare the hanging sleeve
- maybe make a start on my next background filler project
- seriously look at a new pattern for my Etsy shop (which I have neglected over the last few months).

Linking up to To Do Tuesday #77To Do Tuesday #77 over at Quilt Schmilt

Happy Quilting

 Karin

Saturday 8 June 2024

Basting on the Q20

I love basting on the Q20 and have been using this function extensively.

One of the things I find extraordinarily useful is the programming that is possible for the Q20. It has five slots to occupy for different thread combinations that you use all the time. 
Here are the ones that I use most with Gutermann highlighted as I put this in as a new preset. Feeling a bit frugal at the moment and decided to use some of my older threads to baste my quilts to use them up. So I decided to use the old Gutermann thread. Must admit I am not one to believe that my machine loves a particular thread like I so often read in the various quilting groups. To me it is a machine and it needs to handle whatever I throw at it from very fine 100wt Invisafil thread to the more robust 40 TEX Rasant thread. Opening the slots will show you the settings that you have set, i.e. the setting for each of the modes (BSR1 - 3 plus Manual mode. With a bit of adjustment and tweaking I set up my machine for Gutermann thread the other day so that when I come to do some basting next time I only will need to hit the program button to select Gutermann and it will set itself to the settings that I have selected. Very handy! The only thing that has happened to me from time to time is that I forget to switch programs and for example quilt with Aurifil 50/2 thread at a setting for Rasant. 

I have a short video on how to baste on the Q20 on Pinterest if you are interested. Basically I just meander over the entire quilt stitching (carefully) around my pins and taking them out as I go along. I do use a highly visible colour in order to prevent accidentally ripping into my quilting when I take the basting stitch out. The basting has 3 different options on the machine, 1in,2in and 1/4in. I use the 1/2in option for the overall meander and the 1/4in feature to secure the edges of the quilt.

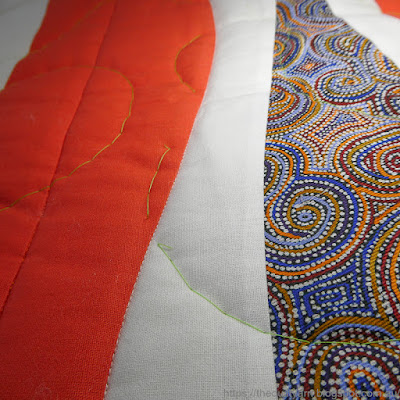
For my current quilt, which is a gorgeous little quilt from the Orange Tree Quilters charity group, I used a lime green thread instead of my usual red thread as there is a lot of red colour in the quilt.
The basting is very quick, in fact this was so easy to complete I basted another one of my quilts straight after. Once basted I can leave the quilt sitting around until I am ready to do the quilting. Nothing will move, the basting keeps everything nicely secured.
Another background quilting project coming up for which I will use Invisafil thread.

Felt very frugal this week as I also stitched some batting together to make one bigger piece for another quilt. Had lots of little leftovers though and spent some time to sew them all together. Made quite a sizable piece.
This will be for practice only as I sewed them together fairly roughly and also did not concern myself too much with the different quality of the batting. It's amazing though how much you can save by just sewing strips together. This will give me two decently sized practice bits.


Happy quilting!

Karin

Popular Posts