Showing posts with label Wholecloth Quilting. Show all posts

Saturday, 6 July 2024

Festival of Quilts 2024

I had the bestest time at the show! The atmosphere was great, the vendor hall so very tempting and on top of that I had the biggest surprise on the day.

As my readers would know (I talked about this for weeks on end) I entered my wholecloth quilt into the show. I have entered quilts before in the show and was familiar with the process. Normally if you win an award you do get a phone call a few days before to attend the award presentation. Well, I did not get a phone call so told everyone in the family that I did not win an award this year. Went to the show on the Friday to take some photos of my quilt and spent some money in the vendor hall. Had a fabulous time and was just at the Wonderfil stand when a friend texted me from the show grounds congratulating me!!! She sent a photo of my quilt. I was absolutely stunned and somewhat gobsmacked. Had not looked at the display as yet and actually went over to have a look. 
Won two awards: First place in my category which was 'Other Techniques' and also a Special Award for Excellence in Machine Quilting. Made my day...I am so very pleased with this.
Apparently somebody forgot to ring for this category. Bit of a pity that I did not get to the award presentation, but realistically I could have gone of course even if I did not win, however it was a rainy and very cold evening so I did do some knitting instead.

So finally I can share some process photos which I have been waiting for:

Finished project: can honestly say that this is probably the first time I was really happy with every aspect of my workmanship (...and this is big for me, does not happen that often!)
The centre motif: stitched with a combination of rulers, freehand and also used one of Cindy Needham's stencils (rope) for the inner border.
Lots of feather arrangements
Amish Curling Feather border: put the learnings from one of Bethanne Nemesh' workshop ( I think it was called Feather Fiesta) into practice
Lots of texture: chose to do mainly tiny lines in the background. While the main elements were stitched with Aurifil 50/2 thread I did use 100wt Invisafil thread of the same colour to totally flatten the background. Included a little bit of a microstipple in the feather centers, however that was tedious and very heavy-going on the eyes. 

I am so glad I finished this. This was a design that I started back in 2018 when I did a workshop with Cindy Needham. Was so enthused in her class that I drew up an entire wholecloth in the class. I was going to stitch this out but as the design needed several tidy ups never quite got around to it. Over the years then I altered the design several times...never quite happy with it until last year when I finally had enough and spent the time to finalise the design.

Well, onto the next project...

Karin

Wednesday, 13 March 2024

5 Essential Tips When Wholecloth Quilting

I previously wrote a series of posts about wholecloth quilting starting HERE.

This post is an extension to that. Not having done a wholecloth in some time, I took some photos as I went along and also started to think about all the things that can go wrong when attempting a wholecloth. What follows are 5 critical points where things can get a bit haywire and will affect the outcome of your project.

1. Mark the crosshairs!
This is a really important step as your entire wholecloth is based on those few lines. To do this press your fabric really well and then fold it in half. Press the center line...don't worry about whether this is ever going to come out. It will! Then fold your fabric on the vertical and repeat. Now take these lines and very carefully mark the center lines on your fabric with a fabric marker of your choice.

Take your time with this task. I also then mark in the 45 degree lines using a ruler.
Don't worry if your 45 degree lines do not exactly end up in the corners of your fabric. Unless you have been extremely precise in your cutting the lines are likely to be slightly off in the corner but correct in relation to the vertical and horizontal crosshair lines and that is what's important.

2. Marking
Test your chosen marker before you start. If you followed my blog you would be aware that I had a bit of a mishap at this stage. I made some mistakes in tracing my design and rinsed it off. To my horror, some of my lines turned brownish and did not come out. I believe that this had to do with my lightbox emitting heat at the edges which set the blue water erasable marker. I ended up buying another piece of fabric and starting again, this time tracing the design without a light box just to be sure.

3. Equipment
When designing your wholecloth think about the tools that you are going to use. I obviously forgot about this point for my recent wholecloth having designed center motif circles for which I actually did not have the right ruler. I could have solved this by stitching the circles freehand which I have done in the past however this is extremely challenging as it is super hard to keep it a 100% round and on a wholecloth this is going to be extremely visible. I ended up buying the Echo clips for my Bernina Q20. They just clip on and can be used to extend the size of your ruler. Similarly, I had not thought about my beautiful Amish feathers. To stitch out the spine in that nice rounded way, I also had to use a ruler, but this time use it in a somewhat sliding motion to make the curves as consistent as possible. Definitely had not thought about this before and it took me ages to do that. So planning how you going to tackle stitching out your wholecloth is a definite must. In addition, do a test run of your stitching to get more familiar with your design. Unfortunately with a wholecloth you usually start with the center motif which is also the main thing that your eye focusses on when first looking at it so you want to get that down as clean as possible.
3. Basting
Do not skip on this stage. A wholecloth project has to be basted fairly heavily, I would say every 3-4in in a grid as you are shifting fabric around as you stitch the various sections. You start by stitching out the general frame, starting in the center and moving outwards usually so you going going to have a lot of unquilted loft around which in my case puffed out enormously as I am using a wool batting. The basted grid contains the loft in its own little square and prevents it from shifting over to the next section.

4. Expect the Unexpected
In my experience there is always something that goes wrong and usually several unexpected issues pop up. I am used to that by now and do not get overly excited by it anymore. In my current wholecloth I had an interesting issue, almost hilarious after my mishap with the marking. For the first time ever my blue marks were fading. This has never happened before. This is what was left of my grid by the end of one week. Not sure why this happened and whether it has to do with the current heat wave we are in. It is often quite sticky inside the house as we are running an evaporative air conditioner for most of the time. Probably not ideal for a water erasable marker.
So this was not the idea but it meant that I had to stitch out my frame plus the feathers literally in that one week and in between reinforce my blue lines (where I needed them most) so that I would not loose them altogether. It was hard core but I managed to get it done. So much for that lovely idea to stitch this out in a relaxed and well thought out way! I was literally stitching every day for several hours.
5. Skill level
Consider your skill level and the purpose of the quilt. Are you just doing this for your own enjoyment or are you planning a show quilt. I am a relatively sloppy marker which is somewhat surprising as I am also a perfectionist, however as I know my weaknesses I do know that I have to pay attention to this as I stitch. I will usually correct my design as I stitch along. I stitch feather plumes usually very slowly looking ahead and around me to make sure they are angled in a way that makes sense.
I don't necessarily follow my lines at all times and have in this picture rounded some of the angles on the inside of the feather plumes a bit more. I was not too concerned about having to do this on most of the curves as I by now have a particular angle and size I stitch my feather plumes with so I was fairly confident to be able to do this in a consistent manner.
Another issue which I think people underestimate is the amount of starts and stops and the time it takes to stitch out an intricate design like this. With this Amish feather every curvature is stitched in sections. You could backtrack and absolutely do it all in one hit, but again, that would be very visible and if you are doing a show quilt and probably not recommended. This sort of stitching can become incredibly tedious and frustrating, so something to think about before you start. On top of that I do still bury my threads, so it was after each section, stop...bury the beginning and end, then start again, making sure every stop and start looked good on the front as well as the back. I do remember that people found this extremely annoying when I was teaching my Mini Wholecloth class and most people just backtracked to get things done. That is absolutely fine, however it will show on your project, so you will need to decide beforehand how you want your wholecloth to look and for how much intensity you are prepared.

I did manage to start my grid quilting so I can follow my lines with a ruler, but for now I am having a bit of a break.

For the To Do Tuesday list from last week...well, did not do anything else but stitch this wholecloth.

For the remainder of the week I am planning 
- to have a break
- wash some fabric for the Fox quilt, and 
- maybe do a Fox block, but that's it...got a few other things on this week!

Linking up to To Do Tuesday #65 over at Quilt Schmilt.

Karin

Tuesday, 5 March 2024

To Do Tuesday #64

My list from last week was smallish
- pinning, basting and making a start on the wholecloth; backing fabric is ready to go, just needs to be cut and then I will need to make a decision on thread.✅
- wash the background fabric for the Fox quilt❌
- maybe make a Fox block to get started on that project which will be ongoing until I have enough blocks for a quilt.❌

So I made a start (finally) on the wholecloth. I was thinking to do a post in the next few weeks on the trials and tribulations of wholecloth quilting...things never go as expected!

I started off by testing my new Echo feet attachments for the Bernina Q20. Ended up finally getting those as my wholecloth design incorporates circles for which I do not have the right size rulers (funny that with a draw full of rulers!).
Was a bit worried about these as I had read that they are fiddly to put on and also prone to breakage. Gave them a whirl though and was pleasantly surprised. They do clip on very easily and are also very easy to remove. Had no issues with them at all. Tried them out on a practice piece to get a feel for my design. This is what that looked like.
My practice piece turned out nice and I was ready to go
Pinned and then basted my wholecloth and as you can see I baste my piece very heavily, approximately every 3 - 4in, always in a grid as it distributes the puff evenly.
My batting is wool and it is much more puffy than I expected. In the past I have used two lots of batting, wool and cotton, but did not want to go there this time as this is quite a sizable project and quilting with two battings does make the quilt very hard and heavy.

I did have some issues with putting my frames in as the puffiness distorted my lines and I am a tad out of practice. Took me a moment to get a grip on that but eventually got there. After having done the square frames with a ruler I then looked at my feather sprays. Inititally I was going to stitch the spine out on the inner feathers but not the Amish feathers...for those I was going to stitch the spine as I go along. Too easy I thought!

Well, when I stitched out my first feather spine I could feel how the puffiness was working against me and I had a little bit of an issue keeping my lines straight. Then looking at my Amish feathers I thought that there is no way I am going to keep that nice and round just going along backtracking to create the spine. Additionally I did consider that Amish feathers depend on their nice roundness to look good and by then my perfectionism had truly started taking over.

The Amish feathers in this design are based on a 4in circle, however to fit them into the border the circle had to reach out to touch the next circle, so it was not just a matter of stitching a circle with a ruler. I had to stitch against my ruler moving it along ever so slightly to stay on track. Needless to say, this took ages to do. I used Amanda Murphy's 4in circle ruler for this which has a bit of a maybe not non-slip, but harder to slip backing which makes it easier to handle the ruler. I did not put on a more rough Handiquilter grip strip because I needed the ruler to be able to be gently moved as I went along. 
Also, as the feathers go in opposing directions I had to do each circle element individually, so start and stop, tie off and start again. I have by now finished this and for the most part slowly stitching against the circle ruler worked really well and I am happy with my spines, but promptly encountered a new issue, i.e. my blue markings are fading which is almost funny given that I had a problem with the marker leaving brown marks in the first lot of fabric. So I am forever reinforcing some of my lines, but have also been stitching every day to get the framing done. After that is done it does not matter so much whether the markings are in there or not. I have drawn the feathers so much that I will be able to follow my own stitch path without an issue, just have to make sure that I reinforce where my feathers end in relation to the border and frame. I think it is our weather over here. It has been hot and sticky and the air conditioner is running most of the time. Couple that with sweaty hands which is probably enough to make some of those marks fade.

Anyway, finished the frame and the spines by now and am onto the feathers. I am stitching this with a light yellow Aurifil 50/2 thread which just blends into the fabric. Now wish that I had chosen something a bit darker as it blends a bit too well and is at times a bit hard to see. But so be it, looks great on the patterned backing.

So for next week I am planning to 
- continue on the wholecloth by stitching out the feathers (and then probably have a bit of a break from it)
- wash the background fabric for the Fox quilt
- maybe make a Fox block to get started on that project which will be ongoing until I have enough blocks for a quilt
- write some instructions for my Mini Wholecloth in order to put that in my Etsy shop.

Bit ambitious, but we'll see...

Linking up to To Do Tuesday #64 over at Quilt Schmilt.

Karin

Sunday, 27 November 2022

Another Mini Wholecloth Finished

Finished the second wholecloth from the same design that I did some weeks earlier. 

This time I stitched this out on a dusty pink fabric using a 'run-of-the-mill polyester thread. While this worked fine, I am not sure I would do this again...the thread was almost abrasive. No problem stitching with it, but a real hassle to pry it out of the fabric if you tried unpicking. However, as this wholecloth is for a class I am doing next year I thought that I give this a whirl as people will come with all sorts of thread.
I used different fillers this time and also made the frame around the heart a smidgen wider. Quite like this! The feathers are done a little bit more playful in this version and in the end I decided to put a grid in the surround. Not a bad idea, however I should have done my grid slightly smaller. This was done with a 3/4in grid. I put double lines in there which I thought would be enough to narrow this down a bit. In hindsight though I should have started off with the 1/2in grid and then did the double lines. By the time this became a bit obvious to me, it was too late...I was not going to take that out! Thought that this would be a good talking point in class in terms of thinking about size when choosing a background filler. Often you only see the effect of your quilting once you already have gone quite a distance. Definitely something to think about. While pretty, the grid in my mind detracts from the actual design...just too much going on here.  Very interesting exercise though.

I will probably do one more wholecloth from this design, this time focusing on the weight of the thread, i.e. using something like Aurifil 50/2 for the main design and then stitching the background down with 100wt Invisafil, again using slightly different fillers. Let's see what we can come up with.

This will give me three different versions of the same Mini Wholecloth to talk about in class. That should be enough to get started.

Karin

Wednesday, 27 February 2019

Moving Onto The Wholecloth

I am on a roll...finished off my Ruler Practice Quilt! My Pfaff machine was in for a Spa treatment and so I had nothing else to do.

I was really feeling like some FMQ, but did not feel like just doodling and ended up pulling out another UFO.
Had not looked at this for some time and really felt like some stitching, so I began to continue on that. This has ended up as an UFO as there are some design issues in there which seemed just too huge to continue with it. On the other hand, looking at it now I thought that this was a pity...it's a decent piece of fabric (Kona Solids) and a fair amount of stitching. It would look amazing finished, I think, even with all those 'mistakes'. Anyway, really felt in the mood for it and just continued stitching...
Did a little bit every day as you have to concentrate quite a bit on this one and made some progress. Will need to do some unstitching in some areas and also just come across another problem...my corner motif needs to be altered! What a hassle. If this ever gets finished this will be an amazing feast in improvisation!
Also started the design process of my other project, another wholecloth, that I drew up in Cindy Needham's class last year using a lot of her wonderful stencils that she had brought along.
It's nice but does need some work.
Started off with Cindy Needham's Ultimate Stencils. Normally you would use the transparencies that Cindy has provided for her stencils to draw up your design roughly. I usually start with drawing on paper, using the blue washable markers. Somehow I got used to that as I did not originally have the transparencies and I must say, this helps me to think the process through in every minute detail. As I am drawing I take note of the measurements and how my designs are going to fit into the spaces that I created as well as looking at how the quilting would show up, i.e. which area will 'puff out' and which one will recede. 
And here comes the somewhat intense part...I will do the same drawing over and over again, until I am happy with it and I am sure that everything fits.
This is number 2
...and so it goes on. Already have a number 3 going, but forgot to photograph it, but I think you get the idea. The above drawing was used to trial different sizes and different arrangements. Also have Cindy's Border Stencils and played around with that as well. While I am drawing this I get a sense of were problematic areas arise as 'if I cannot draw it with ease, I cannot stitch it either' and that gives me the hint that I need to do a bit more work on that. Undecided also about the size of the middle section...maybe make it a tad bigger? Before I had the Sweet 16 I did stitch everything freehand from my drawing. Now things are getting a bit more complicated as I have got rulers, so my design needs to be matched to particular rulers if I am going to make use of the rulers.
If you are interested in the wholecloth design process, I did write a number of posts about it last year, starting HERE.

Getting back to drawing...this could take a while!

Karin

Thursday, 3 May 2018

I’m Back

So much so for all good intentions of posting more regularly...have let it slide again. Have a number of excuses...life got a bit busy as usual and then we went on a holiday to New Zealand (which was great). Found a little fabric store in Auckland

Truth be known, I have struggled with motivation over the past month or so...

I was working away on my Wholecloth and actually got quite stressed with it as the deadline for our show here is the 1. June. Things just were not working properly and I reckon I made several ‘planning’ mistakes. On top of that I was getting tired with the amount of repetitive quilting. This is how far I got

I then had a bit of a moment where I thought ‘this is ridiculous...this is my hobby and should not become a stressor (got enough of that at work!). So I stopped...accepting that I will not enter a quilt in the show this year and the world will not come to an end! Went on my holiday, had a fantastic time and when I came back started on the Handiquilter challenge that my local group is currently working on. As I was running behind by a month I had to knuckle down, piece a quilt together and get back to ruler work. Almost caught up with the task for the second month now and must say that I am enjoying the ruler work immensely.


Also had another (refreshed) look at my Wholecloth...will continue with it, even though I now think that I should have thought that framework through a bit better, however it will still look great when it eventually gets finished. All good learning...will finish it in between other things as the repetition of that piece is seriously boring and the thing I struggle with most. Definitely finding out where my passion sits in terms of Wholecloth quilting.

Karin

Sunday, 25 March 2018

Wholecloth Quilting - Designing Your Own Motif

This is just an example of how you can quickly design a motif using the Ipad. I designed this motif using the Graphic App (formerly Idraw) which is an App you can purchase on the App Store for A$14.99.

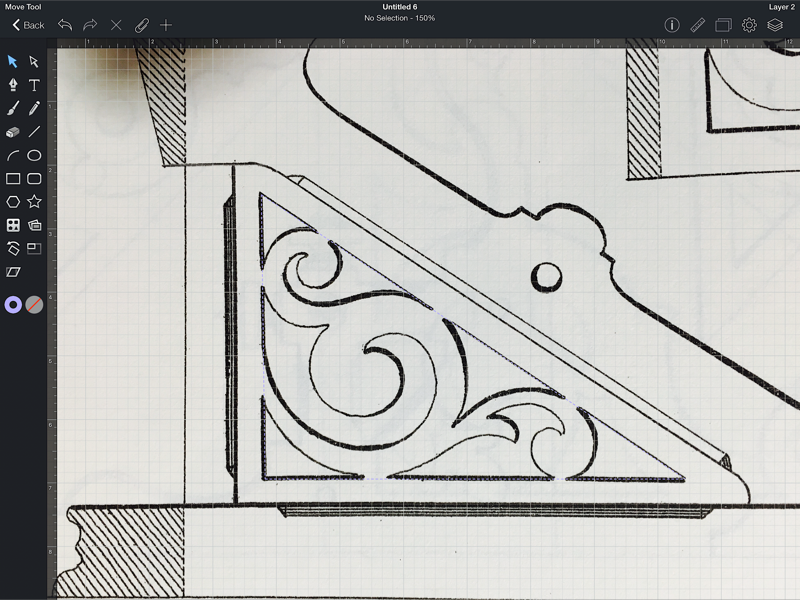
This is a picture I found in a Dover publication '200 Victorian Fretwork Designs' by A. Sanguineti (I love fretwork!)
I took a photo of that little image and imported it into the Graphic App...does not look like much, but wait...

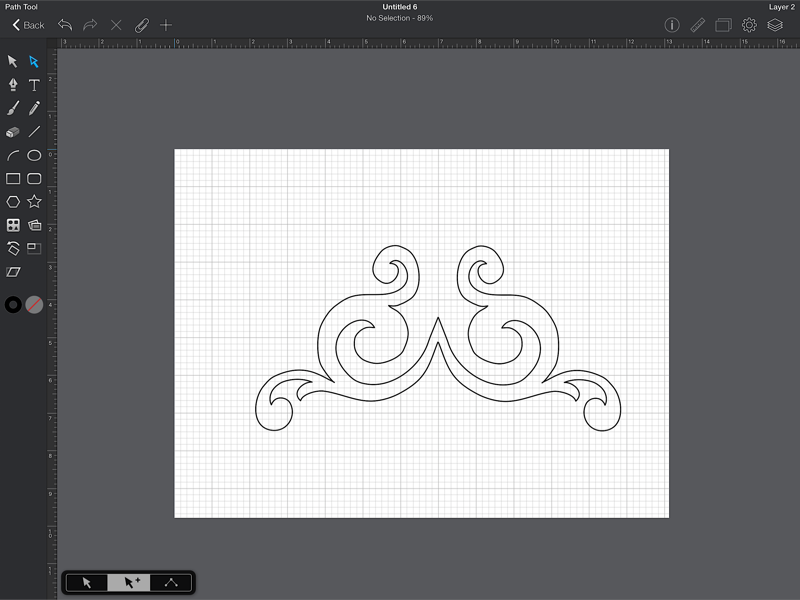
I then traced the photo with the Apple Pen...you can set it so that it automatically smoothes out the lines as you go, in addition to going back into it to smooth out some of the individual nodes. Not too difficult at all as most of the smoothing is already done by the 'smoothing function'. Did this a bit quickly as this was just to show you how this works, so there are a few wobblies here and there.

After some general tidy up, I had the image of the motif drawn as a continuous line design leaving it open at one end as I was going to connect it to another copy of it (copying the image and flipping it over horizontally). I think I may have grouped them together as one unit at this point (should have taken some notes!)

I have played around with something a bit similar in the past and knew that it needed to be less horizontal, so I turned the unit by 45 degrees, copied again and aligned it. This looked a bit more promising. Love the ability to just play around with the arrangements at this point.

I then grouped this into one unit, copying once again and flipping it over vertically to get the second half of my unit.
tada!!
Actually quite like this arrangement. Put another layer on to put it into a square to get the visual on how this would look in a quilting block. Instantly thought that I could extend this motif further by putting something into the corners as well, but I will stop here. This whole process took me about half an hour in front of the TV.  Now I could spend more time on this to make it absolutely perfect for tracing which is entirely do-able on the Ipad, but I think if I was going to use that I probably would import this into the computer drawing program to iron out some of the wobblies (mind you, have not explored all the drawing functions of this App as yet, i.e would like the stroke of the pen tool to be pointed...possibly has this in-build somewhere).

Anyway, hope you enjoyed this little play session on the Ipad...I certainly did. There is a letter box around the corner from my house that has a really nice motif on there...I am planning to inconspicuously walk past and take a photo to draw that out...perfect quilting motif!

Karin

Friday, 23 March 2018

Wholecloth Quilting - Your Own Design

Designing your own wholecloth quilt is a lot of fun but also a lot of work. There are several good books that describe the process and/or give you some design ideas , like
- Make Your Own Quilting Designs & Patterns by Judy Woodworth (super excellent resource)
- Create Your Own Dream Feathers by Peggy Holt
- Custom Curves by Karen McTavish
- The Secrets of Elemental Quilting by Karen McTavish

First of all you do need a set of tools...rulers, templates, circles, French Curves, ovals and/or stencils. I should also mention Cindy Needham's Handbooks which I forgot to mention in the last post as the place to go to if you are looking for stencils and design ideas.

So, how do you start? You can use paper to draw 1/4 of your design, flip it over and mirror it. You could then make several copies of the motif and lay them out on the table to have a bit of a look what this will look like. This is a very laborious process that takes a long time! Alterntively you could use mirrors to audition your design (also see You Tube video with Sharon Schambler on how to do this)

I prefer using the computer to design, making use of drawing programs. I have tried Photoshop, Adobe Illustrator and finally ended up buying the Serif Draw 8 program. These are drawing programs that are not geared towards quilting but together with the EQ8 program I usually can make something work for me. I am currently having my eye on the Pre-Design program which is a 'lesser' version of the Art and Stitch program that is especially designed for quilters and embroiderers.

Carla Barrett's blog is an excellent source if you want to further delve into the world of digital wholecloth designing. Carla uses a tablet and Photoshop Elements (I believe). She teaches her method and also offers eclasses. Her blog is full of great inspiration.

Also useful and becoming more and more manageable is the Ipad, particularly when coupled with the Apple Pencil. With the help of some good Apps like Graphic (formerly Idraw), Adobe Draw or Sketch, Adobe Capture and many other Apps to choose from, you can get a fairly decent design to look at.
BTW, also  useful to audition quilting designs! Having a bit of a look what my feather design will look like in the melon shape. This was done on the Graphic App
In terms of process then, you start to doodle...maybe you have seen something that sparked your imagination, you could trace a design or you could use stencils or part of stencils. This is where Cindy Needham's Ultimate Stencil Collection comes into play


When I first got the Ultimate Shape Stencil I was so inspired I designed a range of weird and wonderful designs (see post HERE). I did use one of those designs to develop last years' wholecloth.
With the help of the Ultimate Round Stencil I came up with this center motif
...drawn onto the trusted Ikea paper. I then took this design and imported it into the computer drawing program where I tidied it up and traced it off so that I had a neat and precise copy to play with. I took my design then into the Adobe App on the Ipad and tried different layouts and different arrangements to see what I liked. This is what I settled on

The actual wholecloth turned out a little bit different but this picture gave me a good starting point


Another example of a doodle I did, drawing a quarter of a design...very rudimentary and then duplicating it many times, arranging it into a square.  Here I did four quarters to make up one half of a design
Looks absolutely awful, however how good is this, I can wipe it and come up with a different arrangement. This was just to illustrate the process and to show you that it is possible to do some quite complex designs with the use of the computer or Ipad. If I liked this design, from here I would go and draw the design on paper properly, maybe then importing it into the computer to tidy it up before using it as a design to trace onto the quilt.

Next post I will show you how I traced a motif on the Ipad...need to split the post as this was just getting too lond

See ya'

Karin

Wednesday, 21 March 2018

Wholecloth Quilting - Development of Ideas Part 2

Following on from my last post, launching into part 2 of the development of ideas and how to go about designing your wholecloth. This is about medallion type wholecloth quilts that have a center motif usually surrounded by some background fillers and some borders.

My first introduction to this was through Patsy Thompson who was one of the experts on Quiltshopgal's FMQ challenge in 2012. While I did not directly participate in the challenge I was so inspired by her very simple, yet so effective method. She took a center motif and just went around adding border after border, increasing the width as she went along. I think I stitched this out in a couple of days
I was hooked. Next, I followed Patsy Thompson's style of creating wholecloth quilts which often start with a feather wreath in the center


All I did is add a background filler (in this case micro-stippling) and put some feather motifs in the corner. Very basic to start with, but I was impressed with these initial attempts.

As I went along and gained more experience with wholecloth quilting I started to get more elaborate and learned about some basic rules like:
- add several smaller borders around your center design and fill with simple designs like swirls, ribbons, loops or just lines; experiment with a straight square design or put the borders on the diagonal
- stick to a few selected shapes in your wholecloth
- work with repetition, i.e. have a motif that can also act as corner motif like in the following quilt
- think this through in terms of how much background you have to fill as this can take a long time to fill (i.e. see above...that micro-stipple was an absolute killer)
-  add interest by using grids and if you are really keen, learn how to fill those grids to really make your center design pop
- once the center design is done and you have decided on a background filler around it, add a few more borders, again keeping in mind to repeat already used shapes; you can see in the picture above that I put in a larger 'seed design' to enclose my center, thereby repeating the shape of the cnter motif. I then added some straight 1/4in lines to extend this out a bit and finished it off with a feather border.

This is one way to construct your wholecloth. While the result usually looks quite striking, the process is actually quite simple. In terms of designing this from scratch it depends on how much work you want to put into this and whether or not you enjoy designing. If you do not, you can make use of the many books that are on offer, all of which have a variety of motifs and designs, or find some spectacular motifs on the web for free. Or you can purchase stencils that are designed for wholecloth quilts. Here are some resources that I found useful:
books
- Quilting Wide Open Spaces by Judi Madsen
- Custom Curves by Karen McTavish
- Mix & Match Quilting Patterns by Helen Squire
- Inside the Lines by Pam Clarke
- The Secrets of Elemental Quilting by Karen McTavish

Some links
Quilting Creations  and
The Stencil Company for stencils and pre-printed wholecloth designs
Forest Quilting for free motifs
Cindy Needham's Craftsy Classes
Patsy Thompson's DVDs (particularly the Feathers DVD range)
Leah Day's Feather and Heart Mini Wholecloth (this is a workshop offered over on Leah Day's website; this was the first wholecloth I ever did and I remember the anxiety this produced just looking at it...however, as it is a mini project it was very achievable and turned out beautifully)
...and many, many more; hopefully this will spark your interest and you might give it a go.

Designing your own motif will take a little bit more time but is very rewarding.

Karin
Thursday, 15 March 2018

Wholecloth Quilting - Development of Ideas Part 1

This is probably the hardest part. How often have you looked at a wholecloth in a quilt show and wondered how people come up with those brilliant ideas. This took me a long time to work out. I started to research this a bit over time and also delved into how best to draft designs. Over time I realised that there are a number of different ways on how to approach a wholecloth quilt. While you need to have some sort of inspiration to start with I believe the more critical point is how you are going to approach it. This dawned on me when I was doing a very traditional wholecloth quilt with a center motif last year. Thinking about this I started to categorise wholecloth quilts into several categories, i.e.
  • An allover design consisting out of repeated motifs
  • Medallion type quilt with a prominent centre design and various variations of that, i.e consisting of numerous borders or Mandala type quilts 
  • Pictorial wholecloth quilts
  • Modern wholecloth Quilts, and also 
  • Rulerwork based wholecloth Quilts
Each of them will require a different approach to designing, different tools and obviously a different level of skills and I found it helpful to have that structure as a guide. So if I am inspired by a particular motif or design I will think about which category would be the best fit. Is it a smaller design which would lend itself to repeating it over the whole quilt or is it maybe a design that could be done with a ruler where I could then extend outwards. I am finding this a bit helpful as it will guide me to a particular way of designing it and gives me that overall structure to work from.

Looking then at the categories, my current project falls within the first category of an repeated all over motif. Must emphasise that this is not my original idea...I have seen this on Cindy Needham's


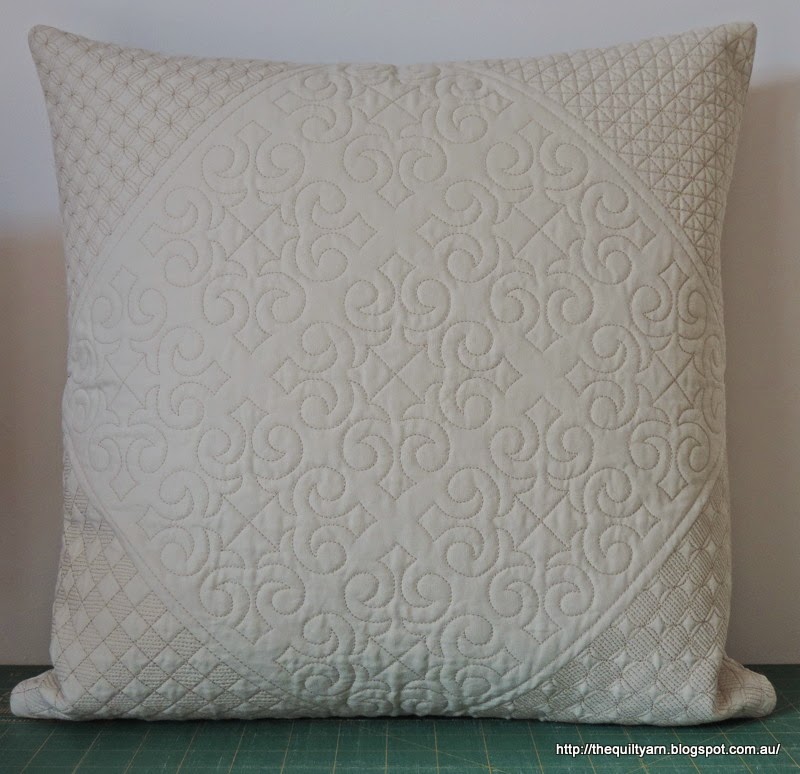
‘Wholecloth' Craftsy class a couple of years ago. I first used this in a pillow challenge that was run over at Quiltshopgal in 2015 (see my post HERE) For the challenge I took a seemingly very boring stencil, put it on point and repeated it. Looked absolutely fabulous!


I remember thinking then that this would make a lovely allover pattern for a wholecloth quilt.
You can apply this principle to all sorts of stencils and like I have done with my current project, mix and match different stencils together. The options are really limitless. Here are a few more ideas:


These two stencils are from Pam Clarke’s book 'Quilting Inside the Lines'. All I have done here is repeated the stencil in a straight way across the quilt. I particularly like the second one and you could imagine that you could now extend this out with a bit of a border maybe taking part of the motif and designing an accompanying border stencil or you could just simply stitch a very formal feather border around this. Or you could set this on point and have a bit of a look what that looks like...you can really play with this and come up with quite exciting ideas. I did this on the Ipad with the Adobe Draw App. If you prefer to work with paper you could copy your motif several times and lay it out in front of you to have a bit of a look.

If you look back over my most recent posts you will get an idea of how I tackled getting my motif repeated over my piece of fabric. 

Karin

Popular Posts