Showing posts with label Cloud Nine by Patricia E. Ritter - Urban Elementz. Show all posts

Saturday, 4 February 2023

Edge-to-Edge Design on a Sitdown Longarm

I finished my little charity quilt. Normally I would not do anything too involved on theses charity quilts...not because they are for charity but simply because I am volunteering my time and resources to quilt them. However I absolutely fell in love with the last charity quilt. Not sure what it is about this one, but I really like the very simple design and the colours of that quilt. The fabric reminds me of something but I cannot quite place it.

Such a pretty quilt and nicely straight. So I decided to do an edge to edge design over it. If you never looked into this check out the designs at Urban Elementz...so many choices and I am not sure whether I mentioned this before but there is also a whole section of some 50 plus designs that you can use for free. Really appreciate this.

For this design though I chose a panto that I had bought from Urban Elementz - the self print Cloud Nine Design from Patricia E. Ritter. I think that is the third design that I purchased from Patricia E. Ritter. Coincidence or maybe her design appeal to me because of their openness (for my purpose I do need the design to be a bit more open). 

I have mentioned in previous blog posts (e.g. HERE and HERE) how exactly I go about doing this on a sitdown longarm machine. I use Golden Threads paper to trace rows of the design. this time though I wanted this to go all a bit quicker and I used 8 sheets of Golden Threads paper and stitched the traced design through that rather than tracing off the design 8 times.
As you can see I trace with a blue erasable marker. This is because when you rip out the paper there are always little specks left in the stitching and I just want to be careful not to transfer any markings onto the quilt.
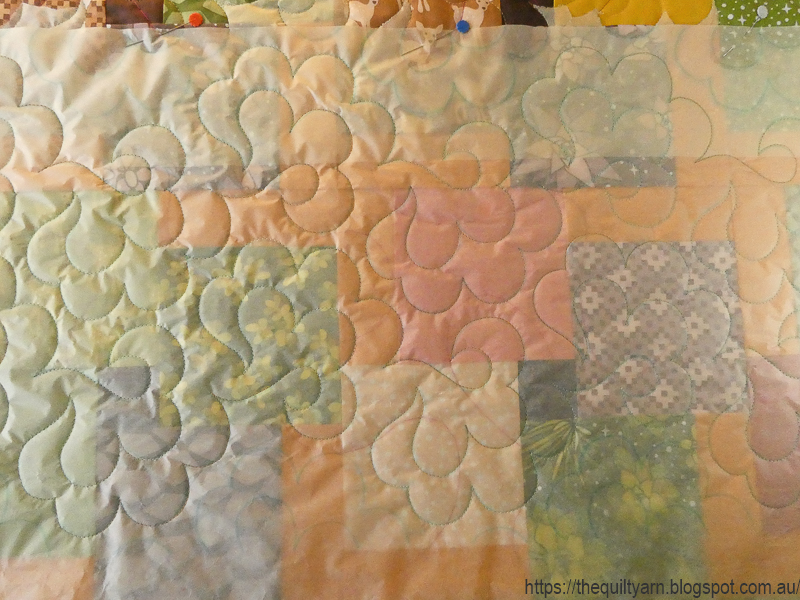
A brief look at what this looks like stitched through

I remove the paper as I go along, except for the last bit which I need for the alignment of the next row
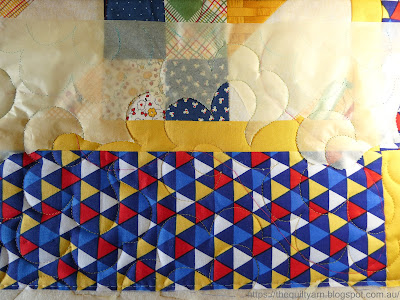
I have done this design before so it went rather quickly. However, this time I did a bit of a stuff up in row 3...it was getting close to dinner time and I was hurrying along placing a row onto the quilt ready to go  for the next day. When I started it again the next day, my natural perfectionism was a life saver. I made a very sloppy petal about 2 swirls in and decided to take it out...only to realise when turning to the back that I had aligned my row on the previous already stitched one, so I had 2 swirls stitched twice! I was happy that I discovered it and proceeded to take my stitching out which is something you can absolutely do with the paper, however you have to be super careful. The paper is wafer thin and rips easily. Complicating whas the fact that I had stitched my design through the 8 layers with a very large needle which made the paper even more likely to just split. After I removed all the stiches, put my frazzled paper in place
You can see here how the paper is starting to split. I decided to ignore that bit and stitched as best as I can around those split papers. Worked fine as I was used to the movement of the design by that stage, but did make me somehow anxious, as it is very hard to see how it is turning out with all the paper on top.
In general I follow the lines as best as I can however this particular design is stitched with a little bit of speed...I can imagine that on a longarm on the frame you would really lean into that which also happens to a lesser extent on the sitdown, so lines are not always followed precisely. I have learned not to worry about that too much, however I do make sure that I hit the points correctly as when I align the next row, I can be assured that they are in the right place. In addition I check how my row aligns against the pieced seam lines...not measuring, however  having a bit of a look whether I am still straight and whether design elements hit the same spot as I go along. Works absolutely perfectly every single time.

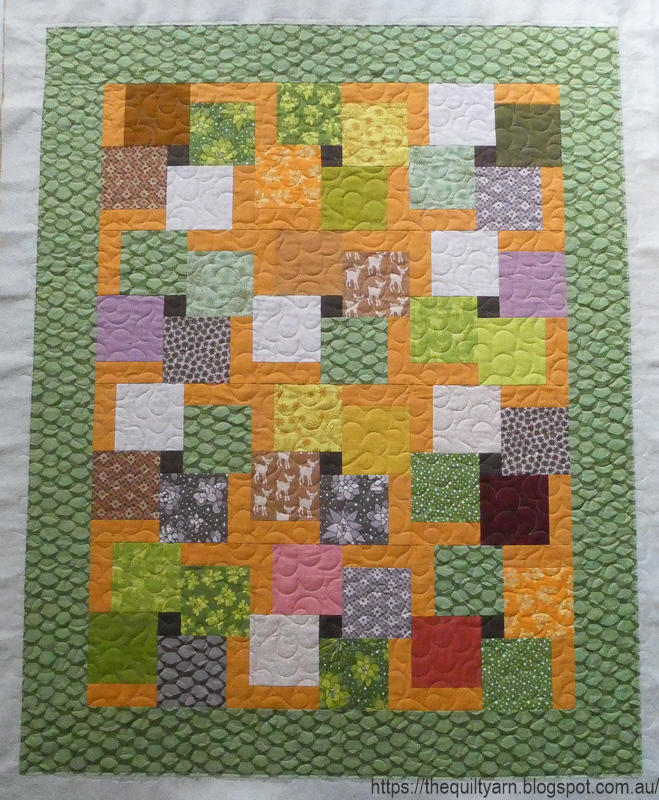
The quilt looks just lovely

...and the back
Now I can say with some confidence that none of the swirls would be exactly the same, however it reads as consistent and looks absolutely spectacular. So happy with how this turned out.

Altogether I used 9 rows to quilt this. Had to trace one more design to finish off and must say I do prefer to stitch on the drawn line rather than those little dot lines, however it was much quicker of course, using the stitched through rows.

So satisfying. 

Karin

Wednesday, 18 May 2022

Edge To Edge Quilting on the Sitdown Bernina Q20

I am finishing off my little side project and thought I do a post on how I put an edge to edge design on a quilt using a sitdown longarm machine. I did do an earlier post some weeks back but thought it might be interesting to people to see a more detailed description of the process.

As I am in a bit of a hurry I again used the Cloud Nine design by Patricia E. Ritter that I purchased as a self print design from Urban Elementz a few weeks earlier. I printed several pages of the design and then stuck it together to form one row to fit my quilt.
As you can see the design to be stitched is printed in black whereas the previous and next row is in a lighter grey colour. Starting off I traced the design (all of it) on Golden Threads paper. In order to cover an entire quilt you need many of those rows (some 10 rows for my small baby quilt). That of course becomes incredibly tedious to trace, so this time I tried something different, i.e. I stitched through several layers of Golden Threads paper from my first traced design to produce multiple copies in one hit. So, started off with the first row which was traced and stitched through.
I trace with a blue water soluble marker which is fairly faint however you can see that under the machine light. The reason for this is that I do not inadvertently want to transfer pencil marks or similar onto the quilt top. In terms of attaching the paper I use both, pins and removable glue dots. The pins are always at the top where I can see them because as you go down in rows you overlap the rows and if you have pins on the bottom it is easy to forget that and like I have done before, run over a pin. The glue dots are great...they stick to the fabric and paper but when you take them off, they come off with the paper. They do not leave any residue behind and the only danger is that you might stitch through one. While that is a bit of a hassle, it is way better than running into a needle.

Here is the first row stitched out. I am quilting this on the sitdown Bernina Q20, using the stitch regulator (BSR1) set at 9 stitches per inch. The BSR1 is the mode where the machine keeps stitching at a pre-determined speed even if you do not move the fabric anymore which means that when you stitch along in stitch regulation and come to a point where you momentarily stop to change direction it will take one or two stitches before you take off again which gives you a very crisp point. For the thread I used my trusted Aurifil 50/2 weight in a variegated orange colour, this time teamed with a prewound (Decobob). Quilting out the rows is incredibly quick...the design is a bit over 7in so you do quilt this in bigger sweeping movements which is easy to do with the stitch regulator (and a lot of fun!).

Once finished with the row, I start taking the paper out. In the photo you can see my little glue dot coming off with the paper.
I suppose you could leave the paper in, but I got used to taking it out row by row, so that I can see what I am doing. In terms of taking the paper out though, I do leave the part where the next row is (in light grey on the design which I also traced on) on the quilt because that serves for the alignment of the next row where the first and next row overlap. While I do check how my stitched row aligns, there will always be differences because once you get going you may not always stitch directly on the line, hence the traced beginning of the next row is the more important one for the next alignment.

So this is what this looks like...most of it taken out with just the bottom part left for alignment. The paper comes out easily (you can take it out bit by bit or tuck on it gently) and I find it quite relaxing sitting there taking out the paper. My points looked it a bit sloppy in parts on this first row, so I had to make a tension adjustment at this point to ensure that my points were nice and crisp.


Now for the big experiment...the stitched through rows. Wondered how that would go. 
This did not fill me with a lot of confidence as I am used to the traced design, but gave it a go and to my surprise that worked quite well. Next time though I might stitch that through with a bigger eye needle as I had problems seeing the row underneath once I overlapped the next row. However I managed and stitched my way down the quilt.

As you would have noticed I only stitch one row at a time, however as I came to the bottom this time I did try stitching two traced rows in one hit.
Yes, that worked, however I don't think I would do this all the time...by this stage I was quilting towards me and I just had a lot of paper in front of me which was a bit difficult to negotiate. Also was a bit overwhelmed taking out two rows of paper.

Anyway, finished this today and am quite happy with how this turned out. A few little inaccuracies did creep in here and there, but that is to be expected with this method. The paper can shift a bit, you start to loose it a bit in terms of following your lines...mind you, some of that you can see as you stitch in the overlapped region and you can even that out a bit as you go along, particularly if you know the design well. I also check on my alignment as I quilt over the seams making a note where a particular element sits in relation to the seam. That lets me know how straight my row is. Again, it will not be a hundred percent but it should be similar as you move across your quilt.

The finished product


I quilted this over 2 days and I would say, all in all it took me about 6 hours. A bit more effort however I do like the look of edge to edge designs. The only limitation is that I have to choose simpler, more open  designs being mindful that I have to take the paper out. While it comes out easily it does get stuck in points and tight spaces, so you want to choose a design that has bigger distinct shapes to make your life easier.

Now, the binding and then I am back to my Background Filler project.

Karin

Tuesday, 15 March 2022

Edge To Edge Quilting On a Sit Down Longarm

Finished putting my little owl quilt together and was wondering about how to quilt it. Did not feel like stitching-in-the-ditch (never really feel like that ), but was also bored with my range of allover meandering designs. Thought about just stippling over it, but felt that this was too boring. While I can do other allover designs, did not feel like concentrating that hard to do one of those more complex designs.

Well, after a lot of to and fro, decided to do an edge to edge design over it. You have to wonder though because that meant a lot more work, but somehow that is exactly what I felt like. Something more interesting that would keep me amused for a few days.

I love edge to edge designs and if I had a longarm on a frame I would probably do this all the time. The range and variety of designs that you can get is just amazing and they do look really good. For this little quilt I bought a new design from Urban Elementz called Cloud Nine -Petite by Patricia E. Ritter...easy peasy, just pay up and then you can download the design to print on your home printer. The only thing you really have to worry about doing it on a sitdown machine is to choose a fairly simple design, so that removing the paper does not become too much of a hassle.

I have done edge to edge designs on a sitdown longarm before...fairly work intensive as you have to trace the design to be put on the quilt and then quilt over it being left with removing the paper. I use Golden Threads paper for this which makes that part fairly easy, however it is still a lot of work doing it row by row. I trace the design on the paper using a blue water soluble pen as I do not want any unwanted marks on the quilt from a pencil or similar.

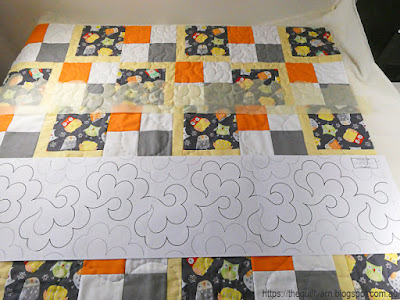
Starting off...there is the row of the Cloud Nine design


This photo was taken after the first few rows...you still can see remnants of the yellow Golden Threads paper (the blue meander thread is my basting - I do baste all my quilts before quilting). I do take out the paper as I go, however leave the majority of the last row for alignment of the next row. This quilt made alignment a bit easy because of the seams which I could check against every now and then to keep the rows as straight as possible. I could have saved myself some time in just tracing one row and then stitching through layers of paper with no thread in the machine to create multiple copies, however I prefer to trace the rows. That way I get used to the thread path which makes the quilting easier. You probably wonder how I attach the paper to the quilt...some people spraybaste the paper onto the quilt, which means you have to wash your quilt upon completion. I found a better solution for myself. I use inexpensive sticky glue dots...they stick to the paper well and hold it in place. They come off the fabric easily (when you remove the paper they stick to the paper) without leaving any residue behind. I do attach the upper side of the paper with pins, however that is the only spot that I use pins, because it is very easy to overlook pins when overlapping the rows which means you could inadvertently stitch over a pin (yep, learned the hard way). 

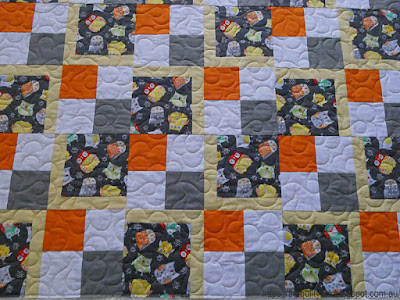
This did not take that long at all. I did 8.5 rows in total and am seriously happy with how this turned out. Love the design which just flowed well and was very easy to stitch out. Made even better with the Bernina Q20 stitch regulator which gave me some beautifully uniform stitches and very nice points. In fact, quilting a row was done in a couple of minutes as I could go reasonably fast, not having to worry about stitch length or anything. 

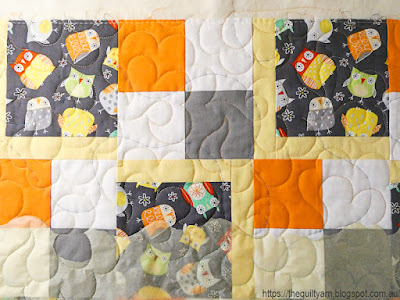
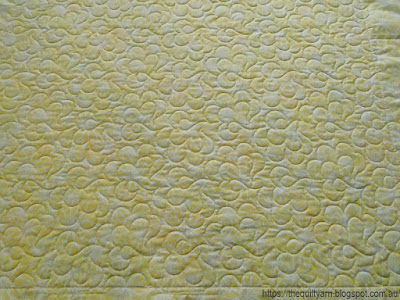
Next photo is a bit dark and the design looks a bit busy this way. I used a shaded orange Aurifil 50/2wt thread with hues of orange, orange-yellow and a lighter colour. It blends in just beautifully and all you see is the texture of the design.


Thrilled with how this turned out. Really like this design, so easy to stitch out and gives the most beautiful texture.


Karin

Popular Posts