Showing posts with label FMQ feathers. Show all posts

Monday, 1 June 2026

Overall Feather Design

Well, I am back on my sitdown and very happy. Cleaned up the sewing room and made use of the now empty spare room to put the computer in. Feeling less crowded and things are much better organised.

Started on my workshop sample, just trialling different things that I want to cover in class. The sample gives me an idea on how long it approximately takes to stitch out the class content and also what size of practice samples should be cut out for class
I got side tracked, of course...started playing with rulers, tried different things, realised I had not covered what to do when your space is much bigger than you comfortably can stitch out. Overall very useful which will be used to finish off my handout. The class has now been scheduled for November so I am now well ahead ( which is handy as we are having overseas visitors at the end of July). Also found a new favourite feather border arrangement.

Its the last one in the lines of feather shapes. I think I took that inital feather arrangement from the 'Ambrosia' pantograph and then just continued with the same shapes in an arbitrary playful way. Looks quite nice and helps me to quilt in a little more informal way which I usually find quite hard. It seems that my muscle memorey is hardwired to do really formal feathers and any deviation is almost painful to execute. That was really fun to stitch out.

After that I continued on my mission to put an overall feather design on one of the charity quilts. I had practised this a bit both on the frame and now on the sitdown after seeing it on the website of StitchedbySusan. Like the texture of that design and thought that it could be potentially an easy way to get some charity quilts done.

So this is stitched edge-to-edge rather than allover, meaning I am going from left to right and then back again. This was certainly a challenge and I thought for a moment about doing an allover design - in which case I would have stitched this out in quarters turning the quilt clockwise after each quarter. However that would have meant that the feather plumes would go in different directions and I was not sure whether that would look any good so I stuck with the idea of edge-to-edge.

I found going from left to right easier than going the other way. Started in the middle of the quilt finishing off one half and then turned the quilt to do the other half. Must say, initially struggled a bit as I am also quilting on a larger scale but soon got into the swing of things. Happy to say that I did not get stuck anywhere and was able to move along quite quickly from row to row.

Came out ok, but not sure whether this is almost a bit much. It certainly has got a nice feel to it and looking at individual sections is lovely, even though the overall picture looks a bit crowded. I think I have another few scrappy quilts in my bundle of charity quilts. Might try it again maybe paying a bit more attention to the scale as some of my shapes are a bit irregular ( like instead of getting stuck I would make really long and big shapes to fill out a space 😆). Good experiment...took two afternoons to completion, so a good option for those charity quilts. Mind you, also could see this with a nice pantograph stitched allover!

Well, we shall see what I feel like next.

Karin

Saturday, 11 July 2020

Little Doilie Project Finished

This was a lot of fun to do...it’s the first time I tried this and must say, I really enjoyed this. Got the doilie from the local Op shop for a dollar and placed it in place with spraybasting. Not quite round, but close enough.
I ran out of ideas for the delicate border of the doilie, so left that alone. If I had stitched that down I think it would have turned out too flat. Could not resist though and hyperquilted a little bit in the feathers, then decided that that was enough.
If you have read my previous posts, I used Bethanne Nemesh’ Lily Line ruler 3 for the frame around the doilie. The frame turned a bit into an overall background fill, but I like it. The ruler was an incredible time saver and the design was easy to execute (once I had decided on which parts of the ruler I was going to use). Fantastic tool!

Had a few issues with my tension for the pebbles on the new Capri. Lots of flatlining and cursing. I used Aurifil 50/2 for the quilting and similar to the Sweet 16, the thread behaved quite fiddly. I recently purchased the horizontal spool holder and ended up putting the almost empty spool on that, this time threading the thread straight down rather than looping the thread around the thread guide (as you are
supposed to do)...and to my utter surprise, no more tension issues! Have long suspected that the fiddliness of the aurifil thread has to do with the thread path rather than the tension setting. Will do some more testing around this...tried it the other day with a different colour thread, but with the spool on the ‘normal’ thread mast, again threading the thread straight down the thread guide and again had much better tension. Go figure...

Karin

Thursday, 1 September 2016

Great class with Bethanne Nemesh

I did a lovely class with Bethanne Nemesh at the Australian Machine Quilting Festival called 'Feather Faster'.
This was 'only' a drawing class demonstrating the no backtracking, no marking, fast way of creating beautiful feathers for your quilt.
Some of my drawings
I stitched this out when I came home in the evening which was really fun to do.

Particularly liked the lacy feather above...this was almost like stitching against your grain, after having learned to backtrack neatly and obsessively on your stitched line, you just stitch over your previous stitching...felt really weird, but to my surprise I really liked that look.

Bethanne spent a bit of time talking about the various ways of drawing/stitching feathers and I did pick up a few tips on how to prevent certain pitfalls like the feathers almost falling over or coming too close to the spine...very helpful. She is a really great teacher and spent a bit of time paying attention to individual quilters in the class who had particular questions or just struggled with the drawings and there was a lot of information packed into this 2 hr class. Highly recommended!
We also got a pattern for a little wall hanging that will showcase the different feathers...I think I will do this next to have a sample of all the different ideas to put up on the wall in my sewing room.

As for my other quilts, particularly with the approaching FAL2016...I think for this quarter I have failed miserably...only finished one project!

Karin

Saturday, 23 April 2016

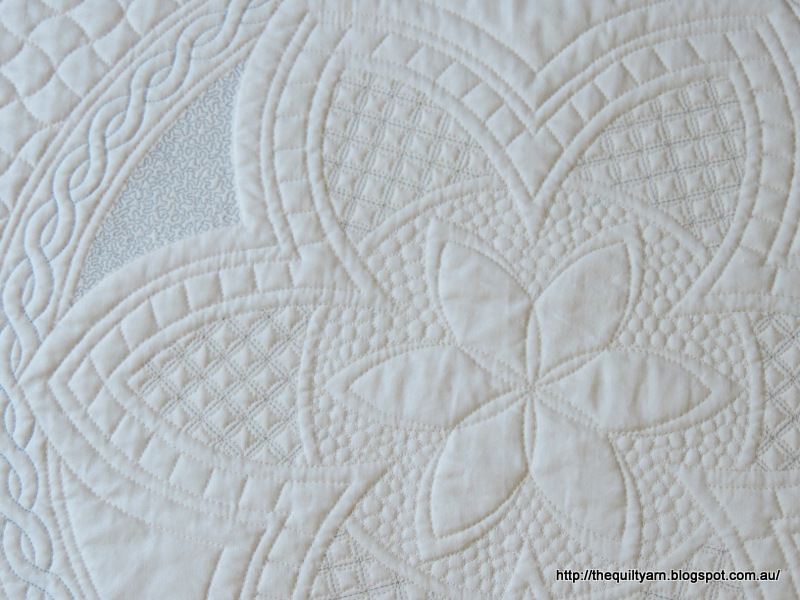
WIP: Wholecloth - Texture, texture...texture

I am so disorganised! I was stitching away on the center of the wholecloth when I realised that I really should put in my feather border before I have any more compaction. My planning is again really ad hoc.

The texture this is producing is really lovely.
Sprayed it again today to remove some of the marking. Given this piece was heavily marked overall, I have the blue markings re-appear in spots. This definitely needs a good wash when finished (which could be many moons away!)
So I started on the feather border and you would think that I learn as I go along...the marking was again a major issue around the corner treatment. I do get impatient, mark it, then correct the sloppiness with more marking to the point of unrecognizable lines...only to 'wing' it in the end. What is that?...I used a gently meandering stencil for the feathers which I have used before and I think I had some problem with that last time...because the stencil is not how I would stitch feathers in terms of angle and curvature, I could not get the flow right for me, so in the end stitched one side out first and then the other. Would have actually been better to put my own feathers in there...that would have been easier (could have even used Cindy Needham's Twisted Grid stencil for that!). Then I decided to echo the feather border which took ages to complete...only went around once and may still go around a second time. This project is getting more time consuming by the minute! I probably will also in-line the feathers with the grey thread to balance out the grey that will surround the central motif.

The center is almost complete
Put pebbles in the center and discovered that I am not that good at Pebbles...I went around each twice which actually looks quite untidy when you look close up. Initially I was going to microstipple the central flower but after doing one petal discovered that that does not work that well (i.e the motif starts to disappear), so I took it out again...I reckon I will leave the center as puffy as that. More planning around this would have been good...I reckon the center would have looked nice with a bit of trapunto in there...
The grid was overstitched with a cathedral windows design...absolutely love doing this. In fact, I blame Cindy Needham for my newly found obsession with grids...I remember not liking doing grids at all when I started quilting, but now I really enjoy doing them for the surprises that you get in the texture when filling them with different designs.

Started yesterday evening (finally!) on the triangle/diamond grid.
Bit hard to see...basically using a repetitive line design in the hexagon shape using the little loop design to travel from one to the next. This idea comes from Charlotte Warr Anderson's book 'One Line at a Time'...she called this the Hex Doodle Weave. Her lines are different... more open and just a bit of a loose doodle to get to the next triangle, however I liked the idea and stitched the more tighter repetitive lines. Was initially a bit apprehensive about the tedious nature of those lines, however found that I quite enjoyed doing it as you need a fair amount of concentration as the direction changes in every triangle. The flattening effect of this design is out of this world and I can't wait to see what that looks like finished.

In fact, I am getting more and more curious about this project as it keeps changing and evolving by the minute with me adding and extending bitses and pieces as I go along...at this rate this will not be finished for a very long time!

Linking up to
A Quilted Passion

Karin

Tuesday, 17 June 2014

Bogged Down

Have nothing to link up anywhere much this week...very unsatisfactory.

I really got bogged down with my second feather border for my Wholecloth quilt. I don't know what it is but somehow the whole quilt took on a momentous importance. I started off marking a bit of a wavy line onto the border, even leaving a half inch space at the bottom, but not sure what happened then. Started my feathers on one side and then stood back to have a look at it...they looked nice, yes...but how was I going to match this properly on the other side?

Seems that I did not think that through at all. Paying no attention really to how I was travelling I just stitched the feathers how I felt like it, sometimes going right to the bottom and sometimes not...herein lies the problem...there was no way to reproduce this on the other side (unless I want to really drive myself mental)...I started half way down and then stopped. Have to rethink this somehow.  Either do informal, free flowing feathers or do the more formal approach of actually following the wave that I have drawn in keeping the plumes a similar shape and size, so that both sides match somewhat. While the stitching above looks nice, once the binding is on, it will be obvious that I followed the wave more closely on the right side.

Funny actually, as I have done this border before in a slightly smaller border and had no problem whatsoever. It seems that the little extra width has totally confused me. I also had to remind myself that this quilt was just for me to practice...it is not going to be the master piece of the century, nevertheless I got completely carried away over the week.

So, I put it to the side and just started to work on my Squares quilt, just sewing squares together...so calming and relaxing.

I think I will have to do some more thinking around this second feather border and make a decision before I start to stitch about what I want this to look like. Maybe I just overestimated my abilities or was not in the right head space. Probably need to mark my reference points better. The stitching of the feathers was fun though.

Watch this space.

PS. On the plus side, I worked out my issues with my Springloaded foot on the new Pfaff 4.2.  I use this foot now with the Dynamic Spring Freemotion quilting mode. When I was at the dealer the other day we talked about that the opening of the foot was creating a bit of an issue in the new model, not grabbing the thread at just the right moment some of the time. The Dynamic Spring Freemotion mode fixed that, but I also put one of those Magic Genie Bobbin washers in the bobbin to just lift the bobbin that little fraction. Stitched beautifully with not one skipped stitch.

Karin

Saturday, 15 June 2013

WIP: Colour Adventure Finished

I am a bit busy at the moment with various things, home and workwise, hence have not posted that much lately. Planning for a trip away in July, so am making a concentrated effort to get some things done.

This quilt is finally finished, except for the binding which I am currently attaching. Also a bit of a saga as I tried to do the binding a little bit differently this time (trying to be super neat...well that backfired big time. Had to take the whole binding off and re-straighten my quilt. Lesson learnt: stick with what you know/let go of that damned perfectionism!)

Here are some close ups of the quilting

Use of taupe thread over several colours - worked brilliantly!

Centre design - a bit more loft would have been good

Surrounding swirl design

Border designs and In-lining of the second border

Corner Treatment


The back looks great
Well, this certainly has been an adventure and a half...I must say I have learned heaps from this, first and foremost...Patience! This was not a quick piece for me and I struggled at times with my own impatience to get it finished. I had a very definite view in my head about how I wanted this to look and struggled to let go of some ideas that just would not have worked.

Overall, I am really happy with this and proud of my little achievement here but also a bit disappointed...unfortunately, the batting (bamboo) I used created bearding like there was no tomorrow and this was a real distraction while quilting but also impacts on the overall quality of the quilt obviously. Definitely will not be using that batting again.

I think I might be doing a Whole Cloth quilt next....just feathers ...that would keep me happy.

Linking up to Leah Day's FMQ Friday.


Karin

Sunday, 21 April 2013

WIP: Colour Adventure Progress

Here is a quick update on the Colour Adventure quilt. Managed to finally baste this quilt and got going on the motif for the star.


I used the bamboo batting that I had lying around...forgot that I had a major issue with bearding last time. Bit of a hassle...also think that more puffy batting would have been a bit better to make the quilting stand out more.

Currently pondering what thread to use on the surrounding areas...I have a greenish thread that I think will blend in. I am planning on some swirls or similar in the surrounding areas...

Belated link up to FMQ Friday on the FMQ Project

Karin

Monday, 17 December 2012

So Inspired - Part 2

Here it is...finished the quilting.


For the first time ever, went around the whole border with a feather design and connected it up so that the whole thing is one continuous feather design. I am super impressed with this. Was not as hard as I first imagined. First drew myself a line half way along the border all around. I then lightly drew the first few feathers in...and of I went with some trepidation.  Went nice and slow and apart from some little irregularities here and there, it turned out pretty ok. More attention in the corners would have been good but I was just really happy that I made it around the corners in an orderly fashion.

As I had watched Patsy Thompson's video over at SewCalGal's December tutorial, I thought that I give the hyper quilting a go as well. Outlined my motif and put some swirls in there, and then 'in-lined' the feathers around the outer border. This worked really well and also helped with making the feathers appear a bit slimmer because some of them turned out a bit 'fat' for my liking.  It also made the feathers pop out a bit more and given that I used a different colour, it makes the border look more interesting, I think. Love that thread build up (used my favourite again - Aurifil 50/2).

Each side of the border has about 50 individual feather shapes, so I would have done the same shape about 400 times. Absolutely can confirm that continued practice does commit a shape to muscle memory.

I really like how this turned out.  Not quite sure what I am now going to do with this...

Karin

Popular Posts