Showing posts with label Lana Lemur. Show all posts

Tuesday, 1 September 2020

Favourite Finish

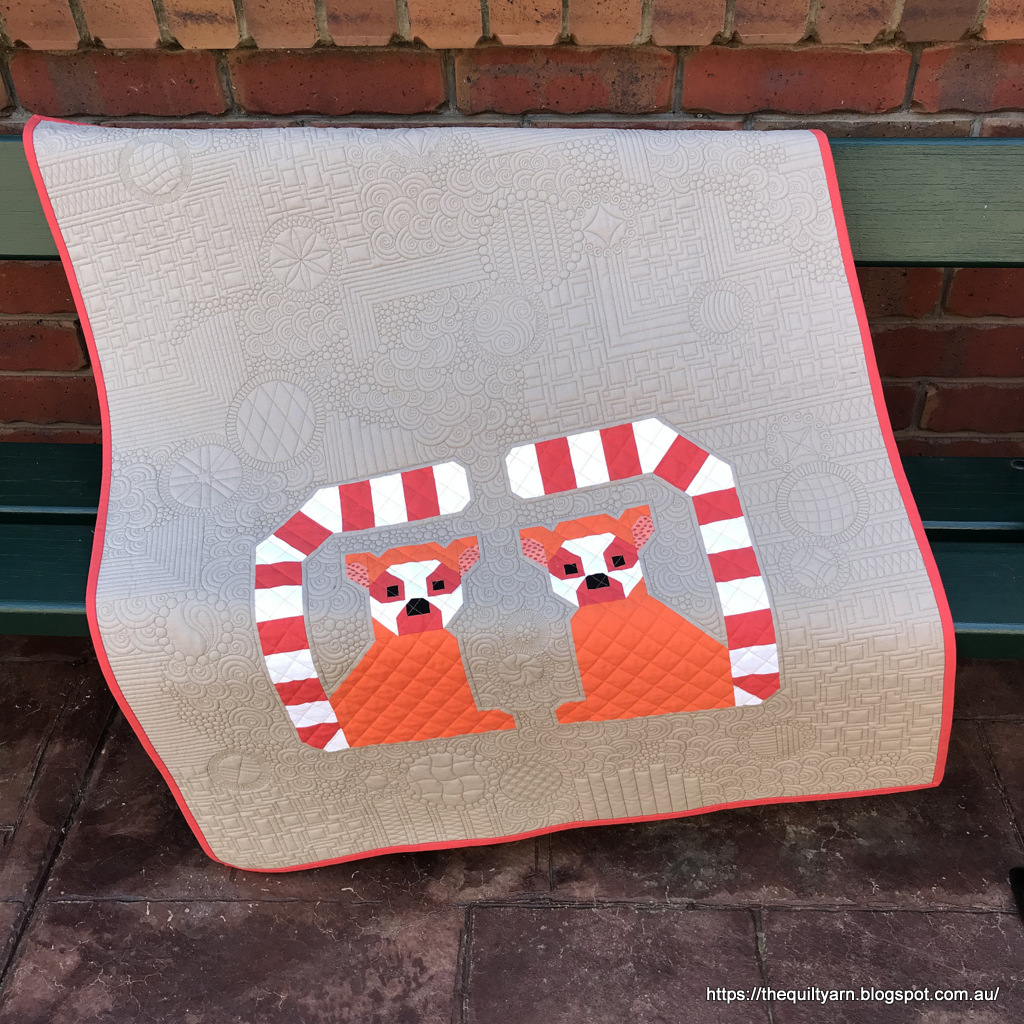
Quick post of the finished Lana Lemur Quilt to link up to Meadow Mist Designs to participate in the Favourite Finish Monthly Link Up - August 2020


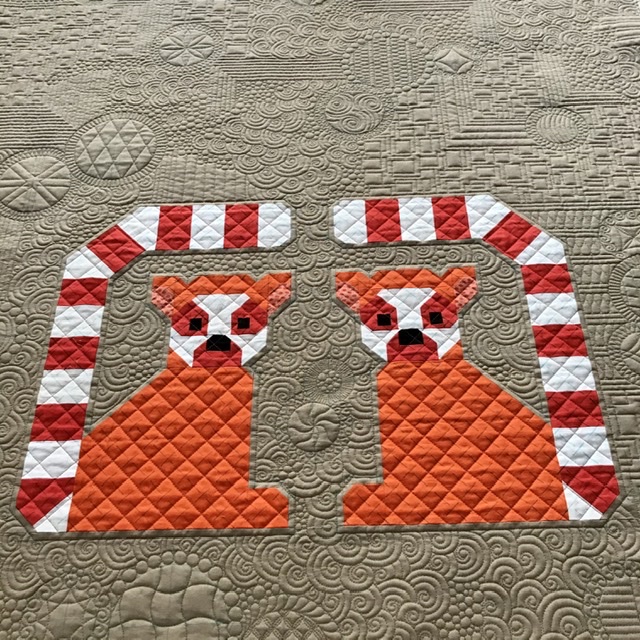
This is an Elizabeth Hartman pattern and initially I was going to do an entire Lemur quilt. That quickly changed and I stopped at just two lemurs. Not that they were particularly difficult, however piecing one lemur together did take some time and I rather fancied the idea of having all the background space to fill in, so stopped at the two to get onto the freemotionquilting.

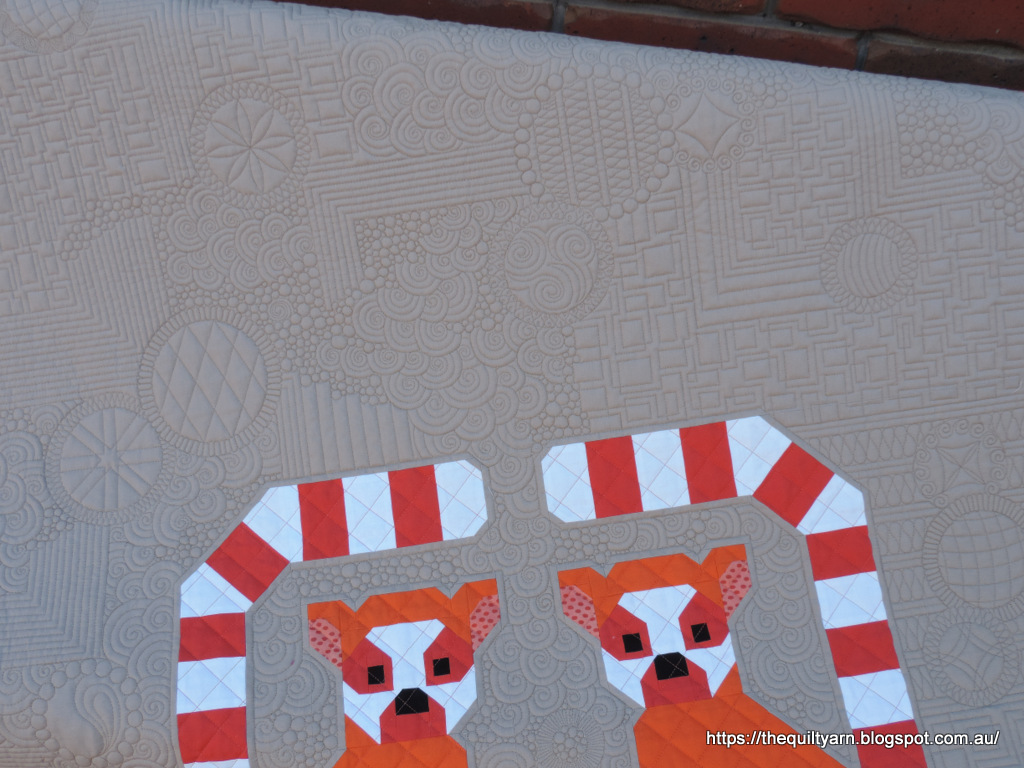
For the background I decided to follow Claudia Pfeil's (P)Filler design DVD of dividing the space with large circles strewn across the quilt and then going from one to the next connecting them with lines, pebbles and stacked swirls . Again, slight underestimation of how long this would take, however it did get done in the end.

Here is a close-up of the quilting
I had no particular plan for this and initially found it quite difficult to be spontaneous, however this did get easier as I went along and came rather natural in terms of what to quilt next.

The quilt measures 36in x44in. Love the colours and how it turned out. 

Linking up to the Favourite Finish Monthly Link up at Meadow Mist Designs

Karin

Saturday, 22 August 2020

Finished The Quilting

Yay!!!!!!
Was not as bad as I imagined and only took a couple of days of concentrated effort.

Now I only have to get rid of some of the blue marker lines and then it’s onto the binding...and the next quilt🤪

Karin

Tuesday, 18 August 2020

Lana Lemur...Still Going

I took a break from my Lana Lemur quilt for about a week but got going again on it this week. Certainly one of my more crazy ideas...this is taking forever!

This is how far I got
So close and yet so far away. 
Like I said before Claudia Pfeil made this look very easy and relatively fast doing it on her longarm in her video Claudia's P(Fillers). I am really dragging my feet with this one. Not sure whether this is because I had no specific plan on how to go about it and have to frequently stop and think about what to do next or it just does take longer on a sitdown.

In thinking about this the last few days I thought that this approach to filling a background is maybe better suited to a longarm machine where you can see a section in its entirety rather than having it all scrunched up and going a bit more blind...not sure about that one. I found that as I was going along switching from one design to the next I was often not looking at the overall picture and some of my transitions are not that great because of that. I thought that it would be easier to have a whole section in front of you to really concentrate on making a visually appealing transition. Could just be that I am a bit tired of it.

Never mind...it will get done, just have to make a concentrated effort this week. Got a few more circles left and need to find something to fill the circles with which should not be too difficult. Just looked a little bit earlier on  Natalie Bonner's Let's Stitch A Block A Day series which is an excellent resource in terms of designs to use for blocks. Will try out a few of her designs in the remaining circles. Also have a few more lines to quilt which should reduce the area to be quilted significantly, so hopefully I can knock this off this week.
Some close ups


Not too bad...I quite like my little circle motif between the lemurs...very puffy.


Karin

Tuesday, 4 August 2020

Lana Lemur Continued - Almost Half Way

As explained in my last post, I am trying out Claudia Pfeil's method of filling up a background as demonstrated in her DVD 'Claudia's (P)Fillers'. Essentially this is a mix and match approach starting with some bigger circles strewn across the quilt and then freemotion quilting from one to the other using different designs. The idea is to create sufficient contrast between the designs to make the whole thing visually pleasing.

Easier said than done!

I started out with the following designs, combining straight lines with stacking shells and pebbles

Felt that it needed something more and decided to mix in a meandering box design to create contrast to those round organic looking designs. Also wanted to loosen it up a bit as I do not want the whole quilt too tightly quilted.

That looked alright however I was not entirely happy with my boxy meander. I did, for a bit of extra fun, try that box design with a ruler in another section...basically just to see how annoying this would be. Never really considered doing this with a ruler and always thought that this would be incredibly tedious.

Wow, to my surprise that went like a treat. All I had to do was to flick the ruler around my box...I did not meticulously align the ruler, just eyeballed its straightness because I was sure that visually, the eye would view its straightness and assume that the lines were all properly aligned at the correct angle. In addition, I used the Capri stitch regulator for this exercise which made it look even more formal. This was exactly the contrast I was after. It looks straighter, more formal and mixes in well with the surrounding lines.


If you compare the two pictures above you can see the difference (yes, I un-did my organic box meander). While the more organic, freehand method is fine when it stands alone as an overall design, for this exercise I really wanted a sharp, crisp contrast to the curves and circles. Really happy with how this is turning out.

I almost finished all the circles for about half the quilt. Quilting the straight lines in sections 'eats' up a fair amount of space and the filling tends to become more manageable that way. Running out of ideas on what to put in the circles and will have to recycle a few designs.

The Capri 18 is behaving like a dream...no tension issues (I am using Aurifil Mako 50/2 on top and Deco bob in the bobbin) and the stitch regulator is my best friend for all those straight lines.

I am joining Cheeky Cognoscenti for her very first Long Arm Learning Linky Party.Check it out! The linky party will run weekly and is open every Tuesday through to Friday.  
Karin


Thursday, 20 February 2020

Lana Lemur Quilt

The Lana Lemur quilt top is done!

I made the baby quilt version of the pattern. It measures 36in x 45in
Does not look like much now, but imagine this with some fancy FMQ in the background! It will be awesome, just need to wait for my Capri machine to arrive. I am thinking dense background quilting like pebbles and swirls (which I will probably regret once I start with that).
Also will jazz up the binding a bit, I think...maybe insert a strip of the orange in there to give it a bit of interest.

The lemurs were challenging to make...the face is made up of tiny pieces and you do need to concentrate a fair bit to get that right. My second lemur ended up a bit better...got the eyes straighter and also the nose in exactly the right spot, but I must say, both times I was just about ready to give up when doing the face. Luckily, then comes the body which is fairly easy and you start seeing the end, so you press on.
Not sure whether I could make an entire quilt with just lemurs...on the upside, making another Fancy Fox quilt now appears like a piece of cake. The pieces are a bit bigger and the face of the fox is not that involved. Also have the Kitten quilt which is similar to the fox...definitely on my agenda (I seem to be going through a bit of an Elizabeth Hartman phase at the moment).

Karin

Friday, 7 February 2020

Lana Lemur Quilt

As I am without my HQ Sweet 16 (sold, waiting for the new Capri machine to arrive!) I am concentrating on making some quilt tops. Recently got the Lana Lemur (and also the Koala Bears) pattern from Elizabeth Hartman. Absolutely adore her patterns. Last year I finished her Fancy Fox pattern... still want to do another one of those as well.

Anyway, got going on the Lemur pattern in a somewhat disorganized way cutting the pieces as I was needing them. Definitely underestimated how small those required pieces were (i.e. 1in). Never mind, I had the time and got started on the face...this took me most of yesterday...in between doubting whether I would get this together. However, I took it fairly slow and just worked my way through the diagrams. Elizabeth' patterns are very well put together with lots of diagrams. In fact, I skipped most of the writing (there are 3 different options in terms of sizes which I always find a bit confusing) and just concentrated on the page with the measurements for the pieces and the individual diagrams.

Here is the face emerging
This was actually quite challenging and I was struggling...the face comes together in 3 parts and is tiny. This section comes to 5in and the seams are all ironed open which I am not used to at all. When I photographed the face I realised that one of the eyes was a tad smaller than the other...will have to watch out for that for the next one. This could have possibly happened because I was swapping between two rulers. Need to stop doing that! 
Must say, I am not a fan of making 1in flipped over half square traingles! As I went along though I started using a fabric glue stick and lightly glued the 1in square in place before sewing on the diagonal. That worked really well and the flipped over units were on average a bit better than before.

After this it got a bit easier (completed the rest of the lemur today) although still could not get away from those 1in pieces. They were everywhere...
Found some matching fabric to make the ears pop a bit and trimmed away some irregularities to make it all fit. Overall, I found that measuring the completed units as you go and straightening them did the trick (mostly!). 
Then came the body which was nice and easy
The tail section looked easy enough, however I am a bit sloppy in my 1/4in seam allowance and as a rule always stitch this a bit narrower...as I was going along, I started to get a bit concerned as to whether this would all fit together (made a few mistakes when I did the fox quilt in terms of trimming some completed fox blocks and inadvertently cutting into the 1/4in seam allowance, hence cutting off some points). Sewed the rest of the tail extremely carefully and did a little bit of fudging to meet the seams and wow...it came out beautifully

Not too bad for a first attempt! Absolutely love the look of this lemur. I will make another one for the small baby quilt option of the pattern. The rest of the quilt will just be the beige background fabric which will allow me to fill it up with some cool FMQ once the new machine arrives.

Had a look at the Koala Bears pattern...also has a fair few 1in squares in there 😬 Maybe I will get used to them!

Karin
Popular Posts