Showing posts with label Baby quilt. Show all posts

Sunday, 10 August 2025

Cute Baby Quilt

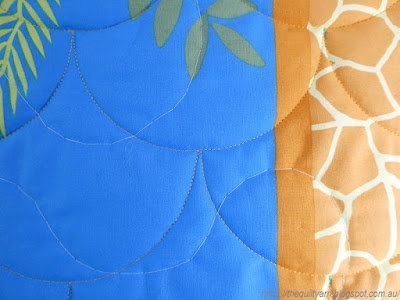
Must be the baby season! Had to quickly finish another baby quilt for a friend of my daughter's. Chose this cute teddy bear panel from Devonstone Collection (design #DV6130) to quickly quilt a clamshell design over it. Then had to hunt around for a suitable backing...as the colours are somewhat washed out I thought that this would be challenging but found something straight away which fitted it perfectly.


Too cute! quilted it with my trusted Aurifil thread 50/2 in a soft yellow colour. Was lucky as I also found a solid in the same colour as the narrow inner border. Currently finishing off sewing the binding to the back and then this can be gifted.

Happy quilting!

Karin

Wednesday, 21 May 2025

Gorgeous Baby Quilt Coming Up

I am working on several projects at once...as always! Finished my gorgeous baby quilt top though. This one is for us, however I will write up the pattern for my Etsy shop in due course. For once I did take good notes while I was making it, so hopefully that won't take too long.

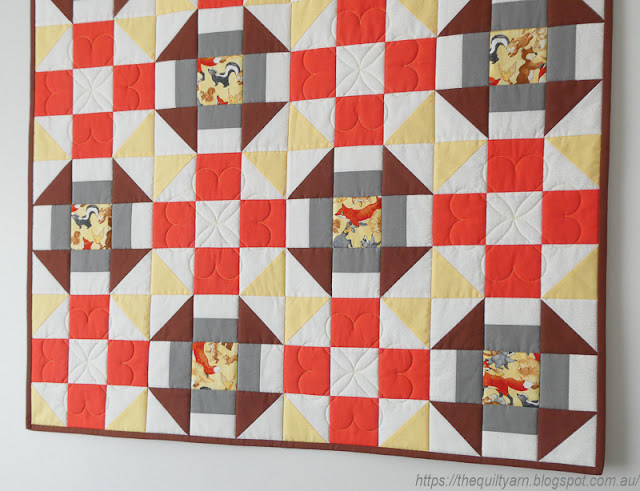
It's absolutely gorgeous fabric! Acquired from a local quilt shop that put together a selection of 'Cottage Grove' fabrics from Art Gallery Fabrics for a Fat Quarter bundle. The quality is outstanding and even after washing the fabric, it felt just superb. I complemented this with some Kona Solid greens to make the stars. Really like the combination of the soft pinks and greens. As usual I changed my mind about borders and ended up buying more fabric only to realize that my border fabric was directional and needed to be placed lengthwise on the sides of the quilt top. What a hassle! Had to do some tricky math to work out how I was going to make this go all around the quilt. In the end I did not exactly pattern match as I would have lost inches of fabric doing this and this fabric was not exactly cheap. I got some fabric left from my Fat Quarter bundle and am thinking of putting another little baby quilt together from that, possibly just doing a Charm Square quilt or similar. I think I might still have enough for a smallish quilt. We'll see.

The last few days I have been torturing myself with trying to work out a Zig-Zag border for another Freemotion-quilting workshop. Should have been quite simple and it was until I decided to look at various different dimensions and shifting my Zig-Zag around. I was looking at Cindy Needham's stencil out of her Border package, but then could not work out the dimensions that were used to produce this stencil. I was there for days until I realised how that stencil was structured! I ended up doing mine a bit different and had to take a deep dive into how to make borders fit a particular length of quilt as I will need to talk about that if I want people to be able to follow the instructions for the borders. Got myself utterly confused a number of times (as usually happens with borders for me) and had to really knuckle down and work this out properly. In the end I used my Affinity Designer Pro program to draw my borders out and check the measurements to make sure I can actually explain how I got to the dimensions chosen and apply this to other borders. Always sounds so simple, i.e. just look at the repeat and either reduce or enlarge as you need it...I was there doing fractions galore, but it definitely helped to have  a visual via the drawing program so I could see what I was doing and where my thinking went a bit wonky at times.

Have a little sample project that I will be stitching out shortly to see how much time is involved in that little skillbuilder workshop. This is for the second half of the year so lots of time still but I want to get this done so that I can discuss it further with the shop owner in terms of what she wants size wise. My sample is based on a 2in zig-zag so it will turn out rather small. I am thinking to make it a 3in zig-zag for the workshop as that allows more space for filler designs. We'll see...

Apart from that lots of UFOs and charity quilts waiting to be quilted. My gorgeous baby quilt is next with a special edge-to-edge design and then I need to write up the pattern.

Will try to post a bit more regularly again once I get back to the actual quilting!

Until then...enjoy what you are working on!

Karin

Monday, 5 May 2025

Making Tiny Stars

I am working on a new quilt pattern...very easy, but includes these tiny 4-1/2in stars. Maybe not one of my brighter ideas but it is for a small baby quilt. Need 20 of them in two different tones. Nothing complicated, just a bit fiddly. Have made 12 so far

Have the most gorgeous fabric to go with this...will be all light greenish with soft pink and apricot tones. Looking forward to finishing these tiny stars and starting on the other blocks.

As I get bored very easily, I am also continuing on my scrap reduction challenge. As part of Lisa Calle's Quilters Groove Creative Design Society we are making a scrappy log cabin quilt. Did a few blocks a few months ago but then got side tracked into other things. While I am doing these little stars I am also making scrappy log cabins at the same time. I usually make two tiny stars and a couple of scrappy log cabins.
I think everyone in the group is making them a bit differently. I settled on a random approach in terms of strip width and colouring. A little bit of thinking this through though is required in order not to be left with a tiny, tiny strip on the outside. Spent one evening though cutting some of my strips straight at 1-1/2in, 2in and anything in between. Goes quicker that way and helps me to make sure that I am sewing them on straight. You could of course also make this really wonky and not worry about the straightness of the components but I started off straight, so I thought that I better continue that way. Have made quite a few by now


Layout is yet to be decided...must say that I find the blocks a tad confusing to lay them out as there is just too much going on in terms of colour. Will have to concentrate when it is time to put these together. While I have been doing these I also thought that it would have looked really nice if I had just done one colour. Have seen a red/white scrappy one on the net and that looked absolutely fabulous. We'll see...no doubt I will have heaps of scraps left over even after this exercise.

Back to the tiny stars...

Karin

Monday, 16 October 2023

Charity quilts

Finished the last two of my charity quilts before delivering them to the Orange Tree Quilters Group. These have been hanging around for a while so I used a production line set up...basting in one hit and using the same thread to finish them off.

First one
Cute little baby quilt...can't go wrong with clamshells. If you are interested in the process of quilting this with the Multi Clamshell ruler on a sitdown longarm machine, I have spoken about it a number of times on this blog and in a little bit more detail HERE.
Came out near perfect again as you can see at the top, my clamshells remained straight and nicely in line at the edges. Does that mean they are all perfectly the same...definitely not, there was a bit of fudging going on here and there which is not visible in the overall look of the design. That's why I like this as a quick allover  design. Quilted this with a yellow Rasant thread (TEX25 which is close to 40wt) on a wool batting which made it nice and puffy. 

Straight onto the next one which was a very bright and cheerful 'Crazy Quilt'
Just did an overall larger scale meander over it which was supposed to have some loops in there but somehow I settled on the meander while I was stitching this. This was the right decision for this quilt as it allowed me to gather some fullness in individual blocks and distribute that out to the sides a bit. Also seemed to have gotten rid of some crooked sashing sections which is handy. Attached a bright orange binding to the quilt yesterday...almost too much for the eyes, but the whole quilt looks just great and will no doubt cheer somebody up.

With that done, I just bought some more wadding to immerse myself back into some of my own project (of which there are many).

Karin

Friday, 23 June 2023

Clamshell Quilting

I thought it might be useful for me to do a post on clamshell quilting. I do use this overall design quite often on my baby quilts as it is a fun way to quilt and always looks great on those little quilts. Babies and clamshell just go together for some reason.

I recently finished a charity quilt with clamshells and while I was quilting along I thought that some may look at this and think that it is too hard to do over an entire quilt.
I use the Handiquilter Multi Clamshell ruler to do the quilting however there are other rulers you can use, i.e. the Handiquilter Versa tool or a circle. A circle, of course, is a little bit harder as you do not have those nodges that stop your foot from going over the line when you place one clamshell over the other.
For most baby quilts I use the 4in size of the Multi Clamshell ruler. I do not mark lines onto the quilts to keep me straight basically because that would involve a lot of precise work to get that right and I don't think it's necessary.

Starting from the bottom up, I first inspect my edge. It is very important that the edge is straight. If it is not you will need to establish a straight line on the bottom as all your other clamshells (and their straightness) will be based on that. Maybe for the first row of clamshells, also make yourself a mark every 4in so you get the first row down perfectly.

And this is basically where perfection ends (coming from a perfectionist). As you quilt, there will be a slight amount of compaction. The above charity quilt had a puffy wool batting, so the compaction started to happen literally straight away meaning that the center line of your clamshell ruler will not necessarily align with the valley of the clamshell underneath. That is incredibly distracting and can throw you a bit. I have found that I can largely ignore this. Instead I focus in on keeping my clams straight and in line by marking the center of each clamshell as I go along. So I will quilt a row, then stop, mark the center of each clamshell just quilted and continue with the next row placing the clamshells exactly where they should be. 

Next issue will be that your clamshells will not necessarily end up exactly on those points because as you are quilting you have put too much pressure on your ruler and things have moved over ever so slightly. Also very normal and happens every time. The good thing with my center marks is that I can see how I am doing, i.e. where I am definitely not on point. This is where the fudging begins. Usually this happens in the middle of a row. So as I am quilting I now have one or two clamshells that are slightly out of alignment. In this instance I might shorten my clamshell a bit by starting to quilt the clam, stopping in the middle and shifting the ruler over a bit to hit the next clamshell at the marked point. Other times I might carry that shift over to the next clamshell a bit to see how the shifting carried on over the row and adjust it then a bit. As I am now on high alert I will check my row, making sure that I end up on the side in the same position. Also when marking the next row in the center I will usually check the alignment underneath to ensure that the clamshell is in the center and straight. 

Over the next few rows, particularly as you are nearing the center slight mis-alignments will occur...sometimes in the middle and other times towards the edge and I will keep fudging to get them back into their right position. If it is a pieced quilt I will also check the height of my clamshells as I pass over a horizontal seam which will give me a pretty good idea on whether I am dead straight or not. Again, there are adjustments you can make. If one clamshell is taller than the other you can adjust this in the next row by just shifting your clamshell ruler up a bit when you come to the offending spot. 

Once you reach the middle of your quilt, you will likely have to turn the quilt and start quilting your clamshells towards you. Often my clamshells shift a fair bit in that row just because of the change in positioning the ruler. In the little quilt above I was mis-aligned towards the edge quite obviously. In this scenario I will look the other way and have a mis-aligned clamshell but ensure that I mark the next row perfectly using a longer ruler to align to the valleys of the clamshells underneath to get back to the alignment as it should be.
The point I am trying to make is that you cannot see this once it is all done as your eyes only see the very consistent and repeating clamshells. The real test comes in the last row when you hit the edge as this will show how straight and consistent you have kept your clamshells. In my example, I was pretty consistent, maybe out by about 1/16in in terms of the height going towards one side, so it was not dead straight. However, the way the clamshells miraculously lined up with the top edge meant that I just made the clams on one side ever so slightly higher to hit the edge and the issue was solved. As you apply the binding on the edge, no one is going to measure that and definitely no one will see that.
  
Let me know if you have any questions. Happy to talk more on this

Karin

Tuesday, 2 August 2022

Finishing off some Panels

Found two more panels in my stash which I am currently finishing off. Went through some of my fabric and needless to say, I got way too much fabric stuffed in every corner of the room. Finishing off the two panels I thought that I would get rid of meters of backing and use up some additional fabric for the binding. However as I am also looking at a new pattern I promptly ended up at the fabric store purchasing meters of fabric (colours that I did not have in my stash), so in fact I ended up with the same (if not more) amount of fabric in the cupboard. Can't win...

I am quilting the trusted clamshell design again on the panels. Really like the design for baby quilts and for me it is the most time efficient design to quickly quilt out. This time though I made it a bit bigger for the first panel as the panel has larger characters on it and I thought it would look a bit better if I went up by an inch.

For this I used Amanda Murphy's 5in circle template. Was interested to see how this would work at that size and also how I would go with not having the 'stopper' that is on the Multi Clamshell ruler.
The wadding for this panel is 60/40 wool/polyester and the whole thing felt really puffy and light weight when I basted it. Wondered how that would go with a bigger clamshell.
First few rows went without a hitch. I actually did not miss the stopping notch that the Multi Clamshell ruler has. As this circle is bigger I had to anyway quilt half of it, then change my grip to quilt the other half. Don't think there was one stop where I went over. The fluffiness of this gave me some issues though as the whole thing was extremely movable as I went along. I again used a drawing 5in circle to always mark my mid point of each clam after I finished a row to ensure that my row continued to be straight and in line with the one underneath.
Inaccuracies do creep in as you go along however. For me it usually happens when I need to turn the quilt and quilt the clams the other way. I don't worry much about it though as this is not noticable and you can fudge your way through as I have done in the photo below...a bit of a side step to get back to how it should be. Not ideal, but does the trick and unless you go looking for it, will not feature at all.
Coming to the end of a panel is always interesting as you then can see how accurate (or not) your rows have been. Was pleasantly surprised with this one as the last row of clams was 'spot on'.
Finished this in a couple of hours and looks quite lovely in that size.
The quilt feels light and fluffy...will put the binding on tomorrow and then it's onto the next one. And that's it...no more panels in the cupboard and the next quilt show is months away, so theoretically no  opportunity to purchase any more panels unless I go specifically looking for it. Don't know what it is with me and those cutesy panels.

Linking up to the To Do Tuesday Link Up by Texas Quilt Gal. As this is my first link up I do not have a list from last week...
For next Tuesday I would like to have the following things finished:
📌Attach binding to the above quilt and hand sew to back
📌Quilt the second panel and attach binding
📌If time allows, complete one more block of my Elizabeth Hartmann wall hanging

Karin

Wednesday, 13 July 2022

Finished my Little Woodland Quilt

New listing in my Etsy shop...finally finished this little quilt. The pattern has been hanging around for years and I even saved the woodland print for several years for just this quilt. It is a very traditional design with its two common blocks, however it does come out really nicely once you quilt a bit of a design in the alternate block.

The quilt measures 36-1/4in x 36-1/4in and is an ideal play mat for a baby or toddler.

Here is my photo on the bench
A bit dark, but I had to hurry today with my photography as it is a pretty grey and rainy day. There was only that little bit of bright light right in morning between 10 and 11 o'clock, so I was racing against the time to get all my Etsy shots done.

The motif really makes this little quilt


Used Amanda Murphy's Heart template (3-1/2in) for the motif. Easy as and the hearts came out lovely. Really like the effect of this.

This little quilt went straight into the Etsy shop before I changed my mind. Just have to write up the pattern now which should not take too long. I think I am going to incorporate several sizes in this pattern as this would also make a great lap quilt.

Karin

Monday, 27 June 2022

Clamshell Quilting


Have been clamshell quilting again. After having finished my big background filler project I made a start on the charity quilts that I picked up about a month ago. To my delight they are little baby quilts in really nice bright colours. Love those!
Me in action
The finished product

I am playing a bit with Idea Pins on Pinterest at the moment. If you want to see the process head over to my Pinterest account and watch my Idea Pin on clamshell quilting (under the Ruler Work board). Would be great if I could display this here but I am not sure there is a way to do that.

Karin

Thursday, 24 March 2022

Finished Owl Quilt

Finished my little owl quilt. 


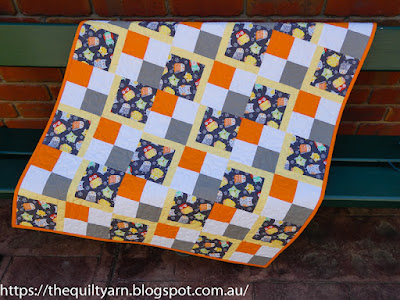
The quilt comes to 36.5in x 48.5in and is quilted with an edge-to-edge allover design from Urban Elementz (see also last blog post). 


Very happy with how this turned out...it's vibrant, cheerful and interesting to look at, despite its simplicity. Lots of fun to put together and I am happy to report that the owl fabric is finally all used up (not that that made any dent in the ever growing stash).
The quilt will shortly go into my Etsy shop for sale, just need to work on some photos and details for the listing.

For now, I am linking up with Quilt Fabrication for the Midweek Makers Linky Party #324

Karin

Saturday, 18 September 2021

Trialing A Cloud Design

Working on my next panel...Have it cut to size and was preparing a backing in order to baste this up but then discovered that my backing had tiny holes right across the middle in regular intervals right across the length of the entire piece. Only bought this yesterday, so it had not been lying around here. Looks like there was a label attached or something and that may have just been ripped off the bolt. Was not impressed.

So had to find another piece, wash it and was left with some time on my hands.

Decided to trial a cloud design with the Handiquilter Multi Clamshell ruler. Thought that this could look quite nice over a baby quilt. For this, I did mark a grid out as there is no way I can orient myself over two rows without having any reference points.

First tried the 3in clamshell. This comes out as 3in x 6in, so rather largish (the fabric is dark brown, however would  not photograph as dark brown as it is pretty overcast today and my sewing room is pretty dark...looks like I took a black and white photo)

...then tried the 2in clamshell
This is most likely the size that I will go with. Works well with the grid marked in and like the clamshell design... on a sitdown longarm or DSM, is a very forgiving design. Inaccuracies do creep in, but with the reference lines, I was able to do some fudging here and there and stay on track. 

Might give that a go on the next panel.

Karin

Friday, 7 February 2020

Lana Lemur Quilt

As I am without my HQ Sweet 16 (sold, waiting for the new Capri machine to arrive!) I am concentrating on making some quilt tops. Recently got the Lana Lemur (and also the Koala Bears) pattern from Elizabeth Hartman. Absolutely adore her patterns. Last year I finished her Fancy Fox pattern... still want to do another one of those as well.

Anyway, got going on the Lemur pattern in a somewhat disorganized way cutting the pieces as I was needing them. Definitely underestimated how small those required pieces were (i.e. 1in). Never mind, I had the time and got started on the face...this took me most of yesterday...in between doubting whether I would get this together. However, I took it fairly slow and just worked my way through the diagrams. Elizabeth' patterns are very well put together with lots of diagrams. In fact, I skipped most of the writing (there are 3 different options in terms of sizes which I always find a bit confusing) and just concentrated on the page with the measurements for the pieces and the individual diagrams.

Here is the face emerging
This was actually quite challenging and I was struggling...the face comes together in 3 parts and is tiny. This section comes to 5in and the seams are all ironed open which I am not used to at all. When I photographed the face I realised that one of the eyes was a tad smaller than the other...will have to watch out for that for the next one. This could have possibly happened because I was swapping between two rulers. Need to stop doing that! 
Must say, I am not a fan of making 1in flipped over half square traingles! As I went along though I started using a fabric glue stick and lightly glued the 1in square in place before sewing on the diagonal. That worked really well and the flipped over units were on average a bit better than before.

After this it got a bit easier (completed the rest of the lemur today) although still could not get away from those 1in pieces. They were everywhere...
Found some matching fabric to make the ears pop a bit and trimmed away some irregularities to make it all fit. Overall, I found that measuring the completed units as you go and straightening them did the trick (mostly!). 
Then came the body which was nice and easy
The tail section looked easy enough, however I am a bit sloppy in my 1/4in seam allowance and as a rule always stitch this a bit narrower...as I was going along, I started to get a bit concerned as to whether this would all fit together (made a few mistakes when I did the fox quilt in terms of trimming some completed fox blocks and inadvertently cutting into the 1/4in seam allowance, hence cutting off some points). Sewed the rest of the tail extremely carefully and did a little bit of fudging to meet the seams and wow...it came out beautifully

Not too bad for a first attempt! Absolutely love the look of this lemur. I will make another one for the small baby quilt option of the pattern. The rest of the quilt will just be the beige background fabric which will allow me to fill it up with some cool FMQ once the new machine arrives.

Had a look at the Koala Bears pattern...also has a fair few 1in squares in there 😬 Maybe I will get used to them!

Karin

Monday, 3 February 2020

Easy Baby Quilt Revisited

Assembly of the quilt top

Lay out the blocks in 8 rows of 6 blocks following the quilt layout diagram. Sew the blocks of each row together, pressing the seams in alternate directions. Sew the rows together, abutting the seams and joining the intersections. The quilt top should measure 36 1/2in x 48 1/2in. Press the quilt top.

...and presto, a finished quilt top

This turned out really cute! The only issue I had was with my ironing the blocks in bulk. Obviously made a mistake in thinking that I thought the seams would just nest as if by magic. Pays to pay attention! The first two rows nested beautifully but afterwards I should have reversed the order of ironing the seams. Yep, that was a bit of a hassle but I got there eventually.

Now it's just a matter of deciding how to quilt this...will play around a bit with that on the Ipad.

Karin

Thursday, 3 October 2019

Another Baby Quilt

Working on another baby quilt and did a bit of fun sewing on the side.

Had a pack of charm squares called 'Corner of 5th and Fun' by Sandy Gervais for Moda Fabrics. Always struggle with what to do with charm squares but keep buying them anyway. Decided to just set this into some sashing and be done with it.
Lovely colours and it is coming along nicely. Not sure yet how to quilt it...thought about just doing an allover design but also looking at the rulers, in particular the arcs and wonder whether I just arc away in the squares and then quilt something in the sashing. We'll see...

Also had two foxes with brown eyes left over. Thought that they were too pretty to discard and made another two, then used up the last bit of the woodgrain fabric. Planning to make a table runner out of this, using up the brown fabric which was a bit lacking in quality as a border. If nothing else this will be nice and colourful and bonus, used every available scrap of the grey, woodgrain and brown fabric.
So enjoyed making the foxes again as I now am familiar with the construction and the best way of putting them together. Definitely will make another fox quilt! In terms of quilting I am thinking of putting a grid design over the faces, some ruler work in the borders...this will be good fun.

Karin

Thursday, 25 April 2019

2019 Finish-A-Long: First Finish for Second Quarter

Completed my first finish for the second quarter of the 2019 Finish-A-Long. You can find my goal list HERE.

Admittedly, I was almost at the end of this, had just the binding to do, but a finish nevertheless.
This came together very quickly. I bought a packet of 6 1/2in strips of the baby blue fabric at our recent quilt show and just cut this into squares. To pretty it up a bit I put a few appliqued hearts on it and I was done. For the quilting I chose a simple allover clamshell design, done with the HQ Versa tool. 
Quilting the clamshell design
And that was it. Done!

The quilt measures 36 1/2 x 36 1/2in.
My next baby quilt will be a bit more involved, with applique and piecing...a fun and colourful design which I designed a while back. But first I will have a few other tasks to finish...

Karin

Wednesday, 3 April 2019

Another Baby Quilt!

This must be the year for babies...I am in need of another baby quilt! I only got baby girl quilts that are already finished, so I was looking for a very quick project that I could just throw together. Initially I was looking for a panel, but could not find anything that I really liked. When I was at a recent quilt show, I discovered a packet of fabric, already cut up into 6 1/2in strips. Bought that and cut it up into squares and just mixed some applique hearts with it. 

Presto...done!
Very blue and cutesy.  Planning on doing a clamshell design over it that I can stitch out with the HQ Versa tool. Prepared everything ready for basting today, so this should be finished in the next 2 weeks. 
Apart from that, dragging my feet. Still have to put my quilt show entry in...currently sewing on the binding and will then get on to all the paper work. I have had some time off work, but now have gone back to my regular working hours. This was supposed to be leading into retirement, however as I have found out, I am just not ready. So, it's back to work for me for a while...not sure, how long, but I am confident I will know when it's time to quit for good.

Today I also got side tracked again...I am just so distractible. Have been searching the internet for a while for tutorials on jelly roll rugs and rugs that are made by braiding fabric strips. Today I came across a really nice You Tube video called 'Weekend Project - The Camden Bowl' by Mom and Pop Quilt Shop. I have seen this fabric bowl at my local sewing shop before...it follows the same principles as the jelly roll rugs, so I started watching this. The woman in the video is hilarious...I laughed out loud a couple of times...very humorous and thoroughly enjoyable! She made it look quite easy and her casual way of putting things together really appealed to me, so I got straight into this and tried it out.

First attempt at just getting the method down...very enjoyable indeed!
yep, I got hooked straight away, so I will try this out in the next few weeks. Still have some leftover jelly roll from French General, so I will use those strips for this to make the bowl. Like the idea of using bits and pieces of leftover batting and fabric. Also have seen bags made out of this and will need to investigate this further as even this little piece that I constructed is unbelievably sturdy, hence really useful for bags. I am also thinking that I may not need a lining if I use this for a bag, but we shall see. 
 
Karin

Monday, 11 February 2019

Almost Done!

Have been steadily working on my baby quilt.

This is the third time I am making this quilt, so it went together fairly quickly. See the other colour ways HERE and HERE. I quilted this quilt exactly like the previous one, given it is going to go to twins. 

First I stitched in the ditch...I used the HQ ditch ruler for this and I must say that this is getting easier as I force myself to do all the ditch quilting on the Sweet 16.
The ditch ruler can be used either side of the seam and I have used it both ways, however I think I prefer to lay it on the seam stitching along the ditch that way.
My ditching looked good and the only thing I might have to watch a bit is my stitch length. As I am concentrating my stitches tend to become smaller and smaller. For the stitch-in-the-ditch I used Aurifil 50/2 in both the bobbin and the top thread.
Then I started on the curves, using the Pro Echo 8 ruler  (on the left) from Lisa Calle.
I don't just like the ruler, I love that ruler. Aligns with ease and given that this was the second time I did the curves, was able to do them with some speed. 
Starting off with the curves...this time I did not break thread that often going diagonally across and back again, then travelling on the side to the next block. I used a white Aurifil 40/3 thread for this on the top with the Aurifil 50/2 in the bobbin. Went without a hitch.
Finished quilt top
Only got the binding left and I am done!

Linking up to Love Laugh Quilt for Monday Making.

Karin

Wednesday, 15 November 2017

New baby quilt

I have been steadily working away on 3 different quilts. Yes, why do one if you can do several at once!

Finished my baby quilt. This one is made out of charm squares and gave me a bit of a headache as I also had obtained a packet of 2 1/2in squares in the same range, somehow thinking that they would make up 4 1/2in squares. Well, they obviously don't and after a lot of internet surfing I finally came up with a combination of designs.
I found the idea with the stars in the center on Pinterest...Vanessa Christensen from the V and Co blog. She had the charm squares and stars arranged this way in a small quilt in some greenish tones. Very pretty. I added some additional borders to use up my 2 1/2in squares...EQ7 came again very handy as the math just did not add up and I needed to do some tweaking. To my big surprise this worked out very well. 
The quilt is by now spray basted and ready to go! Spray basting was definitely a first for me...not sure I like it...got it all over my feet and then spread it all over the floor...bit messy. But I have got something special in mind for this one and spray basting was the better option.

I am planning to do an edge to edge design on it on my HQ Sweet 16. We learned about this in the group I am attending and given that I am really bored with my allover designs this seemed a great option. I selected a design from the EQ Quilting Designs Add-on Program Volume 8 called 'Mini Moonflower Design'. Got very enthused about this and tried it out on a piece of white cotton
While not the most exciting design I thought that this was simple enough to trial on this quilt. I think it suits this little quilt.
In between of course, EQ8 came out and I had to shift my baby quilt from EQ7 to EQ8...today I spent some time on it trying to work out the size of the design and most importantly the placement. While this is all do-able, a bit of planning is a must, particularly as this design is straight across in very definite rows, so I had to make sure it does not sit on every seam line and looks well spread out while still appearing as a consistent overall E2E pattern. The motif consists of 2 rows of flowers and I ended up making this eventually 10in high. The next issue was to pay some attention to the edges and the spacing. EQ 8 was enormously helpful with this...
I worked in Zoom mode and placed my motif where I could effortlessly start...also used that little ruler in EQ8 to measure the approx. distance at points so I have an approximate for placement. I then exported the image using the 'Export Marquee Selection' and pasted it into a Word document, so I can have a look at it when placing the motif on the quilt.

So now I have got a picture of the top left corner and the top right as well as the bottom. Also took an image of the approximate spacing which will be about 1/2in.

Now it is just a matter of doing it! The motif will be stitched out using Golden Threads paper and I will most likely do this in sections. My only fear is that this might not end up straight across for some reason. Well, we shall see...


If this works out I might get some simple pantographs to expand my options a bit in terms of overall designs. Found some really nice ones on the Golden Threads web site. Lots of possibilities!

Karin

Wednesday, 15 February 2017

A Finish!

Finished my little baby quilt
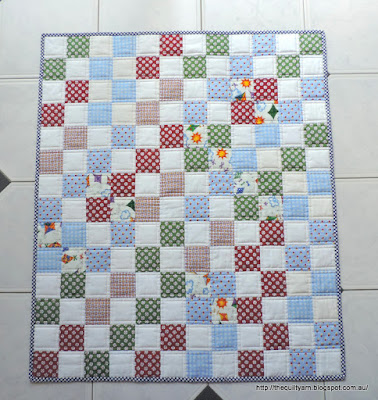
Absolute pleasure to finish. There is something so satisfying about throwing a quilt together out of 'nothing'. I found this fabric in my stash recently and thought it was a pity to let it go to waste. You probably cannot see this, but it has basket balls in the red and green squares - I even forgot why I bought this. I also had some pre-cut squares leftover from a different project, so I did not need to go looking for additional fabric. And the binding...I have used the blue dotty binding fabric for some years by now...sets it off nicely and now I only have a little bit left. Can't believe how long some of this fabric has lasted. Backing was also sourced from the stash...just some white fabric with some pale stars on it. Perfect.
Even the wadding is bitses. Used the tape to put two pieces together and presto...done! This quilt has a lovely feel to it, as I used wool wadding which made it just the right amount of puffiness.

The quilting was done with an Aurifil 50/2 variegated pale yellow thread. Unfortunately you cannot see the colour differentiation, but I think it looks nice and just lifts the whole thing up a bit as every square is slightly different. For the quilting I went with straight lines just using the edge of my sewing foot as a guide...approx. 3/8" away from the seam. Did not go for the 1/4" echo as this would have highlighted the shadow from some of the darker fabric underneath.
I have a recipient in mind, however do not know yet whether they are having a boy or a girl, so just need to wait for a moment.

Now back to what I was actually working on...need to finish off some FMQ on another quilt.


Karin

Wednesday, 1 February 2017

A little baby quilt

The other day I finally cleaned up a bit and went through my stash...OMG...found a lot of things that I had already forgotten about...amongst lots of other things, some baby quilt fabric. Looking at it, I thought that this was a pity to just let go to waste or worse still, use it up for some of my practice runs in FMQ (which I had already done with one part of the fabric). Also found a whole stack of white pre-cut squares that must have been left over from a previous quilt. Perfect opportunity to use my new gadget
If you love chain-piecing as much as I do, you need to get one! This is the thread cutter I got from the Fatquartershop the other day...I got the one where you can exchange the blade once it dulls. Relatively inexpensive, this makes the job of cutting the stack of completed units in a matter of seconds. Really useful gadget.

Anyway, here is the completed quilt top
How cute is this...literally thrown together out of of a few pieces of fabric (should come out at 36"x 42"). Nice little quilt for a boy (the darker fabric has little baseballs on it). Not sure how to quilt it yet...maybe just some lines 1/4" away from the seams to accentuate the squares.

Linking up to Let's Bee Social over at Lorna's Sew Fresh Quilts

Karin

Wednesday, 20 January 2016

Quilt Top Finished

My  baby quilt top is finished...this is the first of the quilts I nominated for the FAL 2016 to complete by the end of March.
Finished quilt top measuring approx. 52inx44in
I was thinking that the end result, while lovely, certainly does not correspond to the effort that goes into constructing one of these using the Y-seam technique. On the whole, it took me about 4 weeks to make my way through the Y-seams. I did find making the individual tumbling blocks easy and also managed putting the blocks into individual rows fairly quickly. The fiddly bit is really putting the rows together. If you want to have a bit of a look how I did construct this, please see my tutorials about Y-seams Part 1 and Part 2.

I am already thinking about the next one
Have this cute 'bug' fabric (bought several years ago) that I matched up with some simple tone-on-tone fabric. I think I might try out the strip piecing method for that one and see how I like the end result, i.e. will that seam across the top diamond really bother me that much? We'll see...

Not sure yet how I am going to quilt my Hippo quilt...whether allover design or just echoing around the diamonds and a bit of a loopy design in the borders.

Well, next job will be the basting which I really hate, so I am going to leave that for the weekend when it is hopefully a bit cooler.

Have not been over to Lorna's for some time (check out her Ugly Christmas Sweater QAL), so I am linking up to Let's Bee Social #108

Happy Quilting!

Karin

Popular Posts