Showing posts with label Clamshell Design. Show all posts

Sunday, 10 August 2025

Cute Baby Quilt

Must be the baby season! Had to quickly finish another baby quilt for a friend of my daughter's. Chose this cute teddy bear panel from Devonstone Collection (design #DV6130) to quickly quilt a clamshell design over it. Then had to hunt around for a suitable backing...as the colours are somewhat washed out I thought that this would be challenging but found something straight away which fitted it perfectly.


Too cute! quilted it with my trusted Aurifil thread 50/2 in a soft yellow colour. Was lucky as I also found a solid in the same colour as the narrow inner border. Currently finishing off sewing the binding to the back and then this can be gifted.

Happy quilting!

Karin

Tuesday, 14 November 2023

To Do Tuesday #45 - Christmas Quilt Panel

My goals from last week
- hand-sew the binding to the backfiller project and create a hanging sleeve (otherwise this will end up in the cupboard) - almost done!
- finish the sock!❌
- pin and baste the Australian christmas quilt.✅

Not super productive this week, but some learning occurred! Also finished another three cat blocks which for some reason was not on my list.

I pinned, basted and quilted that blasted Christmas Panel quilt. The panel is called 'Bush Celebration' design #DV5394 in the Devonstone Collection.  I bought a new pantograph design from Urban Elementz called 'Ginger Snap' by Apricot Moon Designs. The design is large (8in) , so I mucked around with reducing it in size to a level that was comfortable to do on a sitdown machine. You absolutely can asked Urban Elementz for a different size for a small additional fee, however I absolutely had no idea what size to go for and also wanted this design for another quilt, so possibly was looking at a number of sizes. In addition, I am a very visual person and needed to see the different sizes.
Not necessarily great for a Christmas quilt, but I did not want to get a Christmas design which I would only use once or twice and the Ginger Snap appealed to me as I can use that on many different types of quilts. 

So I made a start with the design reduced to about 6 in.
As I suspected, not that easy to keep consistently round even though I am following a drawn line. I possibly could go a little big bigger but definitely not 8in. I think I would start to struggle to keep going on those drawn lines. Loved the look of this and got excited about it, however...

...did not like it on that christmas quilt
As you can see took me a while to get a really good picture of that and I was ho-humming for a while whether to continue or not. In the end I decided to take it out. Just was not the right design. I felt that the playful design created additional busy-ness and was somewhat just wrong.
So I took it all out which took hours! Then I steamed that section to get rid of the stitching marks and lo and behold the iron spat out some brown gunk all over the section! Lucky for me all that rinsed out with cold water and also helped with making those stitching lines virtually disappear. I noticed that I got rid of my basting and put that back in once it was dry. Not ideal and I did make a mental note not to remove basting stitches in the future until I am definitely finished (as this caused some additional problems in the end).
In terms of design I was by now over it. Knew that I needed a calm repetitive pattern, so went with the clamshell design and finished this today.
This was not as easy going as it usually is. The batting is wool, so fairly soft and a little bit puffy. Had some issues staying on track as this panel does not give you a lot of points where you can gauge your alignment. Felt like I was going a bit blind and am actually a bit surprised that this looks fine as I was definitely out of alignment a number of times. Then when I had finished my last row, I flipped it over and wow...two clams had puckered in the last row and another clam had a pucker in the row below. I reckon this was the result of me re-basting it after I had rinsed it. Well, undid the last row and the pucker underneath, took my edge stitch out and re-did all that and finally finished this! What a saga! Looks good though with a calmer design.

On a more positive note, I did play around with the ' Ginger Snap' design in the week as I want to use that for my emerging cat quilt. I did look for cat related designs, however many of them are fairly involved, i.e. have lots of smaller elements which would be too tedious as I am stitching this out with the use of Golden Threads paper. I needed something simple that makes it easy to remove the paper. The Ginger Snap design also comes with different elements inserted, like flowers, hearts, stars (then called Ginger Flowers/Hearts/Stars etc) so I decided to insert a cat paw into it. Spent some time drawing out a decent cat paw in one of my drawing programs, then substituted the circle of the design with the cat paw at an angle. Stitched out (a bit roughly) two different sizes, one at 6-1/2in and one at 5-1/2in.
Stitched out really well and actually was easier than doing the circle. I reckon I probably can go a bit larger in this as I do not have to be so consistently roundish. Really cute and will be great for the cat quilt. Now I only have to fine tune this a bit in terms of size and my drawing (I think one of my claws is angled a bit weirdly), but definitely do-able.

So for the remainder of the week I am planning to
- finish hand stitching the binding on the backfiller project.
- cut and prepare the binding for the Christmas quilt and attach it to the quilt.
- (OMG) finish that sock!
- make another 3-4 cat blocks
- decide which project to tackle next (this could be dangerous...definitely do not start another project before finishing what's on the list!)
- get back to my Etsy shop and prepare for Black Friday sales as well as thinking about a new pattern.

Linking up to To Do Tuesday #45 over at Quilt Schmilt.

Karin

Monday, 27 June 2022

Clamshell Quilting


Have been clamshell quilting again. After having finished my big background filler project I made a start on the charity quilts that I picked up about a month ago. To my delight they are little baby quilts in really nice bright colours. Love those!
Me in action
The finished product

I am playing a bit with Idea Pins on Pinterest at the moment. If you want to see the process head over to my Pinterest account and watch my Idea Pin on clamshell quilting (under the Ruler Work board). Would be great if I could display this here but I am not sure there is a way to do that.

Karin

Thursday, 3 March 2022

New Listing in Etsy Shop

Finished another cute panel with an allover clamshell design. Absolutely love doing this and always comes out really nice. 

For this quilt I used a quality 60/40 wool/polyester blend wadding which gives this quilt just that little bit more loft. Feels nice and snuggly and given its make up will be good for frquent washing.

The quilt measures 30-3/4in x 40-1/4in, a lovely size for a drag along blanket or a playtime floor quilt.


My clamshells

I quilted the clamshells with light blue Aurifil 50/2 thread on top and a coordinating beige Aurifil thread in the bobbin. Looks great...very happy with it.

This was supposed to be the last panel for a while...however, have been to the fabric shop since then and ended up coming home with another two panels. Quite ridiculous really! To my defence, one of them made sense...it is one I recently sold and when I saw it there again, I thought that this would be great to just make it again, as I can then just copy most of the information already in existence from the previous listing. Time saver, I thought! However, then I saw another cute panel and took that as well. Hopeless, truly.

Karin

Saturday, 26 February 2022

Finishing Off and Starting Something New

It's been a while again...I tend to forget what I post and where, so some may already have seen pictures of some of these projects.

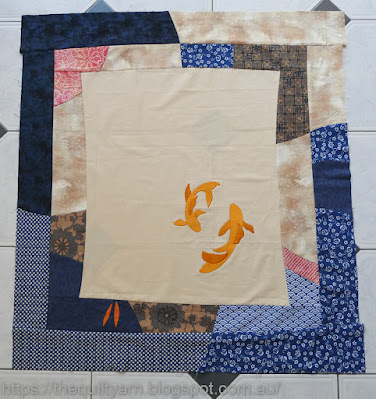
I finished my Koi wall hanging quilt top. Had to wait for some new applique foundation paper to arrive before I could continue. I had some Dupioni silk from my kit left and decided to make a second fish. This was somewhat nerve wrecking as there was not a lot of room for error. I had all these very small fins to make and turn the silk over so I was very careful not to stuff up as there was only just enough silk to make this one fish. Went very slowly and deliberate trying not to stress and it worked out fine.

Looks really nice, very pleased with it. The Breaking Boundaries class will start this weekend...should be great!

Also continued on my Nemeshing piece. As this is a lot of pebbles I did this over a couple of weeks, doing a little bit every now and then. It is hard to finish something when you know it has not turned out exactly how you had imagined it, however I thought it would be  good to finish this, so I would have a visual reminder of where I went wrong. 
I am calling this...'Pebbles with a Hint of Nemeshing'...as many of my smaller swirls have disappeared through the pebbling. Just did not make them fat enough and also thought that the double batting that I used was not the best idea. Live and learn! Will do some more feather practice in the blue border to finish this off.

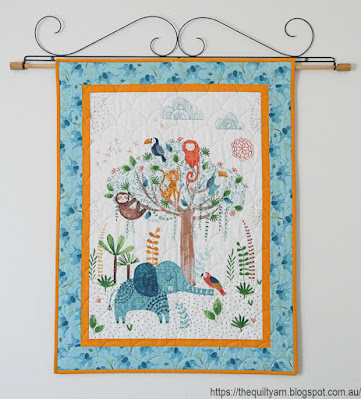
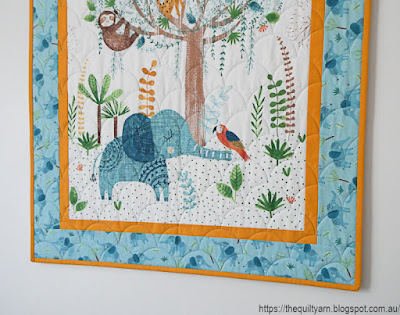
Then I started another Baby Panel quilt. Discovered that I have done this panel before but when I bought it obviously did not remember this. Had to laugh, as the whole time I was thinking that I really liked this little panel...no wonder, bought it before because I liked it then! The Panel is called 'Jungle Fever' designed by Rebecca Jones for Clothworks Fabrics.
Did my favourite design over it again the other day...clamshells with the HQ Multi Clamshell Ruler. Love doing this on baby panels/quilts.
I do not mark the entire quilt top to do this. What I usually do is mark the first 2 rows, in this case two lines across the width of the quilt top 2in apart. The largest clamshell of the HQ Multi Clamshell tool is 2in x 4in, I then quilt the first row and mark a little tick half way on top of each clamshell. Then comes the second row, making sure I hit that little tick mark as I go along. After that I do not mark the horizontal lines anymore as my first two rows should have laid the foundation for being pretty much straight. I do however, continue to make little tick marks on top of each clamshell as I go along to just double-check that my clamshell are centred correctly. 
As you go over an entire quilt there are inaccuracies that creep in which I think is unavoidable. A slight shift in the ruler can make your clamshell slightly smaller or a bit of sliding and you are a bit off centre. I do make small adjustments as I go along like lengthening or shorten some clamshells however do have an eye on whether they are remaining straight and centred on each other. It is always a bit of a surprise to come to a space in the quilt, like a seam or similar where you then can see how accurate you have been. In a panel though there is not much you can go by and the real test came right at the end with this quilt top when I hit the first border. You can see that the top of my clams (the added lines in there is my basting) are approximately half an inch away from the first border. Not every single one was exactly the same but overall this was looking pretty good. There is no way that you are going to perceive little inconsistencies when looking at the finished quilt. Happy with that...this will be a cute little quilt for my Etsy shop.
Now onto the binding and then I will concentrate on the Breaking Boundaries class.

Karin

Sunday, 19 September 2021

Another Nursery Panel Done

This panel has been most interesting. I decided to again use my Handiquilter Multi Clamshell tool, however expanded on the clamshell design and made a 'cloud' pattern. 

For this little exercise I did mark a grid onto the panel though as I was not confident that I would be able to keep the design straight otherwise.

The finished product

So, how did I go about this...first I decided on the grid size, i.e. 2in x 4in and marked this with a blue water erasable marker onto the panel. As I am a very sloppy marker, I half expected that my lines may not be entirely straight all the way up. However, look at the top of the quilt...could not believe it but ended up dead straight. Was a bit impressed with that. I did notice during the quilting that my horizontal lines appeared to be straight, however my vertical lines left a bit to be desired in parts.

The quilting was straightforward
Start with half a clamshell, i.e. eyeballing to stop the needle at the half way mark of the ruler, then continue up with a 2in clamshell and down again with half a clamshell. I marked some alignment points in purple in the diagram. With the Multi Clamshell ruler I was able to align the ruler's lines with the points underneath. For example, point 1 of one row aligns with point 3 of the row underneath...it really pays to get to know your ruler and make as much use of all those alignment lines on it as you can see, in this case I used the vertical as well as the horizontal lines.
Having said this I should also mention though that you will get some compaction as you go along and some of the points do not appear to line up any more with the row underneath. As I have done this a few times by now I was aware of this and concentrated on filling my grid, still checking the alignment as I went along and having an eye on keeping my curves as straight (tilting the ruler ever so slightly can give you problems with the clamshells coming out at different heights) as I could as well as staying in my prescribed grid set up. What I often found was that some points aligned while others appeared somewhat off...it was a somewhat fluid arrangement, but as long as those deviations were approximately similar I did not worry about it as I already knew that this most likely had to do with the slight compaction that you get when quilting. Also, my last 5 - 6 rows of my grid were out by 1/8in...again, no hassle, I just made sure that my clamshells were straight, i.e. all 1/8in underneath that blue line.

For this design, I definitely needed the grid because as soon as you do the full clamshell on top of the half circle you tend to loose all orientation and the grid helps to keep you on track.

Some close ups


I like the look of the back. Looks absolutely precise which of course it is not, but again this is a very forgiving design as you can do a fair bit of fudging when quilting the half circles, i.e. lengthen or shorten them to hit the point on the grid exactly.

While the preparation for this little quilt took a bit longer, the quilting did not take that long and the only hassle was that I had to turn the quilt once I had quilted past the middle as I had too much quilt in front of me. Took a moment to get my brain used to doing the design upside down.

I wonder what I can come up with next.

Karin

Wednesday, 15 September 2021

The Cutest Panel

I am in clean up mode, trying to get rid of some of the panels that I have collected over time.

This particular panel I have had for some years...it is called 'Jungle Friends' by Deborah Edwards for Northcott Fabrics. Finally cut this panel to size which is always a challenge as the material is never entirely straight, i.e. it is a bit tricky to get fabric and design perfectly straight, particularly if you are a stickler for detail like I am.

Decided to do another clamshell allover design...really like that for little baby quilts.
 
Here are the tools that I used...a simple circle, the Handiquilter Multi Clamshell tool and the little fluorescent green disk (which I need at times to hit the right spot).
 
I did not mark the design on the fabric as I am basically a bit lazy, however I did make some marks on the bottom to get the first row exact to be able to build on that.

After this I used the red circle to mark the center of the clamshell as I went along.
That was just to make sure that I hit the center point exactly and also served in subsequent rows to give me an idea whether the row underneath was slightly off.

I quilted the clamshells with the 4in HQ Multi Clamshell tool.
As you can see I have drawn a line with a permanent marker through the center. This is again to align it to the row underneath. Trying to just eye that out is just too difficult. 

So I went along pretty straight, however had some shifting again higher up in the quilt. I think I might have to replace my sticky grips on the ruler as I tended to slide over a bit. In the end I was out by about 1/8in and had to undo two of the rows to get back to a more accurate design. A hassle, but as this is a rather smallish quilt, it did stand out a bit and it would have bothered me if I had left it. 
This is by far the cutest panel. Was able to exactly match the orange border to the colour of the animals. Looks really pretty and feels wonderful with its wool batting inside. I will put a matching green binding on this to finish it off.

Already found a recipient for the quilt which was a bit of a surprise, but great...don't need another quilt lying around.

This was good fun and I am already planning for the next panel that needs to be finished.

Karin

Thursday, 25 April 2019

2019 Finish-A-Long: First Finish for Second Quarter

Completed my first finish for the second quarter of the 2019 Finish-A-Long. You can find my goal list HERE.

Admittedly, I was almost at the end of this, had just the binding to do, but a finish nevertheless.
This came together very quickly. I bought a packet of 6 1/2in strips of the baby blue fabric at our recent quilt show and just cut this into squares. To pretty it up a bit I put a few appliqued hearts on it and I was done. For the quilting I chose a simple allover clamshell design, done with the HQ Versa tool. 
Quilting the clamshell design
And that was it. Done!

The quilt measures 36 1/2 x 36 1/2in.
My next baby quilt will be a bit more involved, with applique and piecing...a fun and colourful design which I designed a while back. But first I will have a few other tasks to finish...

Karin

Friday, 12 April 2019

Clamshell Design

I started to quilt my little baby quilt with an allover clamshell design
The orange thread that you see running across the quilt is my basting stitch which will come out at the end. I did pin this quilt and then ran  over it with a large meander basting stitch taking most, but not all of the pins out in order to do the ruler work.

I am using the Handiquilter Versa tool for this which makes the clamshells 2in x 4in. If you want to be super precise you could mark your quilt up with a 2in grid for ease of alignment, however that would be quite a tedious task. Following the first row of clamshells I just drew a line across the top of the clamshells to keep my design straight and also did some vertical 'helper lines' to hit the centre of the clamshells on my way back (more or less precisely). 
The Versa tool has an alignment line at the bottom of the clamshell that I used to stay on my line across the quilt. After having done almost 3/4 of the quilt I remembered that Bethanne Nemesh draws on her rulers with a Sharpie pen. Ingenious...why did I not think about this before?
I drew some additional lines on the Versa tool
I extended the centre line of the clamshell so that I could better judge the halfway point of the clamshells underneath to make sure that they stayed approximately on top of each other. In addition, I also drew in additional horizontal lines which should sit (again approximately) on top of each of the clamshells rows underneath the row I was working on. 
This made alignment much easier and ensured consistency...should have thought of this earlier which would have avoided me drawing in lines all over the quilt! The Sharpie pen can be wiped off with alcohol, but I might leave them on there...might become handy for something else.
 
Karin

Popular Posts