Wednesday, 31 October 2012

Quilt Along #37- Jagged Lines

It's Quilt Along #37 on Leah Day's Quilt Along Wednesdays. The task for this week was another edge-to-edge design called Jagged Lines.

I went into the sashing of my 'practice quilt' for that. Again I struggled with quilting-in-the-ditch on top and on the bottom, but overall it turned out alright. I just have to accept, it is white thread and I will not have perfection here.


It was very late but I really felt like doing some Flowing Lines and tackled the border. This was also an exercise in using my new Freemotion Sensormatic Echo Quilting foot for the machine ...I posted about it here...if you are curious about what that looks like. Amazing contraption.

This time I paid much more attention to how I was stitching the lines (had some pretty odd shapes when I first tried it). As the border is bigger it was much easier to execute as I could do more sweeping type movements. Also realised that the fabric itself has some flowing lines on it which I actually had not realised before. I did not fill the gaps...this is purely due to how the 'practice quilt' is starting to feel  in terms of its density. Somehow I decided that Flowing Lines in itself would be the right match for the rest of the quilting (and I was right...it feels exactly right).


White thread on dark blue...would not have done this a year ago.


I am very happy with this. The lines look great and the Echo Quilting foot helped with making them pretty consistent. I left bigger gaps to keep the border from becoming too dense.


I did not turn the corners, but went straight across as I am not sure what else I am going to do with the borders. Must say, I really like the look of this.

Questions:

- (apologies if this was addressed before) I started quilting the border from the middle out to the right, facing the border and having all the bulk behind the machine. That, of course, meant that I then had to turn the quilt to complete the other side, this time with the bulk of the quilt in my lap. This was very awkward and created a few hassles with just having to manage the bulk. What is the best way to go about this?
I thought about sewing it side ways but thought better of it as I have a fair bit of compaction going on on the quilt and I thought that this could lead to some distortion in the border.

- starting to get a bit worried about the compaction...at the moment I am quilting wherever I fancy as the quilt is secured by quilting in-the-ditch, however after I had done the top border, I wondered whether I now should continue with the side borders rather than doing the bottom border first (I was thinking of doing Jagged Lines in the bottom to match the top a bit). The quilt itself is pulling in the batting and the border is starting to crinkle (as is the sashing).


Time to link up to Leah Day's Quilt Along Wednesdays

Until next time

Karin

Sunday, 28 October 2012

UFO Sunday #10

Had a bit of a break ...felt quite pleased with myself as I had finished my cat wall hanging and completed the Blockbase Sew Along block.  The Blockbase block was a challenge and took me several days to complete...if you missed it, find the link to the post Here

Went back to my 'Sweet Gumleaf ' block. This is block # 3289 from the Blockbase collection based on Barbara Brackman's Encyclopedia of Pieced Quilt Patterns. Not a difficult block to construct but played a bit with the size and also still looking at different design options via the EQ7 program.

Sweet Gumleaf
The biggest issue for me are the bulk of the seams. Went ahead and did another block (6 ").  I am not using paper for my foundation piecing but a very thin interfacing that I will leave in the block for added stability. This has always worked for me in the past, but with this block I encountered a problem. When I was squaring it off from the back the block turned out uneven even though I had followed my foundation...after the initial 'huh'...!!?, it dawned on me that the interfacing had slightly  drawn up the rest of the fabric possibly due to the three points meeting or the finger pressing that I was doing at that stage (rather than going and pressing each seam with the iron).  So, I reckon, I will have to square up the block from the front, ignoring the foundation lines, as they will not be essential to put it all together. Don't really want to use paper as I then will have to remove all the paper when it is done and that is a big job.

Anyway, I think I have gone somewhere in between UFO and WIP...still need to complete the other table runner.

Linking up to UFO Sunday on the Freemotion Quilting Project.

Karin

Saturday, 27 October 2012

It does not get any better

With the permission of the proud parents, Dana and Christian, here is a photo of Mira with the quilt 'Kool Kats' that I made earlier in the year and finally managed to send off to them (albeit a little bit belated as young Mira decided to arrive a tad earlier).


She is, of course, super cute.

Here is hoping that this little quilt becomes one of those favourite items, usually called 'blankey' that gets dragged around the house from room to room, ending up completely worn out and in tatters but nevertheless will hold that 'special' tag for years to come.

Karin

Friday, 26 October 2012

Blockbase Sew Along #2

This is Block #2 in the Blockbase Sew Along that is hosted by the EQ blog 'Behind the Mouse. Now I must say, this was not for the fainthearted...very tricky indeed. The block is # 2741 in Barbara Brackman's Encyclopedia of Pieced Quilt Patterns  and is called Golda, Gem Star.

Here is my block


What a beautiful block...but I cannot imagine doing a whole quilt of that. It took a while to piece together and as you can imagine matching the points was a bit of an adventure.

My block measures 8" finished size and while I am a bit shy of that measurement on one side it turned out pretty ok overall. I constructed it as suggested in wedges, however pieced sections of the wedges together using foundation piecing. That worked really well. I did not use paper for the foundation piecing but paper thin interfacing which was left in the block to provide added stability.

Linking up to the Blockbase Sew Along to have a look at the blocks other quilters have put up.

Until next time

Karin

Bloggers' Quilt Festival


Amy's Creative Side

I am participating in the  Blogger's Quilt Festival Fall 2012 hosted by Amy's Creative Side with my favourite scrap quilt. The quilt is a string quilt based on 'String Quilting Primer' by Bonnie K. Hunter. I absolutely love scrap quilts with their multitude of colours that do not necessarily go together but as a whole create a harmonious picture.


String quilt (2011)
Quilt Measurement:  64" x 80"
Special Technique: Strip-piecing
Quilted by: Me
Best Category: Scrap quilt

I made this quilt over a whole year while I was working on other projects. Every now and then when I did not feel like doing anything too complicated or taxing I would complete a few of those blocks with the scraps that had accumulated to alarming proportions over the last few years. This quilt just grew and grew and before I realised it had become a big single size bedspread. What I really like about this quilt is that it has all the fabric that I have used over the last 5-6 years. When looking at it now I always discover those most precious pieces of fabrics that I have long forgotten about...a bit like a walk down memory lane.

A close up


I did not use paper in the construction but very thin interfacing that I left in the blocks which made this a very easy quilt to construct, i.e. just sewn the strips onto the interfacing and then squared off the block. Given its size, I used bamboo batting which made the quilt not quite as heavy than if I had used cotton batting and just stitched around the blocks in-the-ditch.

Make sure to head over to Amy's Creative Side to have a look at all the quilts in the festival over the next few days. There are lots of different categories and voting for the favourite quilt in each category will start after Wednesday 31st and go through to November 8th.

Karin

Wednesday, 24 October 2012

Quilt Along #36 - Trapped Paisley

This week's task on  Leah Day's Quilt Along Wednesdays  was a continuation of the Flowing Lines design, however instead of filling the spaces with stippling, Paisley was used to fill in the gaps.

Originally I was going to go straight onto the border of my practice quilt to give that a go, however, I thought I better try this out first to see whether this worked for me and also to get a sense of how tight this was going to be.


This is the approximate size of my border. The stitching is very rough on my sample, however it did give me a good idea on how this was going to work in the border. I do not find it too tight but am not sure I would want it across the entire border. Not sure whether it was just me but I did a lot of backtracking. Also tried the lines as fillers...this I saw at Pat's from Colour Me Quilty. I thought that was a brilliant idea and looked great and was a quick way to fill in the gaps. 

Maybe I should combine 2 -3 different fillers across the border...hmm...undecided.
Ran out of time to do anything else.

Until next time

Karin

Sunday, 21 October 2012

UFO Sunday #9

I did a lot of work last Sunday on my little crazy wall hanging.

In retrospect, the idea of the panel was great, but next time,  I will look at the size of the motifs a bit more closely because this panel is very small, hence outlining these tiny bitses was a bit of a hassle. Mind you, I will never again feel reluctant to outline anything after having gone around tiny cat ears and teeny-weeny birds.

I continued to outline the major bits and then started to microstipple around the shapes. Seriously, I think my stipple is more of a nanostipple it is that tiny...and all this with white thread on a white background, enough to drive you insane. However it got done and not a line crossed (ha, ha...). I can be absolutely assured that this thing will never become undone, ever. Don't know whether you can see it, I even outlined the tiny nine patch block pictures...it was hard to stop after a while. How great is the wool batting. The cats just about jump out of the panel.


Microstippling

With that done I tackled the house because this was seriously puffed out. Not wanting to nanostipple again I just followed the bricks and the windows...a bit untidy because it is so small, but never mind, it got the job done.

Then the border...decided to stick with my idea of the loops and worked some stars into it...all on a bit of a smaller scale. I chose this as I don't find loops that easy if I have to fill an area with them. The design always looks so easy-going but is actually quite tricky because it sends you in a certain direction, so you always have to think ahead. And well, the stars...I have struggled with them in the past  but after the first few on this border I got the hang of it. Bit wobbly, but adds some charm to it, I reckon. I did this in variegated thread which had the added advantage of allowing me to place the stars at pretty regular intervals...just had to wait for the colour change.


And tada...did the binding over the week...here it is, all finished.

Cat Wall hanging 18" x 22.5"

Had a few anxious moments as I could not remember whether I had washed the fabric beforehand. I carefully wet the edges before I washed it...Yep, must have washed the fabric beforehand...no colour runs, not even a hint. Dried it a bit, then blocked it and managed to square it off pretty well (mind you, it is so tight, there was not a lot of 'give' in there).
 
After I had done all this, I actually remembered that I have two more panels sitting amongst my fabric stash...totally forgotten about them. One small lighthouse, similar in size to this and one big panel with lots of blocks printed on it...here we go, should really finish them off. I reckon they have been sitting in there for at least two years. Should really be counted as UFOs as I had all good intentions to finish them quickly by just quilting over it.

Linking up to Leah Day's UFO Sunday on the Freemotion Quilting Project

Until next time

Karin

Wednesday, 17 October 2012

Quilt Along # 35 - Goldilocks

This week's homework on Leah Day's Quilt Along Wednesdays  was the design Goldilocks which is an extension of the Flowing Lines design from last week. Leah demonstrated it in her sashings on the video in her post.

I could not use my sashings for that as they are only 2 inches wide and if I wanted to stipple in it, I would have had to microstipple and I decided that that would be too dense for the sashing. Hence I needed to do the design in one of the blocks which allowed some space for the design. Sorry, photos are not that good but I need to fill up some of the lighter colour squares by now (almost filled up my entire practice quilt - very exciting).


and the back


I'm afraid my design did turn out somewhat differently as I started to veer off to the side making this more of a filler design...this happened as my square started to dangerously puff out on one side (due to some pulling on my part, I think). Hence, I needed to severely flatten this to avoid serious puckers.  Got away with it and then stippled the other side half way down to match it a bit. Looks quite alright. I reckon this could look quite nice in a border but wonder how you would stitch that at the bottom...

Question: If you were to stitch the design in the border would you stitch off the border into the batting travelling to the next point to re-enter your border...would this work?

Linking up to Quilt Along #35 on the Freemotion Quilting Project.

Until next time

Karin

Sunday, 14 October 2012

UFO Sunday #8

Thanks to Leah Day for answering my question re the amount/density of quilting on my little 'cat' wall hanging on Question Thursday #35 on the Freemotion Quilting Project. That was very helpful, particularly re the need to quilt the border a bit more densely. I was wondering about that...now it is just a matter of working out what design to choose.

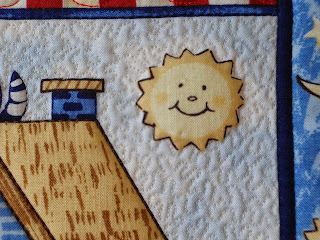
I did make a start earlier in the week and microstippled the area around the house and yes, the sun (and moon) popped out nicely.


This took a while to do but was a great warm-up. I then outlined the cats underneath it...not sure whether I will leave it like that or whether I might do a bit more on that area, but I thought it needed some variation, rather than microstippling every single area.


Next, I pondered over the cats above the house and finally came up with this


Here is a bit of a close-up

I did not want to microstipple again and thought I just follow the wood grain lines...now those cats just about jump out of the wall hanging. Great 3D effect with the wool batting. This is also a design Cindy Needham had demonstrated on the  SewCalGal Freemotion Quilting Challenge during June. I had not tried this before and must say, what a great way to flatten an area quickly and effectively (yes, I am a bit of a lazy quilter). Like Leah had suggested I outlined the cats and heart first then started the lines in the left hand corner moving one by one across each section, i.e next to the left cat first, then moving on to the section between the heart and the cat from top to bottom and up again the other side making my way around to the other cat. Too easy...lines are not straight, I just followed the wood grain feature loosely and it looks great.

Also stitched out my motif again...not totally freehand. I wanted a stitched out decent sample of this, so I used Golden Threads paper with the motif drawn on it and stitched over it. I love doing that...the noise of the needle going into the paper provides an excellent rhythm to the stitching and I always produce very consistent stitches with the paper. Like it. No major problems with the sweeping curves and the feathers came out decent enough, just have to make up my mind whether I use the backtracking method or just backtrack across the top. Got a bit confused at times. If you can imagine this as a quarter of a motif this actually would look quite nice and there are several possibilities in orientating this. Also would work as a border motif with just two of them either up or down next to each other.
 

I am really enjoying just 'playing' around a bit with different things at the moment as usually I am under some self imposed pressure to work on a major project. This year has been good in that I have been able to truly concentrate on developing my skills in FMQ and to let go of the need to produce quilt after quilt. Mind you, I have spent last weekend washing a whole lot of fabric ready to start a quilt using the 'Sweet Gumleaf' block I was talking about last Sunday. This might be my major project for the next half year if the block works out.

Linking up to UFO Sunday on the Freemotion Quilting Project 


Until next time

Karin

Saturday, 13 October 2012

Blockbase Sew Along # 1


This is the first block of the Blockbase Sew Along held over at the EQ blog 'Behind the Mouse'.

The block is called Seesaw and is #1336 from Barbara Brackman's Encyclopedia of Pieced Quilt Patterns.

I made the block 8 inches square and kept the colouring to 4 different fabrics, making the centre light instead of a darker shade. The fabric is from a Jelly roll (30's Playtime, Chloe's Closet) from Moda fabrics that has just been sitting around here and I am hoping that I can use some of it for the upcoming blocks , substituting it with other pieces of fabric from my stash when I need bigger pieces.


I think this block turned out really pretty. Was really surprised by how the choice of fabric changed the look of the block.  Might have to do it again though as the first attempt turned out a bit wonky on the corners.

Have a look at the EQ blog site at all the different blocks

Until next time

Karin

Wednesday, 10 October 2012

Quilt Along # 34- Flowing Lines

It is Quilt Along # 34 on Leah Day's Quilt Along Wednesdays. This is the Flowing Lines design.

As I have sashings in my practice quilt I decided to give this design a go in the sashing. The design itself was not that difficult, however the stitching-in-the ditch was. Really struggled with going sideways in the ditch particularly on top of the sashing where I could not see properly. So overall my focus was on the stitching-in-the ditch and my flowing lines were not quite as wiggly as I would have liked them to be. I think as soon as I approached the ditch I would already tense up...did a fair bit of cheating with stops and starts and undoing wonky stitching, as some of the in-the ditch stiching was positively outrageous and it showed up like anything with the white thread.

Flowing Lines design
 
Some wider than originally intended gaps


Swirl design in inner border
Also did the swirl with hooks design in the inner border. Works like a dream and covers a lot of space very quickly. This inner border is 2 inches wide and the design seems to be particularly suited to this. Has just become my new favourite border design. You can find this design in Angela Walters book 'Free-Motion Quilting'.

Until next time

Karin

Sunday, 7 October 2012

UFO Sunday # 7

Another week gone...

Still working away on my Japanese Table runner, however had many distractions this week. As I am not working on any bigger project at the minute I have been free to just explore different things that tackle my fancy. We had the Australian Machine Quilting Show in town last weekend and I spent most of the afternoon there, coming home with a bag of goodies. Bought  another book... 'Dream Feathers by Peggy Holt' and have been drawing feathers all week and practising FMQ in general.

Karin's Swirly Freeform Feather

How cool is this. This is the final version of a drawing I started earlier in the week. All freehand...I am very impressed with this book, it seems to have made that final link for me in terms of putting feathers together. At first I was a bit sceptical as Peggy Holt talked a lot about coming up with your own versions of designs but before I knew it I had half a book full of different ideas...some good and some not so good. Main thing was they were all achievable and were tailor-made to what I like and find easiest. This is what I like about this book, you do not need to hunt around for that perfect motif, rather you can just make it up yourself making it fit into the specific space that you need to fill on a quilt.  I did stitch the drawing above and did the feathers freehand in a 4 inch space. Worked fine in the feathers without marking but realised I would need to draw in the base shape beforehand,  as this is just too long to stitch freehand without a wobble in it. Will keep going on this...

In terms of UFOs, here is the next one that needs completing


This a panel I stitched together into a wall hanging. I used it to try different decorative stitches of the machine and outlined the main parts just with the walking foot (yes, this has been sitting in the cupboard for a few years by now). The problem was that it left me with hundreds of threads to sew in and this took the fun out of it and it got left behind. Not sure what to do with it and even thought about chucking it...I used a wool batting for this and it is very puffy.

Maybe I should use it to practice FMQ in it. I could microstipple the background behind the house, outline some cats and birdhouses...the border has little stars in it, so I thought I could do a loopy line design with some stars in between.

Question:
- If I microstipple one area will I then have to heavily quilt all around it to make it even or could I just outline some of the cats for example in the next few sections. Not sure whether this would look odd with a heavily quilted section in between.

And what is this...yes, could not help myself...trialling a new block I found. It is from the EQ program Blockbase and is called Gumleaf

 
Here are 2 blocks sewn together out of scraps, forming one half of the very skinny star in the middle. Love this, just have to find a way to deal with the bulk of the seams where the three skinny points meet. This is foundation pieced, so comes out very accurate (I use very thin interfacing for the foundation rather than paper- this way it can be left in).

As you can see I am off in all sorts of directions at the moment. Should be interesting to see what I actually end up doing.

Linking up to Leah Day's UFO Sunday  later on.

Until next time


Karin

Thursday, 4 October 2012

Quilt along #33

Still doing Paisley in Leah Day's Quilt Along Wednesdays. This design is called Pointy Paisley.


Lots of backtracking and like the Snake Paisley I found that I had lots of very awkward spaces to fill.  Strange really, I did not seem to have the same problem with the Lava Paisley...somehow that sat better with my brain and flowed much more evenly.
I think in this sample I possibly went around the shapes too many times and the design gets lost a bit...I think I prefer it a little bit smaller and more defined. Never mind, good practice.

Also practised swirls with hooks while I was at it and was impressed. After a whole week of doodling the shape and trying to fill up areas I was able to translate this into my square without too much of a difficulty. Goes to show the power of doodling your design first...


My 'practice quilt is taking shape, only a few more squares left before I will have to go into the sashing


Until next time


Karin

Popular Posts