Thursday 18 April 2024

Still Here!

We are by now in the midst of our kitchen renovation...all the contents of the kitchen are placed across the family room and it is very messy indeed. We have set up a tiny coffee station with the microwave on a table, but have no sink or water in the kitchen, hence need to run to the laundry for every little bit. It's interesting to say the least. Dinners are a hassle as we also have no cook top as yet. During last week the work men were in and out so I did not do much at all other than trying to keep the place reasonably clean.

In terms of quilting not much is going on. I almost finished my wholecloth but cannot show any pictures of the whole thing as yet as I am thinking of putting it in the upcoming quilt show. However, here is a little picture of how intense this has become in terms of backfilling
I decided on those tiny echo lines as a backfiller to really flatten out the surrounds. Currently I only have the outside of the last border to do but I reckon that it will take a few more weeks...just in time to put my entry form in for the show. As I need to concentrate in order to quilt this I have not continued on that during the last week.

I did however manage to do one of my fox blocks. I am using up the last of the Dryad fabric from Shannon Brinkley. Just love the colours of that.

Planning to do a couple of those every week once things have settled down a bit.

In the week that the kitchen was demolished and the new cupboards were put in I just sat there knitting one of the socks that I had started earlier. My sock obsession started last year...very enjoyable once you get the hang of it, however it is best to continue to knit socks because it is very easy to forget the intricacies of how to do them as I found out last week. I finished one sock
Looks a bit funny because of the ribbing however looks very nice when put on. this one is for my daughter who has got slightly bigger feet than I have so I just extended the foot a bit more. Am onto the second sock however am trying something new. I got these new knitting needles last year, called the Addi Crasy Trio Needles. Normally you knit socks on DPNs which is ok but takes a bit longer due to the handling of the needles. When I saw the Trio needles I thought that this might be the solutions to go a bit faster. They are developed by a German woman, Sylvia Rasch and there are a few videos on the net on how to use them. So, for the second sock I am knitting with them
You have only three needles which are flexible, two for your stitches and one working needle. My blue stitch markers indicate where there would be a break normally if you would use four needles. Very unusual to knit with as they are very small and I felt at times as if I had two left hands, just could not coordinate myself. However you do get used to them very quickly and the knitting does go quicker as you only have to change needles twice. There is absolutely no way your stitches are going to slip off as they are safely tucked away on the flexible part. Since this photo I had to do it again as I missed a stitch, so got more practice than I wished for. While I was at it also tried the cast on with these needles and must say that that worked incredibly well and was ten times easier than casting on with the DPNs. We will see how the shaping works...in theory this should be easier on these needles as you have got more room to accommodate the increase in stitches. We shall see...

Anyway, for the coming week I will
- continue to knit up this sock
- continue with the backfilling of the wholecloth
- maybe piece another fox which is already cut out and ready to go.

Was going to link up to Quilt Schmilt for the To Do Tuesday #69 however it seems that that linky party has ended. May have to come back tomorrow to have another look. 

Karin

Thursday 28 March 2024

Working With Invisafil

It's been a couple of weeks again since I posted last. We have been incredibly busy with our upcoming kitchen renovation. All of a sudden it was all go, go go...we have been running around literally the whole week looking at appliances, getting things organised and life in general.

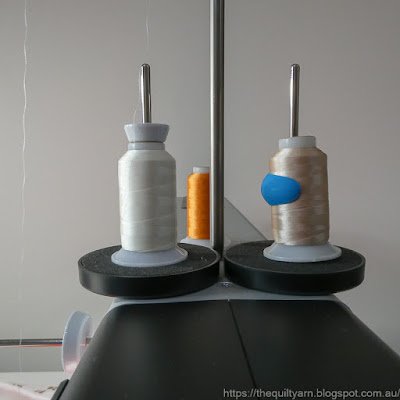
My wholecloth quilt is coming along however came to a standstill last week. I finished all the feathering, framing and grid and was about to start backfilling, however I did not like my thread choice. I am quilting the main elements of the wholecloth with a 50/2 Aurifil cotton thread. This is the thread I use most of the time and up to now I have also used this for backfilling. However, ever since I have done Bethanne Nemesh' online classes I have developed a taste for 100wt Invisafil thread from Wonderfil Speciality Threads. As I did not have a matching colour I had to order another spool in which came last weekend. I started to backfill a little bit last weekend and yes, this was the right choice for filling in the background against the 50/2 thread. Looks absolutely fabulous...I bought a spool of Soft Gold Invisafil which is almost identical to the light gold Aurifil colour that I have used to stitch the main parts. This way, the background stitching is not overpowering the main elements but gently stays in the background.
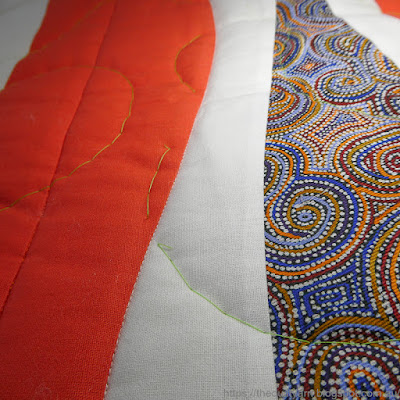
Here I am filling in the space behind the first lot of feathers with tiny, tiny echoes. Looks very nice but is quite labour intensive. Unfortunately I have left some space in the outer border where the Amish feathers run along. Still a bit undecided on how I will fill this. Definitely will echo around twice but not sure whether I will carry that echo filling into the outer border. Had a look around on the net and was reminded that Diane Gaudinsky uses the echo filling quite extensively around her feather work. It does look good when finished but is very time consuming. We'll see what I feel like when I get to that point.

This is all I have done quilting wise this week and I am almost getting a bit stressed as there are other projects that want to be done.

In case people are wondering how I am stitching this on the Bernina Q20.
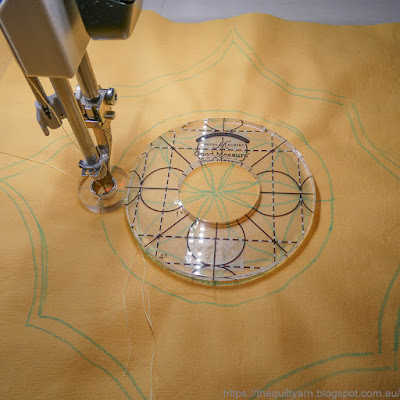
I am using the open toe foot with an 80/12 Jeans needle. This foot can be a bit tricky...I have had the foot catching on previous stitch lines in the past, however was relieved that it has not happened on this project. Behaving itself absolutely fine and visibility is great. I have been stitching in Manual mode most of the time except for the times when I have used the ruler foot #96 with a straight/circle ruler to do the framing and the circles. Find the manual mode a bit easier for detailed work as it gives me that rhythmic humming of the motor which almost puts you into some sort of Zen mode in terms of precision stitching. Regulated mode is somewhat faster and is harder to control when stitching tinier elements.

Well, so far so good...will be interesting to see how this progresses amongst the chaos of the household. Also want to put together a new pattern and have two more charity quilts to complete. The days are just not long enough...

Karin

Wednesday 13 March 2024

5 Essential Tips When Wholecloth Quilting

I previously wrote a series of posts about wholecloth quilting starting HERE.

This post is an extension to that. Not having done a wholecloth in some time, I took some photos as I went along and also started to think about all the things that can go wrong when attempting a wholecloth. What follows are 5 critical points where things can get a bit haywire and will affect the outcome of your project.

1. Mark the crosshairs!
This is a really important step as your entire wholecloth is based on those few lines. To do this press your fabric really well and then fold it in half. Press the center line...don't worry about whether this is ever going to come out. It will! Then fold your fabric on the vertical and repeat. Now take these lines and very carefully mark the center lines on your fabric with a fabric marker of your choice.

Take your time with this task. I also then mark in the 45 degree lines using a ruler.
Don't worry if your 45 degree lines do not exactly end up in the corners of your fabric. Unless you have been extremely precise in your cutting the lines are likely to be slightly off in the corner but correct in relation to the vertical and horizontal crosshair lines and that is what's important.

2. Marking
Test your chosen marker before you start. If you followed my blog you would be aware that I had a bit of a mishap at this stage. I made some mistakes in tracing my design and rinsed it off. To my horror, some of my lines turned brownish and did not come out. I believe that this had to do with my lightbox emitting heat at the edges which set the blue water erasable marker. I ended up buying another piece of fabric and starting again, this time tracing the design without a light box just to be sure.

3. Equipment
When designing your wholecloth think about the tools that you are going to use. I obviously forgot about this point for my recent wholecloth having designed center motif circles for which I actually did not have the right ruler. I could have solved this by stitching the circles freehand which I have done in the past however this is extremely challenging as it is super hard to keep it a 100% round and on a wholecloth this is going to be extremely visible. I ended up buying the Echo clips for my Bernina Q20. They just clip on and can be used to extend the size of your ruler. Similarly, I had not thought about my beautiful Amish feathers. To stitch out the spine in that nice rounded way, I also had to use a ruler, but this time use it in a somewhat sliding motion to make the curves as consistent as possible. Definitely had not thought about this before and it took me ages to do that. So planning how you going to tackle stitching out your wholecloth is a definite must. In addition, do a test run of your stitching to get more familiar with your design. Unfortunately with a wholecloth you usually start with the center motif which is also the main thing that your eye focusses on when first looking at it so you want to get that down as clean as possible.
3. Basting
Do not skip on this stage. A wholecloth project has to be basted fairly heavily, I would say every 3-4in in a grid as you are shifting fabric around as you stitch the various sections. You start by stitching out the general frame, starting in the center and moving outwards usually so you going going to have a lot of unquilted loft around which in my case puffed out enormously as I am using a wool batting. The basted grid contains the loft in its own little square and prevents it from shifting over to the next section.

4. Expect the Unexpected
In my experience there is always something that goes wrong and usually several unexpected issues pop up. I am used to that by now and do not get overly excited by it anymore. In my current wholecloth I had an interesting issue, almost hilarious after my mishap with the marking. For the first time ever my blue marks were fading. This has never happened before. This is what was left of my grid by the end of one week. Not sure why this happened and whether it has to do with the current heat wave we are in. It is often quite sticky inside the house as we are running an evaporative air conditioner for most of the time. Probably not ideal for a water erasable marker.
So this was not the idea but it meant that I had to stitch out my frame plus the feathers literally in that one week and in between reinforce my blue lines (where I needed them most) so that I would not loose them altogether. It was hard core but I managed to get it done. So much for that lovely idea to stitch this out in a relaxed and well thought out way! I was literally stitching every day for several hours.
5. Skill level
Consider your skill level and the purpose of the quilt. Are you just doing this for your own enjoyment or are you planning a show quilt. I am a relatively sloppy marker which is somewhat surprising as I am also a perfectionist, however as I know my weaknesses I do know that I have to pay attention to this as I stitch. I will usually correct my design as I stitch along. I stitch feather plumes usually very slowly looking ahead and around me to make sure they are angled in a way that makes sense.
I don't necessarily follow my lines at all times and have in this picture rounded some of the angles on the inside of the feather plumes a bit more. I was not too concerned about having to do this on most of the curves as I by now have a particular angle and size I stitch my feather plumes with so I was fairly confident to be able to do this in a consistent manner.
Another issue which I think people underestimate is the amount of starts and stops and the time it takes to stitch out an intricate design like this. With this Amish feather every curvature is stitched in sections. You could backtrack and absolutely do it all in one hit, but again, that would be very visible and if you are doing a show quilt and probably not recommended. This sort of stitching can become incredibly tedious and frustrating, so something to think about before you start. On top of that I do still bury my threads, so it was after each section, stop...bury the beginning and end, then start again, making sure every stop and start looked good on the front as well as the back. I do remember that people found this extremely annoying when I was teaching my Mini Wholecloth class and most people just backtracked to get things done. That is absolutely fine, however it will show on your project, so you will need to decide beforehand how you want your wholecloth to look and for how much intensity you are prepared.

I did manage to start my grid quilting so I can follow my lines with a ruler, but for now I am having a bit of a break.

For the To Do Tuesday list from last week...well, did not do anything else but stitch this wholecloth.

For the remainder of the week I am planning 
- to have a break
- wash some fabric for the Fox quilt, and 
- maybe do a Fox block, but that's it...got a few other things on this week!

Linking up to To Do Tuesday #65 over at Quilt Schmilt.

Karin

Tuesday 5 March 2024

To Do Tuesday #64

My list from last week was smallish
- pinning, basting and making a start on the wholecloth; backing fabric is ready to go, just needs to be cut and then I will need to make a decision on thread.✅
- wash the background fabric for the Fox quilt❌
- maybe make a Fox block to get started on that project which will be ongoing until I have enough blocks for a quilt.

So I made a start (finally) on the wholecloth. I was thinking to do a post in the next few weeks on the trials and tribulations of wholecloth quilting...things never go as expected!

I started off by testing my new Echo feet attachments for the Bernina Q20. Ended up finally getting those as my wholecloth design incorporates circles for which I do not have the right size rulers (funny that with a draw full of rulers!).
Was a bit worried about these as I had read that they are fiddly to put on and also prone to breakage. Gave them a whirl though and was pleasantly surprised. They do clip on very easily and are also very easy to remove. Had no issues with them at all. Tried them out on a practice piece to get a feel for my design. This is what that looked like.
My practice piece turned out nice and I was ready to go
Pinned and then basted my wholecloth and as you can see I baste my piece very heavily, approximately every 3 - 4in, always in a grid as it distributes the puff evenly.
My batting is wool and it is much more puffy than I expected. In the past I have used two lots of batting, wool and cotton, but did not want to go there this time as this is quite a sizable project and quilting with two battings does make the quilt very hard and heavy.

I did have some issues with putting my frames in as the puffiness distorted my lines and I am a tad out of practice. Took me a moment to get a grip on that but eventually got there. After having done the square frames with a ruler I then looked at my feather sprays. Inititally I was going to stitch the spine out on the inner feathers but not the Amish feathers...for those I was going to stitch the spine as I go along. Too easy I thought!

Well, when I stitched out my first feather spine I could feel how the puffiness was working against me and I had a little bit of an issue keeping my lines straight. Then looking at my Amish feathers I thought that there is no way I am going to keep that nice and round just going along backtracking to create the spine. Additionally I did consider that Amish feathers depend on their nice roundness to look good and by then my perfectionism had truly started taking over.

The Amish feathers in this design are based on a 4in circle, however to fit them into the border the circle had to reach out to touch the next circle, so it was not just a matter of stitching a circle with a ruler. I had to stitch against my ruler moving it along ever so slightly to stay on track. Needless to say, this took ages to do. I used Amanda Murphy's 4in circle ruler for this which has a bit of a maybe not non-slip, but harder to slip backing which makes it easier to handle the ruler. I did not put on a more rough Handiquilter grip strip because I needed the ruler to be able to be gently moved as I went along. 
Also, as the feathers go in opposing directions I had to do each circle element individually, so start and stop, tie off and start again. I have by now finished this and for the most part slowly stitching against the circle ruler worked really well and I am happy with my spines, but promptly encountered a new issue, i.e. my blue markings are fading which is almost funny given that I had a problem with the marker leaving brown marks in the first lot of fabric. So I am forever reinforcing some of my lines, but have also been stitching every day to get the framing done. After that is done it does not matter so much whether the markings are in there or not. I have drawn the feathers so much that I will be able to follow my own stitch path without an issue, just have to make sure that I reinforce where my feathers end in relation to the border and frame. I think it is our weather over here. It has been hot and sticky and the air conditioner is running most of the time. Couple that with sweaty hands which is probably enough to make some of those marks fade.

Anyway, finished the frame and the spines by now and am onto the feathers. I am stitching this with a light yellow Aurifil 50/2 thread which just blends into the fabric. Now wish that I had chosen something a bit darker as it blends a bit too well and is at times a bit hard to see. But so be it, looks great on the patterned backing.

So for next week I am planning to 
- continue on the wholecloth by stitching out the feathers (and then probably have a bit of a break from it)
wash the background fabric for the Fox quilt
- maybe make a Fox block to get started on that project which will be ongoing until I have enough blocks for a quilt
- write some instructions for my Mini Wholecloth in order to put that in my Etsy shop.

Bit ambitious, but we'll see...

Linking up to To Do Tuesday #64 over at Quilt Schmilt.

Karin

Tuesday 27 February 2024

To Do Tuesday #63 - Slow Going!

It has been a couple of weeks again. My last list was very small:
- baste and quilt another little charity quilt
- start the marking of my wholecloth quilt.

Well, I have done two little charity quilts...
Just did an overall stipple on this and the next one as well as I am still struggling with my shoulder. My cortisone shot has only worked for about two months and then I injured the same shoulder again. As it is the right one this time there is not much I can do in terms of resting it so I just have to be super careful. Very much a hassle!
The next one is a little quilt with a flannel top.
Enjoyed quilting on the flannel...never done this before and was not sure what to expect. Really like the softness of the flannel. Had some slight tension issues in the border but apart from that, no problem. The only thing that I did find was that the stitching was harder to see as it just sunk in which was not helped by the light lavender thread that I was using.

So with that done, I tackled my wholecloth. Last time I attempted this I had some marks left on the fabric and also had some inconsistencies when tracing off my design. Went super slow in my preparation for this and took my time. Basically took most of today to trace the whole lot.
Probably a bit hard to see. The new fabric is 'Shadow Play' from Maywood Studios in a creamy colour. For some unknown reason this turned out quite big and was quite hard to align. Initially I just traced off a quarter of the design, however that did not work that well. Too much movement in the fabric while tracing. This time I traced the entire half off and then flipped and did the other half. That worked quite well, mind you I spent a long time making sure everything aligned. 
My tracing is a bit untidy in spots as I also corrected a few things here and there as I went along. As I had drawn this design out on the Ipad I was curious to see how that translated into actually drawing it out to scale. Must say that that went really well...the feathers were easy to draw with my particular angle and thickness and I did not have to spent a lot of time making it look pretty as I drew them exactly as I would stitch them. My husband remarked that he thought I was going to stitch this freehand! Yes, I could, but it would not turn out very consistent I would think and as this is a rather involved project. I did not want to risk it. You probably wonder why I drew the pebbles in...this is not so much to stitch them out exactly as they are drawn there, but rather a way to ensure that I end up with a pebble at the end of the row. If it was smaller you could eyeball this but not over the distance that I made that section and there is nothing worse than going along and realising in the last minute that you cannot fill out the corner properly.
Thought a lot about the stitching as I went along...did not leave myself enough space at the outer edge and added 1/4in in width and length and also had to correct a few feathers to ensure that there was a gap between the binding and feathers. Also thought about whether to stitch the spine out or stitch the spine as I go along. Both methods are quite fine and I think I will definitely stitch the spine as I go for the Amish feather. Not sure about the other one yet. One annoying thing though...I developed this wholecloth many years ago before I got used to using rulers in my quilting. Would have been easier to stitch if I had designed this around particular rulers to use. Was looking today at various rulers I could use...not sure yet...if I use one of the Pro Echo rulers for the centre frame it will be slightly different. I will wait and see how difficult that is going to be when I get there. For now I just want this stitched out...it has been hanging around for such a long time that it is almost annoying. There are definitely a few things where I thought that I could have done that a bit better, but so be it...there is always next time.

My list for next week includes
- pinning, basting and making a start on the wholecloth; backing fabric is ready to go, just needs to be cut and then I will need to make a decision on thread.
- wash the background fabric for the Fox quilt
- maybe make a Fox block to get started on that project which will be ongoing until I have enough blocks for a quilt.

Linking up to To Do Tuesday #63 over at Quilt Schmilt

Karin

Sunday 18 February 2024

Query re Pattern

I have been working on cleaning up my Mini Wholecloth design over the last few days. I had it initially drawn in the Procreate program to an approximate measurement. With my new drawing program I tidied this up and made an exact copy of it. Turned out really well...locked all my layers this time and labelled everything as I went along which made the whole process much more enjoyable.

I am now wondering whether quilters might be interested in this pattern as I am thinking about putting it in my Etsy shop. The pattern would come in PDF format and needs to be tiled when printed out and then taped together. The Mini Wholecloth comes out at 18in but can be made smaller by squaring it off to a different size.
It is intended as a skill builder as you can leave it as it is, put grids in various spaces or FMQ a design of your choice around the design. I used it in a workshop I held last year and people chose various options on how to fill it depending on their skill level. 

Would be interested to hear what people think about this idea. Too difficult, too bland or not enough direction to complete this project if I just put the pattern up there?

Karin

Tuesday 13 February 2024

To do Tuesday#61

My list from last week was a bit ambitious:

- start marking my wholecloth quilt again; the new fabric is washed and ready to go so there really is not any excuse not to go ahead.
- work on writing the pattern for the little baby quilt above; in terms of time line, that should take no more than 2 weeks
- baste one more charity quilt
- look at that online workshop and see where I can build this in...

I did work consistently on writing up my new pattern and it went quite quickly however it does take me a few days to proof-read everything several times and to take good photos for my listing on Etsy.

Well, here it is...the Zig-Zag Baby Quilt...a striking little project.
I wrote the pattern for two sizes
- 30-1/2in x 36-1/2in and
- 36-1/2in x 42-1/2in

This pattern is partially foundation pieced, however it is not difficult to do if you have a basic knowledge of foundation piecing. I used the Freezer Paper Foundation Piecing method which was completely new to me. You can find detailed tutorials about this method at Bryan House Quilts. Great method, I cannot believe that I have not come across this earlier. The units came together in no time at all, the Freezer Paper method is just fantastic and so quick to do. I think I had more difficulties with squaring up my blocks which is not unusual for me. Then I remembered that I had the Bloc Loc Ruler set (you have to laugh - I cannot even remember the things that I have accumulated over the years). Equipped with that my blocks came out nice and straight. I quilted this little quilt with an overall edge-to-edge design called 'Ginger Snap' from Apricot Moon Designs available through Urban Elementz. Looks great and was fun to do.

Of my list, I did purchase another online class...the 'Sweet Tooth' class from Bethanne Nemesh at White Arbor Quilting. I love Bethanne's classes and this one was flagged with a discount in the newsletter that I subscribe to. It is a quick 3 hour class and while I probably can work out how to stitch hearts like that I do really enjoy Bethanne's teaching style and figured that there is always something new that I pick up when doing her classes. I will not quilt this straight away so for now it is sitting in my Teachable-Bethanne Nemesh set up, ready for when I have the time to quilt this little beauty.

Apart from this nothing else got done. We are currently exploring kitchen renovations which seems to be a whole world of its own with hundreds of choices one has to make. We are at the quotation stage and it should be interesting to see the differences in costs between companies.

For the remainder of the week I am planning to
- baste and quilt another little charity quilt
-start the marking of my wholecloth quilt.

Linking up to To Do Tuesday #60 over at Quilt Schmilt. 
By the way, still having problems with commenting on some sites and not on others. When I go around looking at individual blog posts and comment, some of my comments get through, but others are rejected. For the life of me, I cannot work out what the problem is...I suspect that it is not on my side but who knows. So, please be assured I am not ignoring your blog posts. Chances are that I have tried to comment but cannot for some reason.

Karin

Wednesday 7 February 2024

To Do Tuesday #60

Here I am again. Missed the last week and also saw that I again forgot to make a list of what goals I was thinking about. Yep, it's all in my head...and that is probably the reason why I get so confused at times.

I have not continued on my wholecloth following the disaster with the brown lines, however will put that on the list for the following week as I do need to get 'back on the horse' and start the marking otherwise that thing will never be done.

Finished my latest pattern


Its a cute little quilt that I quilted with an edge-to-edge design again as I just could not face doing all the ditch quilting this would have required. The design is called 'Ginger Snap' from Apricot Moon Designs available through Urban Elementz. The pattern would be suitable for intermediate quilters as it involves some Foundation Piecing. Maybe not the best pattern to put up there however once I had started it I felt compelled to finish it to see what that looked like. It is very bright and I am just in the process of putting the bright blue binding on...a perfect little boy quilt. Then I will have to knuckle down to write up the pattern.

In terms of my planning for the year, I am already behind. Will have to get going on the pile of charity quilts that I have sitting there and also have not done a block on my Fox quilt. And already I am being lured by a small online workshop...I think I have to stop looking at the internet, it is just too full of really great ideas.

So, for the coming week I will
- start marking my wholecloth quilt again; the new fabric is washed and ready to go so there really is not any excuse not to go ahead.
- work on writing the pattern for the little baby quilt above; in terms of time line, that should take no more than 2 weeks
- baste one more charity quilt
- look at that online workshop and see where I can build this in...

Linking up to To Do Tuesday #60 over at Quilt Schmilt

Karin

Wednesday 31 January 2024

Affinity Designer 2

Missing out on a week of the To Do Tuesday Linky as I have not done that much. Finished putting together my new pattern but that can wait to next week.

Instead I wanted to talk a bit about my new drawing program...Affinity Designer 2. If you are following my posts you may remember that I bought the App for my Ipad some time back and was somewhat in two minds whether to purchase the program for the desktop as well. I have got a very old drawing program on the computer from the same maker, called Serif Draw Plus. While it did the job for my pattern writing the new App on the Ipad did open a lot more possibilities however the transfer of my drawings from the Ipad onto the computer was somewhat tedious and the program appealed to me as it is able to be purchased with a one-off payment rather than a subscription service.

So I have been playing a bit on the computer with the new program in readiness for writing up my next pattern. I am generally an intuitive learner however I did sit down and watched a number of videos on some of the tools like the pen and the pencil as I was having difficulties controlling that and I wanted to really test this out in terms of drawing directly on the computer. I am thinking of re-drawing my Mini Wholecloth design into the program as I originally had drawn this in the Procreate App on the Ipad.

Started with the Mini Wholecloth and the Heart shape
This took me ages in alignment however got there in the end. Started playing with colours and the various effects that you can apply to your drawings, in this case the beveling effect. The drawing itself will have to be altered as I have not yet worked out all the measurements for sure.

I then watched several videos on using the Pen rather than the Pencil. On the Ipad I draw with the Pencil using the stylus which you can stabilise to give nicely flowing curves but I really wanted to be able to get a grip on how the Pen works once and for all as this allows me to clean up the nodes of the curves as I go along.

I traced this from the original design and tried all the different Pen modes on this to work out which one is the best to use. Came out not too bad, just need to get a grip on some alignment points and how they snap to the grid that normally sits underneath. If you were to blow this up you would see that the feather spray and heart point do not exactly meet at the same point. But this was just a trial and I will re-do this to get that exactly right.

To compare, I then drew with the pencil tool on the computer like I normally would on the Ipad (minus the stylus).

This is traced off a fretwork design, i.e. I traced one quarter, rotated it to 45 degrees and then mirrored and flipped it over. I did a similar design some years ago although I think this one has additional knobs on it. The tracing was done rather roughly as I just wanted to see how that would work with the mouse button. When using the pencil you can switch on the stabiliser (like on the Ipad) which makes it very easy to follow a line. Felt a bit more clumsy as I am not used to doing it with the mouse however absolutely do-able. Was quite impressed with this as this did not take long at all.

Have heaps more work to do in terms of learning but so far I have been quite impressed. Drawing my piecing diagrams for the patterns I do will be so much easier with this new program on the desktop. In terms of the Ipad App...will probably switch between the two depending on the size and purpose of the wholecloth design that I am doing. I did draw my big wholecloth on the Ipad coming out at 38in...no problem. However when I did the Mini Wholecloth trial above I found it very useful to sit in front of the big computer screen. Found that easier in terms of viewing where I was at. 

Interesting few days...

Karin

Thursday 25 January 2024

To Do Tuesday #58

The weeks are going very fast again. Have been sort of productive however it seems things are not working out the way I want them to.
My list from last week included:

- start the new pattern with the block from above✅
- start the marking of the wholecloth and maybe
- do a little bit more knitting 
- baste another charity quilt 

It was not for lack of trying!
I started the marking of my wholecloth quilt
All was well until I noticed some parts not lining up. I did trace this in quarters and thought that this would work, but I am dealing with movable fabric, so of course that did not work out that well. Rinsed this out with a lot of cursing and taped my two quarters together to make that easier and also remembered that I could just have drawn my frame in from the measurements. Not entirely sure why I did not do this.
The next day I ironed the fabric again and just when I went to put my cross hair lines in I discovered the
BROWN LINES
of part of the center motif. How did this happen? I used a brandnew marking pen, I did not iron my blue lines in...I was flabberghasted and it threw me right back to last year when I finished a wholecloth table runner and had brown lines in some places when I rinsed it out. 
First I tried to get the brown lines out...followed all sorts of suggestions I got in a FB group of what one could use, but I think deep down I knew it would not come out as brown lines only appear when it is heat set. Suspected the harsh Australian sun, so the next day did all sorts of tests, hanging fabric out in direct sun, ironed fabric to heat set some lines and no, all my tests came out clear. The fabric I used for my wholecloth was spoiled. I did wash it a couple of more times and I got it faint enough to use for maybe another table runner project.
All the while I was cracking my brain as to what could cause this. My latest suspicion is my light box. I have got a very fancy LED lightbox that I have had for years. Never really had a problem with this. I did notice that the edges of the light box were quite warm when I was doing the tracing of my wholecloth (which took several hours) and wondered whether this could cause some of the marks to be heat set into the fabric. That would explain why it is only in very random places, i.e. maybe were I rested my arm for tracing or where the motif for example was resting for quite a long while on the edge while I was tracing the feathers around the edges (my wholecloth fabric extends the size of the light box so I have to shift the fabric over to do the various sections). Never really paid attention to this and it certainly has not been a problem in previous years but I cannot remember whether the heat has been an issue previously as it has been a while since I have done a bigger wholecloth. Interestingly enough, I also had this issue on the table runner, also close to the center section which I would have moved over to trace a feather border around the edges. The tracing area of the lightbox itself does not get hot, it is just around the edges, I think.
Anyway, I have bought new fabric and will try again. In order to test this out we will put some blocks of wood around the light box and put some glass on this, using the light box as the light source that way. This will ensure that the fabric does not touch the lightbox edges and if that does not work...I don't know.
Also discovered that my center motif is 3-1/2in and 4-1/2in in diameter. What was I thinking? I have not got half circles rulers I can use to stitch that out and would have to do this freehand. While possible it never comes out as clean as to when you use a ruler. No way was I going to change my design again...instead I went out and bought the echo clips you can get for the Bernina feet. A very expensive and frustrating week!
I did start on my new pattern by making my triangle units using the Freezer Paper Foundation Piecing method. Made about 10 units before I had to replace the foundation. Really like this method as it goes very fast and without much fuss and bonus, you do not use a lot of freezer paper.
And that's all I did. Frustration levels are high, not helped by the weather. It is 41 degrees today and I was going to piece a bit more today but that has not happened. With this sort of weather you can really only sit around without breaking out in sweat, even with the air conditioner running.

Hoping that other quilters had a better week. Linking up to To Do Tuesday #58 over at Quilt Schmilt.

Karin

Wednesday 17 January 2024

To Do Tuesday #57

Hi there!

I have had an interesting week. My goals for the week were:
- make a test block of the new pattern (and take some notes this time!)
- put my plan for the next 3 months on paper starting with the wholecloth quilt (which is still waiting to be printed)
- continue on my sock
- pull out the fabric for a new Fox quilt and get ready to tackle that.

I did sit down and did some major planning...too many projects in my head. I lost count after the 13th project. No wonder I was getting so confused! Carefully went month by month and really thought about what I can and cannot achieve. Split some tasks across the months and also build in the charity quilts which do take on average 2 days to complete. Used my Goodnotes App on the Ipad for this and spread out the projects over the year...will be interesting to look back on what I did and did not complete. Hoping that some projects will take less time as there are a few other things which are not even in there, but we shall see. Feel less out of control with what's going on in my head 😂

So, started off with making a test block for a pattern I am looking at doing for my Etsy shop. Posted about it HERE. Well, after I thought that I had it all worked out I went ahead starting to make the blocks.
It is a simple block that really should not have given me a lot of trouble, but after yesterday I thought that I might have to go back to Quilting School. I started off on the premise that I could actually piece this starting with two Square in Square blocks, cutting them into into quarters and using this to construct the unit. That worked and I arrived at a measurement of 6-1/4in for the finished block. Went with that as I had spent hours calculating this through. Also checked this with EQ8 and yes, this seemed to have been correct.
Yesterday I did piece a few blocks using the Freezer Paper Piecing method for those coloured units and started to have problems with squaring off the block. When I checked my measurement I seemed to be ever so slightly off when I measured those squares of the block. Checked my foundation print out...also off by a few thread widths. Now, this got my attention as the EQ8 program is never off! 
Went through the printer settings...did I inadvertently change something on there? But no, all was as it was supposed to be, so I went back to the EQ8 program.
Well, learned a few things! I still got the older EQ manuals in book format, so started searching and ended up in a section which talks about 'How to avoid rounding mistakes in rotary cutting. In essence, EQ8 applies conventional quilters wisdom to its measurements, i.e. it adds 1-1/4in to the finished size of quarter square triangles for cutting, just like you would when working it out yourself. The inaccuracy produced by rounding of to 1/8 or 1/16 however can become significant when the size of the finished patch cannot be easily measured on a common ruler. Had another look at my block...my setting was set to rounding of to the nearest 1/8. When I went deeper though and rounded of to the nearest 1/16 and to 'no rounding' at all it showed me that my square was in fact uneven, meaning that I had a block that did not easily fit into a grid of any kind and the unfinished block was somewhere a bit less than 6-3/4in which explained why I had such difficulty squaring this up. In short, my amazing calculations were wrong somewhere.
I did test this further and made my block 6in...checking this on EQ8 produced a consistent value of the square, rounded to the nearest 1/8, 1/16 and with no rounding at all, coming out at 2-1/8in in the finished block. Checked my foundation print out...yep, all correct and sewed the block.
The block came out perfectly and the problem with squaring up had disappeared. Who would have thought that such a simple block would give me so much trouble. My work space looked like this which shows you what was going on in my head...total chaos!
This has taken so much longer than it should have but it just goes to show how important it is to spent the time on making a test block, for any project really.

Also spent some time printing my revised version of my wholecloth and spending a bit of time with the Affinity Designer program again. Good fun...did a few more lessons as I am still thinking about purchasing the program for the desktop. It is a one-off payment which is more attractive than the Adobe Illustrator subscription service. At the moment I am still working on the Ipad which is great but when it comes to printing I need to export my drawing, then get it onto the desktop as I need to print the thing as a poster, i.e. spread the design over multiple pages to get a 100% copy of my drawing which is somewhere around 35in.
Spent some time sticky taping this together...always painful as you get slight inaccuracies on the home printer but we got there in the end.
Looks crooked, but is actually a perfect square. So now I am ready to mark this onto the fabric and think through some of the elements...its been a while since I looked at this, so some of the things might change. Happy with my measurements though and the revisions I made.

For this week I am planning to:
- start the new pattern with the block from above
- start the marking of the wholecloth and maybe
- do a little bit more knitting
- baste another charity quilt 

That's probably enough...we are in summer down here and the weekend will be uncomfortably hot, so I might just fade out.

Linking up to To Do Tuesday #57 over at Quilt Schmilt

Karin

Friday 12 January 2024

Making a Test Block

I spent a few days on looking at new patterns and set out to do a test block for one of them. Certainly looked simple enough if I could figure out the math for this block.

Wow, what an adventure...I have the EQ8 program which of course gives me the precise measurements which (after many attempts of mucking around) were at 6 1/4in:

Now, nobody is going to piece that with those measurements. How did I even get there. When thinking this through I tried to figure out the math for this block but it got very hairy as I tried to work out a simpler way of piecing this starting with a simple square in a square block and cutting that into quarters. My head hurt trying to work out what measurement I had to start with and in the end I had to sit down and piece this multiple times to think this through.
First attempt
Fail...my seam allowance was cut off. Next attempt:
Nice, but completely different measurement to what I thought it should be! Back to the drawing board...in order to piece this, I had to understand the math of the measurements. I was sitting there for ages doing all sorts of calculations with fractions until I worked that out and realised where I had gone wrong. I have a few more samples that I have not included here of my attempts to get that right. It was actually a bit hilarious.

So here it is, the final  attempt
Two Square in Square blocks (who would have thought that they can be so tricky in terms of their measurements). I cut those into quarters and arrived at my block
Not too bad but I thought that this is a very convoluted way of doing this and while piecing this is ok, you are dealing with a lot of bias edges and the likelihood of distortion and erosion of seam allowance is high.

So then I tried the Freezer Paper Piecing method. That was something I was going to try in the New Year when a friend alerted me to the possibility of this last year. Never heard of it...went over to Bryan House Quilts and read through a tutorial on this. It is basically foundation piecing without actually stitching through the paper. And bonus...you can use your template again and again.

Gave that a go...easy-peasy!

Here is my first finished unit. 
It is a small unit so that went very quickly and without any great hassle apart from me being a bit rusty in foundation piecing (i.e. making sure to cover each piece). Peeled off the paper from the back and made the second unit and then sewed them together and attached the big white triangle.
Can't beat that in terms of accuracy and the stability of the block. While still dealing with some bias edges the distortion was noticeably less. It also means I can make this block bigger, in fact I could make it any size I want without any great hassles. Piecing this from starting with a Square in a Square block really only gives you two measurements that you can work with if you are not into cutting pieces in 1/8 increments, so that was very limiting. 

Learned a lot over the last few days! Not sure whether I am going to pursue this pattern...it is sitting there looking at me saying 'make me!' but I am not sure whether people are that interested in foundation piecing. Mind you, these are only very small sections to make, so that could work for some people. Will ponder on this for a moment. In the meantime my mind is again going sideways already thinking of the possibilities...I have got several other designs sitting there where the freezer paper method could be a real game changer. Almost thinking to make this year the year of 'challenge'.

Karin

Wednesday 10 January 2024

To Do Tuesday #56

My goals for the last week were
- complete the dinosaur charity quilt using the edge-to-edge design from above.
- continue knitting my brown sock
- developing a plan of attack in terms of projects for the coming months. I know that I do want to start my wholecloth but also need to be working on some patterns for my Etsy shop, so that needs to be thought through a bit.

I finished the dinosaur charity quilt and it came out really beautiful. I used an edge-to-edge design called 'Happy Times' by Hermione Agee available through Urban Elementz.


It is the cutest thing. The design is new to me and comes with 2 rows printed out so I wanted to see how that goes on the sitdown longarm.

Starting off...
Going very well but I am astutely aware that I am spending a lot of time on this. Not that I think these charity quilts don't deserve that but when I started quilting for the local charity group I did consider that I need to keep the quilting fuss free and relatively quick unless like in this case I do want to try out something specific. For this quilt also, when I do look at them closely and see the work and commitment that has gone into it, I often feel that they deserve the best. This quilt is a panel and the group just sewed two small borders around it. However, the batting...somebody has sat down and sewed batting strips together at about 3-4in width for the entire batting. Was very impressed by this.
Anyway, to speed up the process, I traced my next row of design and then placed 5 more rows behind and sewed through this with an unthreaded machine, so that I now had 5 stenciled rows ready to go. Normally I trace all my rows however wanted this to go a bit quicker and also try it out again.
Well, it was very hard to see (maybe should have used a bigger needle!) as you can see in the picture below.
Given that the design was really quite easy to stitch out, I managed with the extra light from the machine and completed the quilt quite quickly. However, for the future I probably go back to tracing row by row as this was more difficult to manage.
However look at the bottom
Was impressed with how straight this turned out.

Close up of the design
Great design, definitely will use this again. Came out really cute and suits this panel.

So what else did I manage? I did not continue my knitting however spent a lot of time on the computer looking at new patterns and while I was at it, cleaned up my EQ8 program a bit. Have several possibilities of new patterns and have been spending the last few days on trying to work out one particular pattern in terms of math to make it more user friendly. Will have to do a test block to see whether my calculations are correct, will probably start on that pattern. Apart from this I did spent a lot of time in my head trying to work out a plan for the next 3 months or so, but have not written that down as yet, as I am constantly side tracked with new ideas. Definitely need to develop that plan to stay on track.

For the next week I am planning to
- make a test block of the new pattern (and take some notes this time!)
- put my plan for the next 3 months on paper starting with the wholecloth quilt (which is still waiting to be printed)
- continue on my sock
- pull out the fabric for a new Fox quilt and get ready to tackle that.

Linking up to To Do Tuesday #56 over at Quilt Schmilt

Karin

Popular Posts