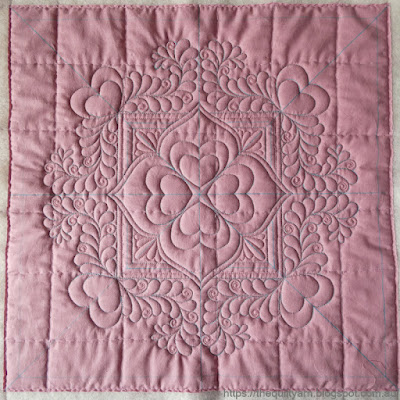
This time I stitched this out on a dusty pink fabric using a 'run-of-the-mill polyester thread. While this worked fine, I am not sure I would do this again...the thread was almost abrasive. No problem stitching with it, but a real hassle to pry it out of the fabric if you tried unpicking. However, as this wholecloth is for a class I am doing next year I thought that I give this a whirl as people will come with all sorts of thread.
I used different fillers this time and also made the frame around the heart a smidgen wider. Quite like this! The feathers are done a little bit more playful in this version and in the end I decided to put a grid in the surround. Not a bad idea, however I should have done my grid slightly smaller. This was done with a 3/4in grid. I put double lines in there which I thought would be enough to narrow this down a bit. In hindsight though I should have started off with the 1/2in grid and then did the double lines. By the time this became a bit obvious to me, it was too late...I was not going to take that out! Thought that this would be a good talking point in class in terms of thinking about size when choosing a background filler. Often you only see the effect of your quilting once you already have gone quite a distance. Definitely something to think about. While pretty, the grid in my mind detracts from the actual design...just too much going on here. Very interesting exercise though.
I will probably do one more wholecloth from this design, this time focusing on the weight of the thread, i.e. using something like Aurifil 50/2 for the main design and then stitching the background down with 100wt Invisafil, again using slightly different fillers. Let's see what we can come up with.
This will give me three different versions of the same Mini Wholecloth to talk about in class. That should be enough to get started.
Karin


