Friday 23 November 2018

Handiquilter Ruler of The Month Club 3 - 1/4in Line Grid Ruler

I already have the 1/2in Line Grid Ruler from the previous Ruler of the Month Club and it is one of my favourite rulers to use for piano keys, grids and straight lines.
Line Grid Ruler and Skinny Ruler
The one on the left is the half inch Line Grid ruler. The 1/4in one is just like that but with a narrower slot.

So I started playing with the 1/4in Line Grid Ruler
How straight and even is this! I would have no hope in hell of completing this with just aligning a straight ruler. You would not think it is different, but it is for me. This ruler forces me to stay on track and alignment is simple as you only can advance 1/4in at a time.

My ruler quilt is coming along...did some more work on the border painstakingly putting in 1/2in pebbles
Continued to play a bit more with this ruler but there is only so much you can do with lines. In the end I used it also to put in a line of 1/2in separating the border from the center. This worked better for me than just using the straight ruler as you are holding this ruler with both hands. If you are on the look out for rulers, I can definitely recommend this type of ruler.

Karin

Monday 19 November 2018

Challenge Quilt Is Done

I have completed my challenge quilt from the local HQ group. The design is by Heather Hopkins and has been stitched out over most of this year in sections.

Turned out beautifully

Some close ups: lots of texture

Middle section

Corner

Outside Edge

What next?

Karin

Tuesday 13 November 2018

Ruler Practice Quilt #2

Having some fun with the rulers of the Handiquilter Ruler of the Month Club 3

My favourite so far, the Petal Pusher

Has a leaf shape and a rounded petal shape


Simple, but lovely little motifs for Charm Square quilts

I paid no attention to the size of the rulers that were going to be offered and constructed this quilt before I actually got some of the rulers. As you can see in the first photo, the shape is too big for a Charm Square, coming in at 4 1/4" square. This is where the Handiquilter Echo feet become incredibly useful. I used the 3/8" Echo foot and stitched out the motifs  bringing them to a size of 3 1/2" which was just right. Of course, you can also enlarge your motifs and put a circle in the middle which I did in the bottom left photo. Lots of different things you can do with this one.

The Hexagon Ruler

That one is absolutely massive...
...and I struggled with that one. You can try to shift the ruler around to fit your hexagon in that space, but it is very fiddly and was a bit too much for my brain. Again I used the Echo feet, this time using the absolutely huge 3/4" one to get the size I wanted
The little hexagon on the top left is about 2 1/4" on each side. Back to the normal foot, I then tried the repeating lines...let's just say I struggled. Had a very hard time to keep this precise. After that I just played around which was much more fun and constructed the little star and the windmill just aligning the ruler to the crosshairs reference lines that I had drawn. That I found very useful as you can keep your angles very correct.

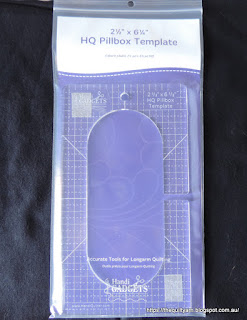
The Pillbox Ruler

Also very huge and I wondered what I was going to do with that one

Large ruler! Could imagine doing an overall design with that one, but wanted to give that a go on my little Charm Square arrangement to see what one could do with that


Very interesting line design in the above left picture. Easy to do as it aligns nicely on the 45 degree angle. Then I did a very fat petal shape with that, don't really like it but a good reminder that the rounded part can also be used for petals. The last one is an interesting design, again which could be changed by aligning the ruler differently. Well, who would have thought that one ruler can give so many different shapes.

Very interesting little exercise.

Karin

Thursday 8 November 2018

Marking Your Quilt #2

I have a collection of different markers
From the top:

White Clover Marking Pen: leaves very fine white lines that appear after a moment; supposed to come out with heat from the iron; some quilters swear by this but I must say that it did not work for me - the lines do not come out completely with the iron which is ok if you definitely stitch on your lines as it will not be visible once you stitch over them. Useless to me as I often do not stitch directly on my lines or change my mind about something I have drawn - and in general I am a very messy marker, so this one is definitely out for me.

Violet Air Erasable Marker: use that all the time to put in temporary lines, i.e. when sewing binding together or quickly marking a motif in a square. No rinsing, no iron, lines just disappear by themselves.

Sewline Ceramic Marker (white): also use this extensively for drawing some lines or markers on darker fabric, however the lines are very fine and I do not find it suitable to mark out an entire wholecloth for example - not smooth enough and I do have problems at times to get the white marks out.

Blue Water Erasable Markers: Everybody's go to, I think, for light fabric. Have been using them for a very long time and use them to mark my wholecloth quilts. Never had an issue with them, however you do need to make sure that you do rinse them out completely as they can leave brown marks after a while. As I wash my wholecloth quilts once finished, this has never occurred in any of my quilts.

Next picture...from the top

Water Soluable White Pencil (Clover): No idea what this is and where I got it from; inspecting it more closely it does not actually say what it is. It just says that the lines disappear with water (which they do) and that it is made with white colouring. Was not game enough to use this on my purple Ruler Practice quilt.

Bohin Chalk Marker: Finally got one of those - a simple chalk marking pen. Did my centre line on my purple Ruler Practice quilt with that. Like it - nice strong lines, except that the pen dulls relatively quickly, so if you want fine lines you need to sharpen it continuously.

Roxanne's Quilter's Choice White Marking Pencil: A chalk pencil that comes in a pack of four (2 white, 2 grey), relatively inexpensive. Read about it on The Quilter's Review recently and then came about it by chance in one of the online shops over here. Marked my border with this, as I had tested it and it appeared to stay on and was able to be erased with water.

Here is my border, all marked out with this pencil
Clear fine lines that stayed on through the handling of the quilt, i.e. basting, stitching in the ditch for a few days and general handling.

Removing the marks with water after I stitched down the frame
and here it is...mostly gone
Very happy with this marking pen!

Karin

Wednesday 7 November 2018

Ruler Practice Quilt #2

With the baby quilt finished I went back to my ruler quilt. Used spray basting to put it together...this time a bit more careful, so that I did not get that sticky stuff all over the floor. Worked well.
I did go over the whole thing with the basting stitch of the Sweet 16. Probably not necessary but at least then I'll know that it will not go anywhere.  

Also wondered whether my marking in the border would remain with handling and smoothing it all out and was happy to see that that worked.
Looks a bit faint in the photo but is easy enough to see. I used Roxanne's Quilter's Choice Chalk pencil and am a bit impressed with that (more on that in my next post about markers). My border design is from Cindy Needham's Border stencil collection...as you can see I chose the zigzag lines to keep it a bit simple...might dress that up a bit once I have the basic design down.

Then I went ahead and started stitching-in-the-ditch using the HQ Ditch ruler. That came as part of the first Handiquilter Ruler Club and I had not really tried it out that much on an actual quilt. Must say, that ruler is very nice and very easy to handle...like it!
It has got these rounded off notches on either side which you align directly on the seam to get your 1/4in space and it guides you along your ditch in a very consistent manner. Also discovered that if I place the notch next to the foot when starting off I can avoid that wobble you sometimes get when having stopped and starting again. Very comfortable to use and very helpful. Ever since I have got this machine I have basted and stitched-in-the ditch on it as this was one of the reasons I bought the machine...to make things easier and quicker. While it has taken some time to get used to the machine I do find it is much quicker and easier to stitch-in-the-ditch with the Sweet 16...you have got more room, can see better, manoeuvre around your less than perfect seam lines and once you got the hang of the rulers, stitching-in-the-ditch becomes almost effortless. Similarly with the basting...I have used this function on every quilt since I have got the machine...just so useful. 

My plan is to finish off the stitching-in-the-ditch and then put the structure of the border design down. As this quilt will lie around for a while and will get handled a fair bit, I am unsure whether my white lines will continue to be easy to see or whether they will become fainter with handling etc. Don't want to risk this as this would be a nightmare. In terms of thread, I am stitching in the ditch with purple Rasant thread, not sure what I will use for the ruler work that is yet to come.

Karin

Monday 5 November 2018

Another Baby Quilt Finished

Found the most gorgeous fabric for a baby quilt - 'Jungle Fever' by Rebecca Jones for Clothworks.
Had to have it and as luck had it knew exactly who this should be gifted to.

Kept the quilt simple, using the panel in the series and surrounded it with 'dancing squares' in the outer border. Had seen this technique in the lecture with Ricky Tims that I attended during the Australian Machine Quilting Festival and thought that this just hit the mark. Easy to do and adding that playful element. Had just enough green fabric to finish off the border and then ended up buying some very cute backing fabric from the same fabric line.


Could not resist, it just fitted so nicely...more animals, some palms...


Went a bit organic with the quilting as I did not feel like a calm meander or a simple loopy design. Felt like something a bit more involved and different. Baptist Fans would have looked nice, but after having done them for months on my last quilt really needed something new. Decided on a mix of swirls and paisley.
The whole thing came out very textured and very whimsical. Took me a moment to get used to this, but I ended up liking it. I am still amazed at how much more quickly I can finish off an overall design on the Sweet 16. Did the entire quilt which measures about 36x50in in a couple of hours spread over two days. The machine performed beautifully and I was able to practice a bit more speed and get the hang of how to improvise stitching out this design in a somewhat consistent manner.

Very happy with the result.

Karin

Saturday 3 November 2018

Ebooks

New additions to my library


Doodle Quilting by Cheryl Malkowski


With my ever expanding book collection I started to limit myself to ebooks...easy to store and also a bit cheaper.
Usually I wait for a sale as I did for this one which I grabbed from C&T Publishing for 50% off the ebook price.


Also bought another Doodle Quilting Design book by Karen M. Burns and Amelia Johanson

Had seen this book before and liked the designs but did not want to purchase the physical book, so hunted around the internet for an ebook. Found this one at Martingale.

I like these sorts of reference books for fresh ideas and trialling new designs. Both books consist of mainly illustrations with simple 'how to' stitch arrows. Lots and lots to look at...

Of course I had to play a bit...stitched out the Dandelion design and a bit of a leaf design from the book above

..and also tried a cute little sashing design called Flame which got a bit corrupted with the swirl...it is supposed to have the gentle feather shape.

I keep my ebooks on the Ipad, so that I can have them next to the machine for reference when trying out the designs. This is just so handy!

If you are looking around for design ideas, I can highly recommend these books both for the beginning quilter as well as more experienced freemotion quilters. There is truly something for everybody.

Karin

Popular Posts