Sunday 30 June 2019

Mission Accomplished!

My machine has come back from service and I have finally been able to set myself up properly. Decided in the end to get the right extension flap for the table. Initially when I bought the machine I only got the extension to the left, obviously to save some money. However over time I was not unhappy with the arrangement but knew it could be better.
So this is what this looks like now
 Absolutely fabulous!!! Very happy with the set up. Gives me heaps more room on my cutting table and I know the space to the right will be heaven when quilting a bigger quilt. I thought it would be a hassle fitting the right flap on once the table was already set up, but it turned out super easy and quick. I also lifted my table up a bit after having done some more research on table heights. It now sits at 74cm.
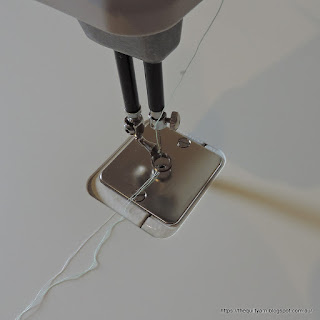
In addition, I finally tackled the table surface and the annoying issue of the machine (needle plate) being slightly higher than the table insert . We are not talking by much, however it did create a minor annoying issue when using rulers. In certain positions your ruler would wobble a bit. I got replacement feet from the dealer. Basically they are like 'sticky dots' in 3 different sizes. You take the original feet off and attach these sticky dot feet to lower your machine.
Over the moon. I now have the overlay in perfect alignment with the needle plate. I cover the needle plate with the supreme slider and the ruler now sits nice and straight against the foot, no more wobble!
Will have to be more careful though...the technician lowered my foot a fraction, saying that it was a tad too high. I am currently looking at maybe getting the Clarity Ruler foot from Accents by Design for midarm machines, depending on whether the profile of that foot is a bit higher. Could get the Sure foot, but that would further restrict visibility.
The machine runs perfectly...obviously needed a spa treatment. Sounds completely different...

Now I only need to finish my quilt top to actually have something to quilt. Although I will have to also continue on my HQ group's challenge quilt...I am having a few weeks off work from next week, so hopefully I can get some things finished.

Karin

Wednesday 26 June 2019

Very Cute

So I managed to finish off all my blocks...
...and today started to put this together. Have to concentrate and go slowly as my piecing is never accurate, hence have to straighten and adjust while I go along.

Managed two rows today and am very pleased with how it is going. This is going to look ultra cute!
Already thinking ahead of the quilting and thought that I might leave it at a minimum level, i.e. outline the birds, echo the sashing and echo the foot shapes of the block (hmmm...not sure about that as they are all different colours!) and then just put curves in the middle sections of the Fancy Foot block. Alternatively I could do an allover design in a light yellow colour. Decisions, decisions...!

Linking up to Sew Fresh Quilts for Let'sBee Social

Karin

Tuesday 18 June 2019

Fancy Foot Block

Made a start on my blocks for the Funky Bird Quilt recently but was too busy to post about it and then forgot all about it.
This is the Fancy Foot block. It can be found in Maggie Malone's book '5500 Quilt Block Designs' (#2164). It is a simple four patch design that looks particularly striking in these bold colours.

I used the Accuquilt GO cutter to cut out the shapes which made this a relatively easy affair, particularly for the elongated triangles which were cut with the 4in triangles in square die (the die that you use for the Storm at Sea design). While you can cut this yourself, a die like this makes this very easy and quick. The pieces align perfectly and come together quickly. Helps of course, if you think about direction beforehand...I had a whole stack of triangles the other way around and needed to re-cut them to get them the right way around!

Have everything cut out and just need to find some spare time to chain-piece my little heart out and put it all together. My HQ Sweet 16 has gone in for a service, so there is no excuse not to finish this  up in the meantime.

Karin

Sunday 9 June 2019

Progress on Funky Bird Quilt

Almost done all of the birds
Little bit left on the last three and then I can get to cutting out the fabric for the piecing...bit work intensive but it will be very cute. This is what I am planning

How cute is this!
The block is called Fancy Foot and I first came across it  on a site which show-cased antique quilting blocks. Unfortunately this website is now defunct, but I also found this block in Maggie Malone's 5500 Quilt Block Designs. I constructed this four patch before and thought that this was the perfect companion for the birds.


Apart from that I am still in cleaning and re-thinking mode to make my sewing set up a bit more user friendly. I have moved my cutting table over into the corner and created some space for a potential extension flap for the Sweet 16...will trial this for a moment to see whether this works for me with the table.
This re-thinking has been such a brain teaser...really want to make do with what I have and make it work somehow. Ideally, you could get a height adjustable table, looking a bit like this and create one seamless surface when you need it for the Sweet16 and put it up for when you working on cutting out a quilt. This would be great but those tables come with a fairly hefty price tag, so my extension flap for the Sweet 16 is the cheaper option. Some of the items on the table would then move over onto the extended bit and my table would be a bit more empty when working on it.

Anyway, back to those birds!

Karin

Wednesday 5 June 2019

Re-Thinking The Sewing Room

I had a delay with my HQ Sweet 16 going for service...it will now go in the middle of this month. Not sure whether this prompted me to re-think my sewing room, but that is what's happening at the moment. I have not been entirely happy with my set up.
This is how the Sweet 16 is situated
See the gap between the cutting table and the Sweet 16 table...initially I had this at the same height, which was brilliant for the Sweet 16 but unworkable for the cutting table. Was doing my back in as the table was too low. I am thinking about getting the right extension flap for the Sweet 16. Probably should have done this when I first got the machine, but thought I could save some money. If I get the right extension the whole wall will be taken up with Sweet 16 and cutting table, in fact the cutting table would have to go right into the corner and .the right edge would be somewhat less accessible...
...as there is a shelf right next to it. All a bit messy and cramped but I need that shelf with all my stuff!
On the opposite wall is my Pfaff machine...I have a Horn sewing cabinet (Outback)
Fully assembled it looks like this
Outback MKII and Extension Table
Image from Horn Sewing Furniture
The dimension is approx. 165cmx120cm. This has been absolutely great for many years, however now that I am using the Sweet 16 for all my FMQ my time on the Pfaff is limited to sewing my piecing together. Having it in the room limited my floor space and the extensions to the back served mainly as a rubbish dump for all sorts of bitses and pieces...again, all very messy.


So on the weekend we took the extension off, but left the flap to the back which neatly folds down
If I need it, then all I have to do is pull the cabinet to the middle of the room and lift the flap.

Created heaps more floor space this way which I seem to need when I am putting a quilt together
Not finished with my re-think of the room, but it's a start. Really need to create more order and functionality. If I get the right extension for the Sweet 16 then it will only have to move over by about 20cm as the cutting table is not exactly in the corner. Good thing is that the extensions can be folded down, so I do not necessarily have to have it up on the left all the time, allowing plenty of room for window cleaning (😂 as if that is going to happen!).

Will have to think further on this as these extension flaps are not exactly cheap.

Karin

Popular Posts