Tuesday 27 June 2023

To Do Tuesday #26 - Ruthless Quilting

My tasks for last week were:
- start my pattern write up for next month's Etsy listing❗(thought a lot about it, but have not started yet)
- write another two blog posts as indicated above✅
- continue on knitting my second sock which will be an evening TV task
- continue to sew together my strips to make some room around the sewing machine (until they are all gone)
- prepare some fabric for another Wholecloth table runner in preparation for an upcoming workshop

So while I have done most of the things, my week has mainly evolved around scraps. As mentioned last week, I was talking with a friend of mine about the overwhelming amount of scraps that we, as quilters, do accumulate over time. She was showing me some pictures of two quilts she made entirely out of binding leftovers. Well, that was it for me...abandoned my original idea for a scrap project and got going on my strips as well as the bag of leftover bindings.

Overwhelming is an understatement. Spent the other day cutting out a few more strips with my Accuquilt Strip cutter. I have got two different strip cutter dies (one for 2-1/2in strips and one for 2, 1-1/2in and 1in strips - very handy!) Worked out a bit of a game plan, i.e. divide my strips into one lot consisting of 2in strips and one lot of 2-1/2in strips separating them by tonal values, i.e. light, dark and medium. Using the binding is a great idea, however I did need to look around for lighter strips as my 
bindings are usually on the dark side.

It was wild. There was fabric everywhere and I did finally wear out my rubber mat used for going through the cutter with the die.

Sorted them as best as I could into their tonal values
This is by no means all that I got...these were just the additions to what I already had cut some time ago.

Started sewing the strips together
Anything that was miscut or off in some way, ended up in the bin. Even when cutting the strips there was this incredible compulsion to keep little offcuts etc, but this time I was ruthless...offcuts from this process went into the bin!

By now I was unsure whether my original idea would work, i.e. I was going to put these two blocks together in a somewhat interesting layout, however trying this out I decided that that was too much of a good thing. Just a bit too busy for my eyes. Well, so now I am making two quilts, one with the smaller strips and one with the bigger strips alone. 

The other thing that happened was that while exploring all the 'hidey' places for fabric leftovers, I discovered this
A whole stack of Charm Squares! Cannot even remember cutting this out, but assume that I did this when I got the Charm Square die for the Accuquilt cutter. There where about 50 in the smaller stack. Yep, so I cut some more just grabbing some of the bigger scraps that I had laying around. It always amazes me how much you can still cut out from the leftover fabric.

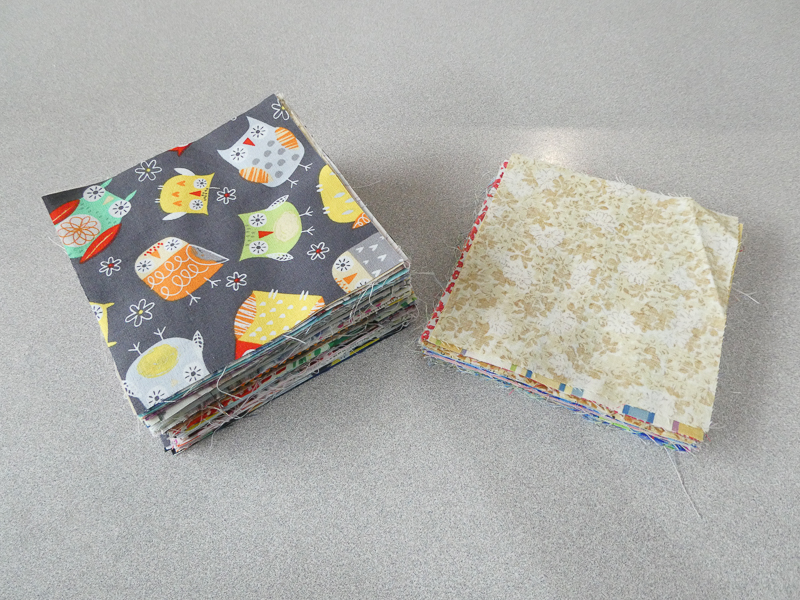
So now I am in the process of making three quilt tops, two strip quilts and one larger Charm Square quilt. I do have a number of ideas for scrap quilts and also want to do a scrappy house quilt again, but at this point in time, this is what I have to do to get through some stash. I have been leisurely sewing these blocks...initially a lot out of smaller strips to use up the bitses and pieces but now I am onto the larger strips, so it is going at lightening speed. Yesterday I made 22 blocks in one sitting of about 2 hours. At this rate, this is all very do-able and should come together quickly. Any mishaps, wonky blocks or miscuts...straight in the bin! No messing around...I did notice that some of my strips, presumably those that I cut out myself before I had the strip cutter are sometimes just really wonky. The strip cutter does make a lot of difference...they always come out perfect.

I am hoping that this will free me up for some other, slightly more interesting scrap projects like the wonky house quilt (a design by Bonnie Hunter). 

Made one of those during lockdown and absolutely love it. Fear not, there is still a lot of scrap fabric left for a number of other quilts!

So for the coming week I will 
- continue to sew those strips together until I have got enough to make a quilt top. I am approximately half way through on both stacks of blocks, so this should be do-able
- start on quilting another of my table runner wholecloth quilts
- start writing up my new pattern (this will take a few weeks but I have to have this on here, because I am definitely procrastinating)
- continue knitting my second sock - struggled through the beginning again but am on my way now).

Linking up to 

To Do Tuesday over at Quilt Schmilt (when it comes around...I am a bit early this time and will have to come back to link up)

Karin

Friday 23 June 2023

Clamshell Quilting

I thought it might be useful for me to do a post on clamshell quilting. I do use this overall design quite often on my baby quilts as it is a fun way to quilt and always looks great on those little quilts. Babies and clamshell just go together for some reason.

I recently finished a charity quilt with clamshells and while I was quilting along I thought that some may look at this and think that it is too hard to do over an entire quilt.
I use the Handiquilter Multi Clamshell ruler to do the quilting however there are other rulers you can use, i.e. the Handiquilter Versa tool or a circle. A circle, of course, is a little bit harder as you do not have those nodges that stop your foot from going over the line when you place one clamshell over the other.
For most baby quilts I use the 4in size of the Multi Clamshell ruler. I do not mark lines onto the quilts to keep me straight basically because that would involve a lot of precise work to get that right and I don't think it's necessary.

Starting from the bottom up, I first inspect my edge. It is very important that the edge is straight. If it is not you will need to establish a straight line on the bottom as all your other clamshells (and their straightness) will be based on that. Maybe for the first row of clamshells, also make yourself a mark every 4in so you get the first row down perfectly.

And this is basically where perfection ends (coming from a perfectionist). As you quilt, there will be a slight amount of compaction. The above charity quilt had a puffy wool batting, so the compaction started to happen literally straight away meaning that the center line of your clamshell ruler will not necessarily align with the valley of the clamshell underneath. That is incredibly distracting and can throw you a bit. I have found that I can largely ignore this. Instead I focus in on keeping my clams straight and in line by marking the center of each clamshell as I go along. So I will quilt a row, then stop, mark the center of each clamshell just quilted and continue with the next row placing the clamshells exactly where they should be. 

Next issue will be that your clamshells will not necessarily end up exactly on those points because as you are quilting you have put too much pressure on your ruler and things have moved over ever so slightly. Also very normal and happens every time. The good thing with my center marks is that I can see how I am doing, i.e. where I am definitely not on point. This is where the fudging begins. Usually this happens in the middle of a row. So as I am quilting I now have one or two clamshells that are slightly out of alignment. In this instance I might shorten my clamshell a bit by starting to quilt the clam, stopping in the middle and shifting the ruler over a bit to hit the next clamshell at the marked point. Other times I might carry that shift over to the next clamshell a bit to see how the shifting carried on over the row and adjust it then a bit. As I am now on high alert I will check my row, making sure that I end up on the side in the same position. Also when marking the next row in the center I will usually check the alignment underneath to ensure that the clamshell is in the center and straight. 

Over the next few rows, particularly as you are nearing the center slight mis-alignments will occur...sometimes in the middle and other times towards the edge and I will keep fudging to get them back into their right position. If it is a pieced quilt I will also check the height of my clamshells as I pass over a horizontal seam which will give me a pretty good idea on whether I am dead straight or not. Again, there are adjustments you can make. If one clamshell is taller than the other you can adjust this in the next row by just shifting your clamshell ruler up a bit when you come to the offending spot. 

Once you reach the middle of your quilt, you will likely have to turn the quilt and start quilting your clamshells towards you. Often my clamshells shift a fair bit in that row just because of the change in positioning the ruler. In the little quilt above I was mis-aligned towards the edge quite obviously. In this scenario I will look the other way and have a mis-aligned clamshell but ensure that I mark the next row perfectly using a longer ruler to align to the valleys of the clamshells underneath to get back to the alignment as it should be.
The point I am trying to make is that you cannot see this once it is all done as your eyes only see the very consistent and repeating clamshells. The real test comes in the last row when you hit the edge as this will show how straight and consistent you have kept your clamshells. In my example, I was pretty consistent, maybe out by about 1/16in in terms of the height going towards one side, so it was not dead straight. However, the way the clamshells miraculously lined up with the top edge meant that I just made the clams on one side ever so slightly higher to hit the edge and the issue was solved. As you apply the binding on the edge, no one is going to measure that and definitely no one will see that.
  
Let me know if you have any questions. Happy to talk more on this

Karin

Thursday 22 June 2023

Animal Panel Baby Quilt - New Listing in Etsy Shop

I have got a new listing in my Etsy shop. Put it up there the other day, did all the social media advertising but forgot about my blog.

So here is a quick rundown on this cute little quilt
The quilt measures 33-1/2in x 48-1/2in (85.1cm x 123.2cm). 

It is pieced, i.e. the panel (Noah & Friends by Liza Lewis for Clothworks Fabrics) was extended by a coordinating sashing and outer border. The quilt top and backing are quality cotton fabrics with a layer of 60% cotton/40% polyester batting in between. The quilting was the best part of it. I used a new edge-to-edge design called 'Lorien's Festival by Hermione Agee available through Urban ElementzLots of fun...the design was easy to execute and flowed really well.

Quilted this with my favourite thread, Aurifil 50/2 in an orange tone. The fun, striped binding is double-fold for extra durability, machine stitched to the front and hand stitched to the back.

Close up of those cute characters. Always enjoy quilting little baby quilts and this one in particular due to its bright colours and general busy-ness. There are so many different animals in this small panel tugged away all over the place and I could imagine it would be fun for a toddler to discover them all.
An outside shot. I always include a picture of the quilt on the old outside bench. Although a bit darker this time (its winter over here) it does show the quilt in natural light.

A fun little quilt. For more pictures on the detail, head over to my Etsy shop 'The QuiltYarn'

Karin

Wednesday 21 June 2023

To Do Tuesday #25

Another week gone! 

My tasks from last week included:
- photographing my panel baby quilt and put it up as a listing on Etsy. I am hoping that that quilt will go fairly fast as I am running out of space✅
- hand stitch the binding on the quilt above and start writing up the pattern. This will take me a couple of weeks, I think, as it is a while since I pieced this together.
- baste one of the charity quilts ready to be quilted. Want to complete at least one as I want to freemotion quilt another table runner for my workshop in September.
- continue knitting my sock, hopefully finishing it off. 

I did put up my listing for my little quilt but as I am typing this I remembered that I really should do a separate blog post for the listing. A tomorrow task!
Anyway, here is the little quilt
Cute and very cheerful. Love making these little baby quilts.

Did not do the handstitching of my binding on the second quilt - definitely procrastinating!

However I opened my bag of quilts from the charity group and got going on that. Finished a tiny little baby quilt. Very eclectic but the clamshells did pull it all together.
Will also do a separate post on doing the clamshells with a ruler. So enjoyable and so quick to execute and always looks very polished. Also finished the binding on that one as I was on a roll to get things done.

Well, and I am happy to say, I finished my sock.

That was extraordinarily tough, but I made it. Very happy with the sock. Fits like a glove and is very nice to wear. The foot looks sort of huge when laid out like that, but it is a very normal shoe size. I am shoe size 9-1/2 in Australia, so all in all a very average foot. Learned a lot about sock knitting and know now where I might have to make some adjustments, i.e. I think my heel flap is slightly too long and in general I do need to knit a bit looser, but apart from that, it is perfect. Well, spent a very long time again yesterday casting on the next sock. Must say that I am finding the casting on on double pointed needles just horrendous. Took me hours of getting it together, but finally managed and am on my way. Also bought a cheaper yarn to do another pair after that with those minor alterations. Very addictive...

Yep, I then I started another project today...I was wanting to make a string type quilt and had started on an old pattern about a month ago, however that came to an almighty standstill. Just was not feeling it, however the strings are still sitting next to the sewing machine and the whole accumulation of scraps around the place is just out of control and somewhat overwhelming. Today I was talking to a friend about this and she was showing me a quilt she made out of binding leftovers by just sewing the strips together, a bit like a railway quilt. Looked really nice and I think she said she got two quilts out of her binding leftovers from that. This whole conversation got me a bit enthused about using my strips...I also have collected leftover bindings over the years, thinking I might one day use them for a quilt by making a scrappy binding. Can confidently say, that never happened, however they have accumulated over time and I got about a box full of them. So today I decided to change direction on the string quilt and sew two types of strips together, one made from the 2-1/2in binding strips and another from the mountain of 2in strips and just use them up. I have a layout in mind which is based on different tonal values, but we shall see whether that works. The goal however is to use up these strips and leftovers to make a simple quilt out of this (and possibly continuing on the old pattern as well if there are enough strips for two quilts)) and hopefully get a sense of achievement out of this in using what one has lying around and create a bit more space. Done about 10 blocks already, so this should be a nice 'no major thinking' project.
Have several other scrap quilts in mind as well as a number of UFO's, but that will have to wait until I get through this mountain first. Also planning on then using larger fabric pieces to piece the backings together.

So, for the remainder of the week, I would like to
- start my pattern write up for next month's Etsy listing
- write another two blog posts as indicated above
- continue on knitting my second sock which will be an evening TV task
- continue to sew together my strips to make some room around the sewing machine (until they are all gone)
- prepare some fabric for another Wholecloth table runner in preparation for an upcoming workshop

Linking up to To Do Tuesday #25 over at Quilt Schmilt. Seeing some very interesting posts up there and will come back tomorrow to have a bit of a read where other quilters are at.

Karin

Wednesday 14 June 2023

To Do Tuesday #24

My list from last week was small and included:
- finish off the ditching around my little baby quilt pattern, then do a little bit of ruler work and hopefully make a start on the binding.✅
- finish off hand stitching the binding on my panel baby quilt and if weather allows to take some photos- partially done!
- drop off all the charity quilts and pick up some new quilts to finish off 
- continue plugging away at knitting the sock. 

Three out of four things completed...very happy with that!

My little baby quilt went much faster than I expected as it is only small. I was looking forward to do some ruler work and just when I got really into it, it was done. Used my favourite Pro Echo ruler from Lisa Calle which was very enjoyable.
Even managed to put the binding on so all that is left is to handstitch this to the back and then immerse myself in writing up the pattern.

Also finished the hand binding on my other little baby quilt. Need to take some photos and then that can go into the Etsy shop. More computer time coming up for me.

Feeling productive!  Dropped off my charity quilts and picked up four new ones, but have not looked at them yet.

And then came the great sock adventure. So I am knitting some socks because some bright spark in the wool shop said it was really easy once you get the hang of it. While I can knit, this was a huge challenge. Casting on the stitches on those blasted double pointed needles took me most of the day! Lucky for me though I found a really good tutorial on You Tube from Nimble Needles knitting some basic socks. So I took the pattern that I had bought (and which I did not understand at all) and  watched the video from Nimble Needles going through the motions. The pattern was only helpful in that it gave me the number of stitches to cast on for my shoe size, but better than nothing. I followed along on the video and slowly but surely the sock started to emerge.

Doing the heel flap

Managed to do the rounded heel (which appears just like magic) and the gusset and tried them on...the fit is not too bad, I just need to work on maybe easing of my tensioning of the knitting. It seems that when I concentrated really hard I would start to knit very tightly.
I cannot tell you how challenging this was. In parts I would stop the video and rewind it over and over again, looking at what the man in the video explained, then go row by row, stopping, rewinding and so forth. But, thanks to the detailed video I made it! Now it is just a matter of stitching the length of the foot (no idea how long my foot is) and then there is some toe shaping. Theoretically I should be able to finish this which is utterly impressive. Will have to start the second sock straight after, otherwise I will never get this done.

For the remainder of the week there is going to be a fair amount of computer time.
My tasks are:
- photographing my panel baby quilt and put it up as a listing on Etsy. I am hoping that that quilt will go fairly fast as I am running out of space
- hand stitch the binding on the quilt above and start writing up the pattern. This will take me a couple of weeks, I think, as it is a while since I pieced this together.
- baste one of the charity quilts ready to be quilted. Want to complete at least one as I want to freemotion quilt another table runner for my workshop in September.
- continue knitting my sock, hopefully finishing it off.

Linking up to To Do Tuesday #24 over at Quilt Schmilt.

Karin

Thursday 8 June 2023

To Do Tuesday #23

My list from last week included the following:
- start on an edge-to-edge design for the baby quilt panel; this will take some time as I need to trace the design a number of times on to the Golden Threads paper. Also I am a bit undecided about which design to use...feel like something new and have been exploring designs over at Urban Elementz (always dangerous as I end up spending money!)
- if time allows, start quilting in the ditch around my other small baby quilt and maybe even working on the draft for the pattern. We shall see.
- start knitting another beanie...got the right needles now for the decrease of the top of the hat, so that should come together quickly.
- finish sewing on the binding on the table runner.

Let's see how we did.

Well, I did end up buying another edge-to-edge design from Urban Elementz. It is called 'Lorien's Festival by Hermione Agee. Caught my attention straight away on the first page as this was featured in the new design section.
The design is 6.5in wide, has lots of open spaces and flows really well which makes it very suitable to do on a sitdown longarm machine. If you are interested in the process, I wrote a little bit about how I do this in the previous blog post. It is not difficult, just demands a bit of patience and is a bit more work intensive, but so worth the effort. Looks really good. I then started on the binding...choose a fun stripey binding.
Made sure I joined the stripes properly, but was not so sure about the closure and then this happened
When coming to the end to join the binding I was able to align the stripes almost perfectly for the final join. This certainly does not happen usually to me. Could not believe it! The join is totally invisible when folded over. Looks great! I am now sitting in the evening stitching the binding to the back by hand. Taking my time a bit as this quilt will go into the Etsy shop but I need a bit of a sunny day to photograph this properly and at the moment the weather is just cold and rainy.

Started to stitch-in-the-ditch around my other little quilt which will become a new pattern for the Etsy shop
I get incredibly bored doing this task so yesterday I mucked around with making a little video for IG on this. Managed... that's all I can say. Takes me a long time to edit and cut to bitses and then try to figure out what IG wants. My daughter explained it again to me but I don't know...I don't find that easy at all and her explanation was that it is basically a piece of cake, just press here, do this and that and it's magically done. Took me a very long time...probably could have finished that little quilt instead!

Also still knitting...instead of another beanie I am now trying socks. How difficult can that be, said she. Oh boy, was I wrong! I had to re-familiarise myself with doublepointed needles. But that was not my only problem...as I am European I am used to knitting in the European way, hence I had to look for videos that show that way of knitting. I did find a very good video on sock knitting, however that person knitted the other way and no matter how I looked at it, I could not translate that to my way of knitting. So it took a few days and I found a very entertaining European knitter on You Tube who also runs a blog (Nimble Needles). His You Tube videos are in English which is useful as the patterns I am reading are in English and use English abbreviations. Wow, I can't tell you how challenging even the starting of the sock adventure was...I literally sat here a whole day unable to get all my stitches on those blasted tiny needles. A few times I managed but then kept losing stitches in between. I reckon I did about 8 - 10 attempts before I finally got going. At the moment I am approaching the heel...will take a photo when I get there and hopefully manage. So far it is looking good and I think I have understood from the videos how this is done.

I did finish the binding of my table runner in between, but forgot to take a photo. Still planning on doing another one of those, but not just yet.

So, for the remainder of this week I am planning to
- finish off the ditching around my little baby quilt pattern, then do a little bit of ruler work and hopefully make a start on the binding.
- finish off hand stitching the binding on my panel baby quilt and if weather allows to take some photos
- drop off all the charity quilts and pick up some new quilts to finish off
- continue plugging away at knitting the sock.

That's probably enough for the week

Linking up to To Do Tuesday #23 over at Quilt Schmilt

Karin

Sunday 4 June 2023

Edge-to-Edge Quilting

I finished my little panel quilt. 

It's busy enough, so I just put a sashing and border around it. Very cute! Felt like an allover design and started looking at edge-to-edge designs at Urban Elementz. Of course I found something straight away...could not resist.
A new design from Hermione Agee called Lorien's Festival. It is a 6.5in wide pattern which is a good size for doing it on the sitdown longarm. When looking for designs that I can do on the Bernina Q20 I do look for designs that are nice and open given that I am quilting it using Golden Threads paper which will have to come out when finished. While I do not mind taking the paper out it is obviously easier to have bigger shapes that come out readily and with relatively little effort. When you purchase the pattern you download this one page and then print as many as you require sticking them together with tape to make a row.

When quilting this it is definitely an advantage to have a lot of space
As you can see I can spread out my quilt over the entire surface quilting it going from left to right without having to crunch up anything. The paper is secured with 'sticky dots' and also some pins so that there is no shifting. Can you do this on a DSM? I think you can, however it would necessitate you having a flat surface and you would need to quilt it vertically because of the orientation of the DSM having the majority of your quilt in your lap as you start. Now I have to admit I have never tried this, however I would imagine that that is quite fiddly (mind you, not impossible). Having said that though I do think you can quilt smaller pieces like table runners and borders with this method without any problems.

The design was easy to stitch out
I do trace every row, however you can trace just one row and then put up to eight rows behind it and stitch through the paper without thread to get multiple rows stenciled. I have done this before and it works ok, however I prefer to trace every row. While tedious and by the eights or ninths row you are absolutely sick of it, it does prepare you well for the quilting as the design starts to commit to muscle memory which makes for better results. This design in particular flowed really well and it took no time at all to get the hang of it. In stitching this you follow the lines however you will never be totally spot on. My hands are about as big as the design, so when quilting within the span of your hand you swing out at times as you gather speed. The trick with this is in the alignment of the rows. I rarely align on the row that I stitched. While I do look how I stitched the row and align my points as best as I can, the alignment happens on the faint bottom row. When I get a new row, that bottom row has to align perfectly with the row to be stitched which will ensure that you keep your design nice and straight as you make your way down the quilt. 

Love doing this. While a bit more work intensive I find this very relaxing. Don't have to think much, just follow the lines, then I sit there quietly taking some of the paper out after each row, leaving the bottom row in place for the next row. Quilting the row literally takes only a few minutes. I use the stitch regulator of the Bernina Q20 for this task, so my stitches always look fabulous which makes for very relaxed stitching.

Finished this yesterday...I did spread this over two days mainly because of the tracing of the design. Usually I trace two or three rows, then quilt them, and then trace again.

Turned out lovely...a busy little quilt for busy little people.

Always like looking at the back

Now I just have to do the binding...have a fun striped fabric that I might use and then this quilt will go into the Etsy shop.

On to the next project...

Karin

Popular Posts