Here we are again...another week has gone!
My goals from last week were:
📌Make a sleeve for the show quilt ✖
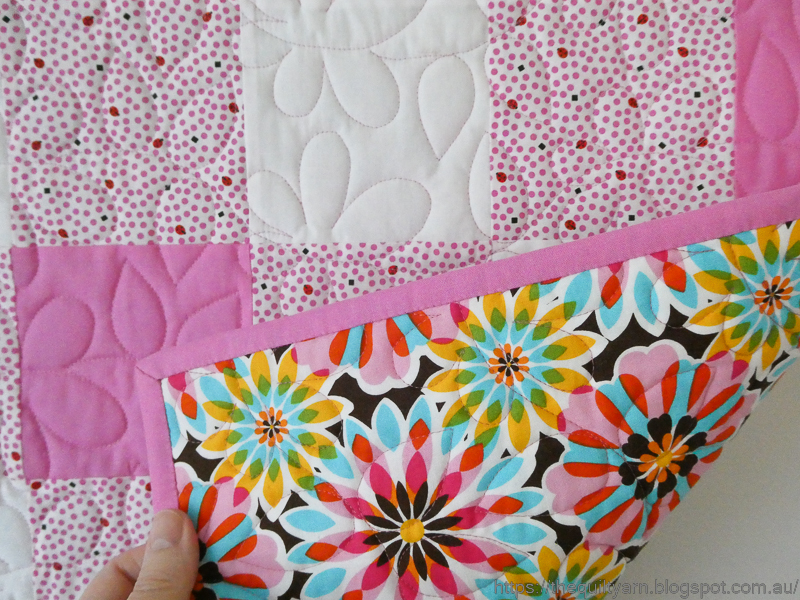
📌Finish the feather quilting in the rose quilt above ✔
📌Baste another charity quilt ✖
📌Design a Mini Wholecloth for another workshop or at the very least have started that process (have about 3 weeks to do this). ✖
This past week I worked on just one thing on and off, i.e. finishing the Rose charity quilt. The busyness really has not slowed down at all, so I am fitting the quilting in where I can.
When I first saw it, I thought that this would be perfect to practice quilting a feather wreath or similar freehand. I did an online feather class with Bethanne Nemesh earlier in the year and that was one of the first things we did. While I could do it, the beginning and ending of the wreath were always a bit of a hit and miss situation freehand, so I undertook to look a bit closer at how I could build in some sort of scaffolding to make that appear more consistent as the wreath
on this quilt would be centre stage.
So I starting practising a bit...amazing what I found in my sewing room. I once bought a Westalee Design kit at a quilt show many years ago consisting of a wad of design grids out of paper and an acrylic square with the crosshair lines marked in. Have looked at this over the years and actually almost threw it out some time ago. Well, this became incredibly handy for this task.
Placed the acrylic square over the grid paper, lining up the crosshair lines with the paper underneath and just started drawing with a whiteboard marker on the acrylic square.
First one: did not like the inside and decided to make that circle guideline larger
...another one: better, but odd shapes on the inside
...and another one (and several others after that)
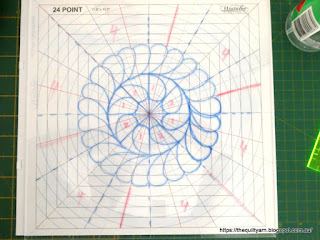
Tried to achieve some sort of consistency where I could use some of the lines as guidelines when quilting. This one above was actually not too bad and I could have oriented myself on the red lines, i.e. drawn those lines in in addition to the crosshairs and aimed for 4 plumes per section. However, comparing this to how I actually quilt my feathers showed a marked difference. I have quilted feathers for quite a long time and like with everything you develop your particular way of stitching feathers, i.e. I will stitch them at a particular angle and height/width in a mostly consistent manner. When I placed the picture above over a practice wreath I had stitched out earlier you could see the difference, i.e. my plumes were a little bit smaller in width, hence my nicely worked out picture above would likely not be replicated on the quilt. I likely would start quilting and not be able to keep to the guidelines set and end up with the last feather being weirdly squished in. If I was doing a quilt with several wreaths or where they were maybe not as prominent (i.e. matching thread) I would not have worried about it as much. In this quilt however, with the one wreath in contrasting thread, that is really the first thing you see, so it had to be somewhat consistent.
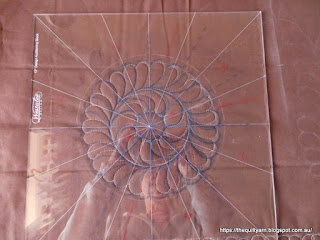
So, I needed to think of some additional scaffolding that I needed to build in. Had a look at my feathers again and saw that the rounded top corresponded to an approximate 5 cent piece, so put that into my drawing and that seemed to do the trick in terms of avoiding that awkward odd shape that you get at the end when closing your wreath. So I tried that with just the normal crosshair lines and the rounded tops marked in (a little bit of fudging here and there to fit them neatly in the space was needed but nothing too drastic). Marked my starting point which was on the 45 degree line on the right and off I went...
Tada...that worked well
Now it was time to go onto the quilt...fearless and confident! It's amazing how nervous one gets even after all those years. But I really did not want to do this several times, so one go it was!
Happy with that...maybe ever so slightly longer on one side (I swear I kept to my outside guideline!). Could also be the photo or maybe my angle in the plumes was slightly different as I went around.... but in any case I am not a computer and it is looking consistent enough.
Then came the setting triangles. Again, did not want to fuss too long around this and chose a very simple design which needed a curve (did this with one of Bethanne Nemesh' Lily Line rulers) and the eight shape marked in. For the markings on this quilt I used a Bohin pencil...I find that the chalk comes out easiest...you just brush it off and it's gone.
This is how that turned out
And finally, the center of the quilt all done
None of this is exact or absolutely consistent for that matter, but overall it reads consistent which is what I was aiming for. Very simple, clean look about it. In terms of time, this took me one afternoon to complete. Once I had my scaffolding worked out, it was rather easy going, just following my markings on the wreath and in the triangles I was aiming for the same amount of feathers on the curve which was not that difficult as I quilt them the same over and over again. Overall really happy with my efforts and keen to try other things that we learned in that online class.
So what's on my goal list for next week...pretty much everything that was on my list the week before😄
📌Make a sleeve for the show quilt
📌Finish the charity rose quilt above (thinking of just putting some small feather border in the black space, attach the binding and it's done)
📌Baste another charity quilt
📌Do some work on designing a Mini Wholecloth for another workshop (have about 3 weeks to do this).


-001.jpg)


