My machine, a Pfaff Quilt Expression 4.0 had to go for a service as I had a certain clunking noise again when FMQ. While I was at the shop I checked out the Pfaff Expression 4.2 that came out last year.
Well, I ended up trading my machine in for the new model as I already had been thinking about an upgrade. At first I dismissed the new machine as it really did not look any different (except for the colour) to what I already had. However, I had some time and discussed it at the shop and got a bit of a run down on the improvements which are mainly internal improvements.
 |
| Pfaff Quilt Expression 4.2 |
To digress a bit...this is my third Pfaff machine. I learned to quilt and FMQ on the Pfaff Classic Style Quilt 2027. This was a very simple machine with basic stitches and very basic functions. Despite the lack of bells and whistles I liked that machine. As I got more and more into FMQ I realised of course, that certain additional functions such as Needle Up/Down, Speed Control and FMQ modes would be an advantage and eventually upgraded to the Pfaff Quilt Expression 4.0. Now that machine had all the bells and whistles (and more) and I remember being initially quite overwhelmed with this. Well, I obviously got acquainted with all of those functions and quite frankly would not want to be without some of them like the throat space, Needle Up/Down function, the Auto Lift and also the ease of the FMQ modes.
I don't want to slag the Pfaff 4.0...it is a good machine for quilting. And I do want to stress that these are my personal opinions and experiences. When I first got the Pfaff 4.0, I did notice and commented that it was somewhat temperamental, particularly when FMQ. In retrospect I realise that temperamental was actually the wrong word to use. One thing that Pfaff is known for is its precision and I soon realised that my Pfaff 4.0 was very precise. For that machine I had to learn the relationship between size of needle and weight of the thread...after some exploration I found the answers in Hariett Hargraves' book
Heirloom Quilting...a whole chapter on threads and needles. That was a bit of a turning point for me and observing how size of needle relates to the weight of the thread used made my Pfaff 4.0 very happy. Since that time I have not had any tension problems or any other thread hassles for that matter when FMQ. However, I did notice very early on that the machine produced some irregularities in stitching when going through the 3 layers of a quilt, particularly when attaching the binding. Initially I thought that this had to do with something I was doing, but I have since read that this has to do with the feed of the machine. This is not a huge problem and you probably only notice once you have been quilting for a while. I did not have some of the other reported problems like struggling to go over multiple seams or thread nests when starting off at a seam. What has been a problem though was that my machine has twice produced a very alarming mechanical clunking noise inside during FMQ and needed to go for repairs. While the stitch quality or running of the machine was not affected that noise definitely did not sound healthy and I did not want to risk damaging the machine. Another feature that was starting to present difficulties was its lighting. It had dual normal light bulbs and I started to have issues with seeing my stitching, particularly on very dark fabric when using a blend in thread. On one of my last projects I had to use my Ott-Light and lay it down on the quilt behind the needle to actually see where I was going when microstippling. Now this was a hassle.
The new Pfaff 4.2 appears basically the same machine and the major differences on first glance were that its appearance had changed (the whole front of the machine is now in a maroon colour, including the buttons, it has upgraded to 3 LED lights, 254 stitches instead of 222, a start/stop button, a new FMQ option which uses a Dynamic Spring Foot (optional accessory) and a new feed system (Optimized Box feed). Now, the latter was what I was particularly interested in and spent some time discussing with the technician who services these machines at the shop.
If you are in the market for a new machine and want a run down on all of its features, there is an excellent
YouTube video by Village Sewing on the net which gives a very detailed introduction to the machine.
Anyway, I did take the Pfaff 4.2 for a test drive at my local shop to have a look at some of the differences. I read somewhere that 95% of people who go for an upgrade usually stick to the brand that they know. Certainly true I think, but even more important I reckon is the service you receive at your dealer. I have been very fortunate in the dealer that I am using...great service, advice and most importantly, trust. Being a regular customer, I was able to just play with the machine by myself for some time and the following is a bit of a rundown on what I found. This list is not going to address all of the features of the machine...
- I was actually quite happy that they did not change its dimension or general appearance. This means that I can use all of my accessories that I have purchased over the years for the new machine. And bonus, I am by now very familiar with all its functions.
- the 3 LED lights definitely made a lot of difference ...such a relief for the old eyes.
- the first thing I noticed was its sound. I am an avid FMQ and rely heavily on the sound of the machine. I have no specific word for the Pfaff 4.0 but on switching the Pfaff 4.2 on and stitching a few lines I thought that this machine was positively purring. Not sure whether this is due to the new feed system or just because the machine is new but noticeably different.
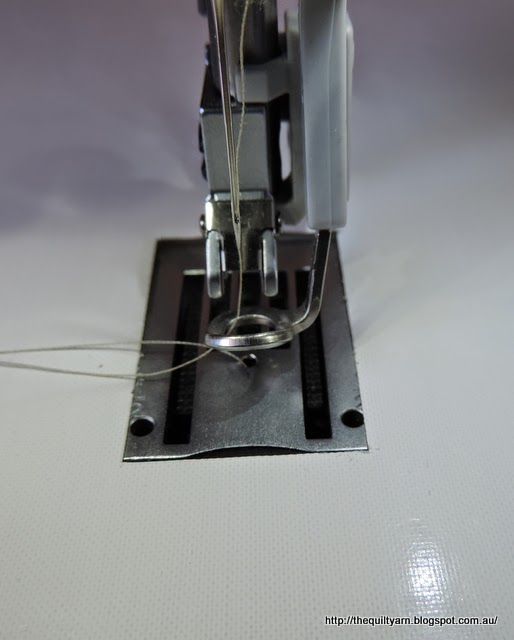
- stitching: I stitched a few lines both on Stitch 1 which is used for normal sewing and Stitch 52 which is used for quilting through your 3 layers of quilt. I tried the tie off on both stitches and there I had my first surprise. The tie off on Stitch 52 (which is different from Stitch 1 and is specifically designed for quilting giving it a very neat and tidy start and finish at a line) did not work that well on my Pfaff 4.0. I tried it a couple of times when I first got the machine but found that it was not secure enough...when tugging at the thread it often came out altogether, so I stopped using it). On this machine the tie off is very secure...being surprised, I tried it a number of times and no matter how I fiddled and tugged that baby was tight. So I reckon I will start using this again because it is a really neat feature.
- 254 stitches: I must admit that I did not try out the new stitches in the shop. Pfaff is known for its beautiful decorative stitches and this is not a major draw card for me even though I promise myself every year that I am going to use them more. I have used the decorative stitches on my Pfaff 4.0 and they are absolutely stunning...you have great variety, 9 mm stitches, 3 alphabets and then there is the tapering function...
Here is an example of what it can do
This was a little make-up bag project that I downloaded from the Pfaff website when I first got the Pfaff 4.0. Amazing fun to make and took me through the tapering function. BTW, the Pfaff website has some really nice sewing projects on its site that are free to download.
In terms of the stitches, they added a few more decorative stitches here and there, but of interest was that they also improved on their
Handlook quilting stitches (both in the manual in terms of explanation as well as on the machine in the setting). I noticed that some of the Handlook stitches appear to be repeated but on closer look they have now included a number of stitches at the end with different settings. Now this might be useful...I did try the Handlook stitches on the Pfaff 4.0 and could not get the setting right so I will try this out a bit later down the track.
- next I tried the start/stop button...what a hoot! Should you ever try this in a shop make sure you set your speed to slow as my machine was set to full speed and the machine just went off...you basically just press the button for the machine to go...no foot control needed. I tried this again at home and I must say this is most useful when using your decorative stitches as you can fully concentrate on keeping the stitch and fabric straight. I like this and think that this is very handy.
- Dynamic Spring foot: now it was getting interesting...

- the manual says that the Dynamic Spring foot measures the fabric thickness and will raise and lower with each stitch to hold the fabric on the needle plate while the stitch is being formed. I have long been waiting for them to bring out a round metal FMQ foot. For my Pfaff 4.0 I mainly used the open FMQ Spring foot...I am used to that foot and it provides the greatest control when FMQ. The hassle with that one is its shape...it is a clear, square foot which makes echoing around shapes at a consistent distance a bit difficult. Over the years I had to become very good at eyeballing distances but I often wished that I had one of those round feet. I have an optional extra, the sensormatic Echoing foot (have a look at a previous post re this foot HERE) which is great if you need to do echoing over a larger distance, however it does require you to dismantle the shank of your machine ( not something that you are going to do for just sewing around something unless you got a sizable area to quilt with echos.) The Dynamic foot is great...it quilts just like my other FMQ spring foot but takes the eyeballing out of the equation. Very happy with that. The foot also a little groove in the pin where it attaches to the machine, so it will not move at all during FMQ. This is clever, I think...the upper part of my other plastic Springloaded foot recently just fell off and I think that this was due to the hours upon hours of use and I would imagine that there is that tiny amount of movement in that pin. As the Pfaff 4.0, the Pfaff 4.2 has the additional Sensormatic FMQ mode which is good for faster type designs like stippling. So altogether now the Pfaff 4.2 has 3 different FMQ modes...Dynamic, Springloaded and Sensormatic.
- internal improvements: unfortunately I am not able to explain the internal workings of the machines as I am obviously not a technician. This is where trust comes into the equation. My understanding from my talk to the technician is that they replaced the feed of the Pfaff 4.0 to address (what I had already noticed) the irregularity in the feed when quilting through several layers. He did explain to me how this looked like inside and how it worked, however I would struggle to describe this, not ever having seen the inside of the machines. In addition, they apparently made several minor adjustments in the internal workings and parts of the machine. Interestingly, my clunking noise in the Pfaff 4.0 was connected to its feed. Through my sustained FMQ some of the adjustments in the feed went out of sink and hence made this unhappy major noise. Not a huge issue, however, each time it happened, obviously needed fixing.
So, sorry, this got a bit long, but overall first impression is very positive. I am planning to report back with some more pictures on the new foot and the stitching and of course, once I have gone through an entire quilt.
I am linking up to Lorna's
Let's Bee Social over at Sew Fresh Quilts. (Still need to put her button on the sidebar...will get there eventually), hoping that people find this useful, particularly for those that might be in the market for an upgrade or even new machine.
Karin