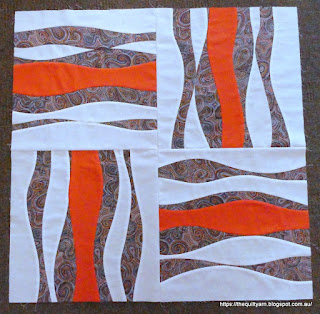
I have been plugging away at my curvy piecing over Christmas in readiness for Bethanne Nemesh' 'Breaking Boundaries' class which begins in February.
Finished this one in screaming colours
...and then made a start on this one
Love the colours of this one, particularly the Aboriginal fabric. The fabric is made from a painting by Warlukurlangu artist Pauline Napangardi. When I saw it in the shop I straight away knew that this was the perfect fabric for this project.Well, this piece is supposed to have also borders with curves in it. So I made this too, however stuffed it up when trying to cut them to size as they were slightly bowed out. The more I tried, the more width I lost, so in the end I decided to make new borders rather than continue to muck around with it.
This is still in the process of happening...
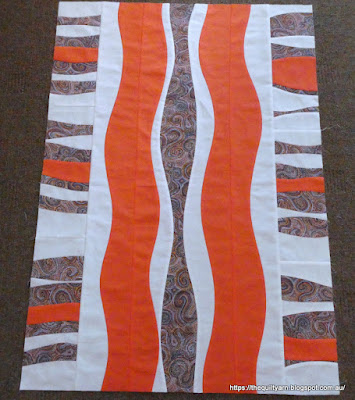
In the meantime, I started another one...just because! I now had four wonky borders left, a test block and a number of pieces of cut offs from the blocks above as well as one strip of the fabulous designer fabric. So, as usual, stopped halfway through the project above and did some improvisational piecing of my own. First, I spent about a whole afternoon straightening those wonky borders. I 'borrowed' a brand new 90 degree tool from my husband's workshop and used that to straighten one end and once I had at least one straight edge, I carefully started to straighten out the other edge. Also, starched the borders before this adventure to have a bit more control over the curvy borders. This took absolute ages to do but I really wanted to see whether I could pull this off. Once I done this I then used the Aboriginal designer fabric as a curvy center strip working with the tiniest of margins when cutting it. I really wanted to use this up and strangely enough this did work out. I then attached the bitses and pieces that were left over and tada...
Love how this turned out. Maybe it could have used a bit more planning but I don't know, that seems to defeat the purpose of improvisational piecing a bit. This sort of just evolved, the longer I stayed with it, the more of an image formed...I did change the sides a bit from the way I had originally attached them, shortening some so I had enough white fabric left on each side. Did not think that through beforehand, as I needed to shorten the whole center section a bit. Throughout the process of putting this together, I almost treated this like some fragile commodity (just about everything was wavy and the success or failure depended on how well I would keep this straight)...starching it as I went along, checking continually for straightness and in general being super careful not to stretch this inadvertently out of shape. Happy to say that my little quilt center (it's about 25 x 36in) is perfectly straight down to 1/16 of an inch. Initially I was just going to attach an orange border and be done with it and use it for additional FMQ practice for the class in February, but I trialed the wavy borders around this one and that would look truly spectacular, so for the moment I am sitting on the fence. That would mean making more wavy borders (I have done 8 so far) and I am not sure how I will go with mitering them in the corners.
Decided to go back to the second project to finish the borders with their mitre in the corner and see how I go with that. If I manage that alright, I might make another set of wavy borders for my improvisational piece. This is all going to be filled with FMQ fillers...can't wait, this will be great!
But here we go...the year has just started and I am already doing what I always do, i.e. getting side tracked and just starting something else (when I still have to finish another two of Bethanne quilts on top of all the other things that are on the list).
Karin


Your third piece is my favorite of your curvy piecing! What great fabrics!
ReplyDeleteLovely, but oh those curves look challenging. I hope you are learning loads of tips and tricks, as well as having fun.
ReplyDelete