As I am in a bit of a hurry I again used the Cloud Nine design by Patricia E. Ritter that I purchased as a self print design from Urban Elementz a few weeks earlier. I printed several pages of the design and then stuck it together to form one row to fit my quilt.


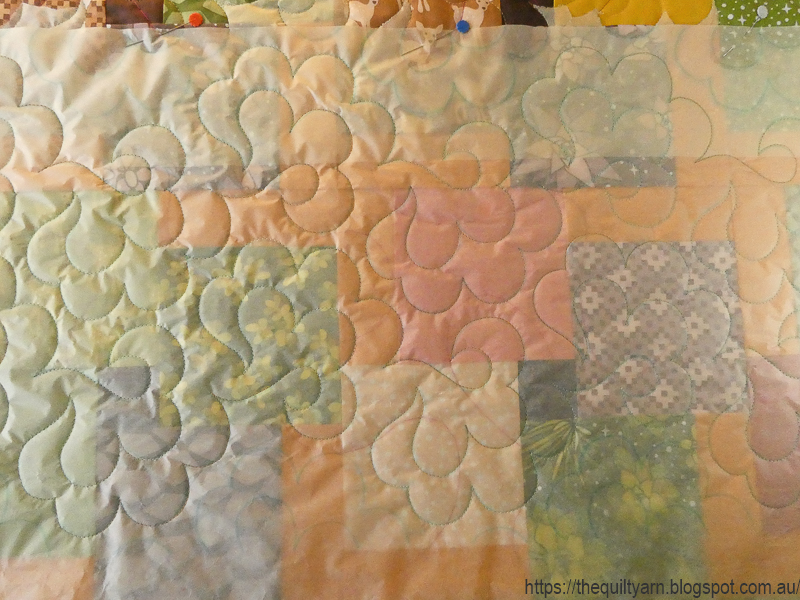
Here is the first row stitched out. I am quilting this on the sitdown Bernina Q20, using the stitch regulator (BSR1) set at 9 stitches per inch. The BSR1 is the mode where the machine keeps stitching at a pre-determined speed even if you do not move the fabric anymore which means that when you stitch along in stitch regulation and come to a point where you momentarily stop to change direction it will take one or two stitches before you take off again which gives you a very crisp point. For the thread I used my trusted Aurifil 50/2 weight in a variegated orange colour, this time teamed with a prewound (Decobob). Quilting out the rows is incredibly quick...the design is a bit over 7in so you do quilt this in bigger sweeping movements which is easy to do with the stitch regulator (and a lot of fun!).

I suppose you could leave the paper in, but I got used to taking it out row by row, so that I can see what I am doing. In terms of taking the paper out though, I do leave the part where the next row is (in light grey on the design which I also traced on) on the quilt because that serves for the alignment of the next row where the first and next row overlap. While I do check how my stitched row aligns, there will always be differences because once you get going you may not always stitch directly on the line, hence the traced beginning of the next row is the more important one for the next alignment.

Now for the big experiment...the stitched through rows. Wondered how that would go.

As you would have noticed I only stitch one row at a time, however as I came to the bottom this time I did try stitching two traced rows in one hit.
Anyway, finished this today and am quite happy with how this turned out. A few little inaccuracies did creep in here and there, but that is to be expected with this method. The paper can shift a bit, you start to loose it a bit in terms of following your lines...mind you, some of that you can see as you stitch in the overlapped region and you can even that out a bit as you go along, particularly if you know the design well. I also check on my alignment as I quilt over the seams making a note where a particular element sits in relation to the seam. That lets me know how straight my row is. Again, it will not be a hundred percent but it should be similar as you move across your quilt.
The finished product
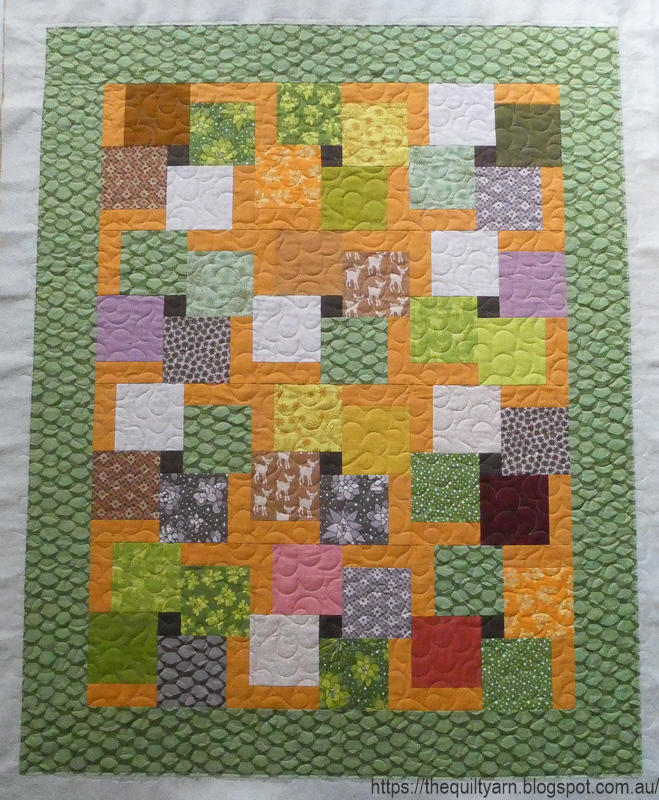


I quilted this over 2 days and I would say, all in all it took me about 6 hours. A bit more effort however I do like the look of edge to edge designs. The only limitation is that I have to choose simpler, more open designs being mindful that I have to take the paper out. While it comes out easily it does get stuck in points and tight spaces, so you want to choose a design that has bigger distinct shapes to make your life easier.
Now, the binding and then I am back to my Background Filler project.
Karin


Thanks for sharing this. I am always curious how everyone tackles the quilting on larger quilts. Your tips are quite useful!
ReplyDelete