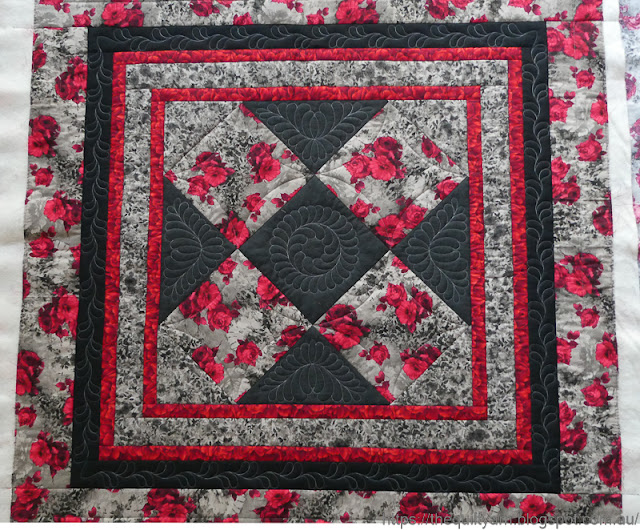
As you may have seen in a previous post, I quilted some feathers in the main dark grey areas of the centre of the quilt. Now I only had the black sashing left. The sashing was only 2in which presented a bit of a challenge as I did want some feathers in there as well. My initial thought was to go around with just a single row of feathers, however that proved too messy as I would have had my 'imagined spine' on the high side of the ditch and with grey thread that was not going to look any good.
Came up with this other idea...an older, more playful design which I had done some years ago involving a wavy line on which you travel putting in some feathers as you go.
Something like this
Hard to see but I decided to use the Handiquilter Wiggly Wave ruler to put the wavy line in. Well, that took a bit longer as I had to work out the corners, i.e. first what sort of shaping did I want in there and how was I going to achieve that with the ruler. Good exercise in really getting to know your ruler. In the end I started drawing from the middle out, stopping 1-3/4in from each corner, shifting the ruler slightly over to achieve the same look on all four cornersI first stitched out my wavy line with the ruler all around the quilt and then started my feathering...Why did I stitch out my wavy line first? I made a little diagram to show you the difference in stitching path doing a continuous feather.I stitched according to the first picture moving over my stitched wavy path. The areas where I had to overstitch (backtrack) are highlighted in purple. In one wave I only have two spots were I need to go over a previously stitched line. While you may have some wobbles here and there, the overall impression is one of consistency as the wavy line, of course, is stitched out neatly with a ruler.Comparing this to the picture No 2 where you would stitch the wavy line as you go. As you can see there is an enormous amount of going backwards and forwards...you start off doing your first plume, then need to backtrack over that to do the second plume, then stitch backwards to make the wavy line and backtrack back over it to continue the wave. While this absolutely can be done this way, I felt that this was way too intensive with the backtracking. Even if I had used a 'bump back' feather there still would have been a fair amount of backtracking.
Happy with how this turned out.
I stitched one side at a time, breaking thread before each corner. While I could have stitched on over my corner to the next side, I decided not to do that as my corners looked surprisingly pristine, so I did not want to mess that up.Well, here is the finished quilt
Finished the binding and label today and now it's on to the next one.
Karin


-001.jpg)


That border turned out perfect and it's a beautiful finish overall!
ReplyDeleteThat border turned out perfectly and it's a beautiful finish overall! If I could quilt freehand feathers like you, I'd turn my computer off a lot more often!
ReplyDelete