Showing posts with label Anything Goes Linky Party at Stitch by Stitch. Show all posts

Tuesday, 16 December 2014

Things Are Taking Shape

Making some headway in planning out my projects for the new year.

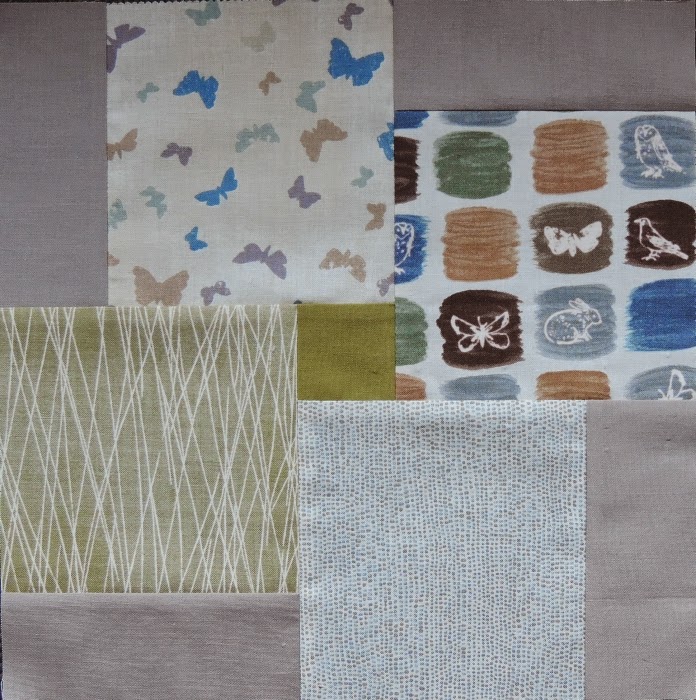
Continued with my new design that will use up 2 packs of my Charm Squares
This block measures 10.5in and will show off those beautiful Moda  (A Field Guide) Charm squares.


Then I made a serious start on that baby quilt that has been sitting around mostly cut up and ready to go. It's really just a matter of putting this together.
Ran out of that particular white fabric and will have to substitute with some other white fabric from my stash. I am not buying new fabric.

Also, did some blissful cutting with the Accuquilt GO cutter one evening beginning to cut up some of the bigger leftovers.
This is the 4 1/4in (finished size) equilateral triangle. Purchased this at the last quilt show and only now got around to actually trying this out. I have a serious stash problem as I am somewhat a tad obsessive in keeping leftovers. Some are sorted into a shoe box full of strings (for another string quilt UFO) but there are also the bigger leftovers and it is becoming a little bit ridiculous to hold on to that. So I started cutting...this was a lot of fun and naturally goes quite quickly with the GO cutter...I have got about 100 triangles there to start off with...the die comes with these niffy little notches to line up the squares which will make it easier when sewing them together. I am planning a Thousand Pyramid quilt out of scraps...not sure about size, but I am thinking single bed size would be great although I dare say, I would have enough for a King size quilt).

Also have been Ebay shopping lately for some of the things that are not readily available around town.

Look what's arrived today

Hobbs Tuscany 100% Wool batting.
This is an end of bolt piece that I acquired at a reasonable price (even with postage) at Ozquilts in Victoria. The piece measures 66in x 48in...I have not had this batting before and I must say this is gorgeous...soft and luxurious...very excited to try this out.
Planning a Wholecloth quilt with this following Cindy Needham's Craftsy class on Wholecloth quilts. I am planning to mark the design onto the fabric over Christmas as this will be a fairly labour intensive process.

Anyway, that's all from me today.

Linking up to the last link-up of the year at Anything Goes Linky Party at Stitch by Stitch. Today's link-up is hosted by Allison at Babco Unlimited.
A big thank you to Marelize for holding the link up over the year. The link up will resume on Monday 5 January 2015. It has been a lot of fun to keep up with what people have been doing and to discover new blogs in the process.

Karin

Tuesday, 9 December 2014

New Design

Here is what I started working on.


I bought 2 Charm packs a while ago - A Field Guide by Janet Clare for Moda. Beautiful! Played with design for a while and settled on the above. I wanted something a bit different where the beautiful squares would take center stage. This ended up with a partial seam which is easy enough to do, just requires a bit of care when putting it together. These colours are a bit out of my comfort zone...all fairly pale, sandy type colours, so it should be interesting how I go with that.

Apart from that I keep missing all my usual link-ups as the busyness of the season has taken over. I am also spending a lot of time on the computer...planning, learning, looking for stuff...

Invested in some great Craftsy classes in line with my goals for next year which again center around FMQ. Bought Cindy Needham's classes in the recent sales, Machine Quilting Wholecloth Quilts and Design It, Quilt It, another FMQ class. If you never looked at an online class, I can highly recommend them. The classes are well structured, separated into lessons which last on average about 20-30 minutes. You can stop your class, repeat sections, jump around through different lessons. This works really well for me and while I can FMQ, there are so many tips that one picks from this whether it be the materials/threads used, resources or simply a particular way of doing a design. Very informative and easy to digest and best of all you can go back any time and re-visit a particular lesson. There are many great classes on there and during the sale I had to really restrain myself from buying more...these two will keep me busy for hours.

I am planning to do another Wholecloth, probably using the example that Cindy Needham used in her lesson. Already printed the main design out, bought some inexpensive white fabric and am waiting for a bit of downtime when I can mark the design on the fabric...can't wait, this will be great!

Apart from this will have to do some planning around my projects (and UFOs), as I have about five new quilts in my head and it is starting to get somewhat crowded in there...definitely need a bit of a plan of attack. Will sit down over X-mas to tackle this...don't know about you but I have got several projects already sitting there, all cut up ready to go...and still, here I am starting a new thing.

Belated link-up to Anything Goes Linky Party at Stitch by Stitch

...and also to Fabric Tuesday over at Quilt Story

Anyway, happy quilting

Karin

Monday, 27 October 2014

WIP: 99 Hexagons

Basted my 99 hexagon quilt.

Had some trouble finding a suitable backing. Initially I was going to match the yellow, but that turned out too hard...too many shades of yellow and the ones that are in this fabric are quite distinctive.


I found this white one with the black floral...while a bit busy when placed together like below, I thought it suited this little quilt perfectly


As you can see I pinned this very tightly, in fact I put a pin into every single hexagon. As I am not going to use the walking foot to secure any seams, I did not want to risk the layers shifting. I am thinking of simply quilting curved lines that go from point to point in each hexagon, then jazzing it up a notch and quilting a simple flower design in the black hexagons. No ideas re the outside borders as yet...really struggle with that each and every time.

Will I need to mark this?  Not sure yet, I am hoping that I can just eyeball this, but we shall see.

Linking up to Anything Goes Linky Party at Stitch by Stitch.

Until next time, hopefully with a completed quilt.

Karin

Wednesday, 22 October 2014

The Challenge

My friend and I have been going to our Guild meetings over the last few months. Not entirely sure why I have never gone before - laziness comes to mind. Anyway, the meetings have been a lot of fun.

At the first meeting they had a presentation about batiks which was very interesting and informative. The shop that presented was the Whyte House Gallery which is located in Victor Habor. At the end of the talk the presenter handed out some samples for people who had never worked with batik to take away...just a few slithers of fabric. Each got about 3 - 4 pieces of approximately 4" x 6" of beautiful batik.

Looking at this fabric and talking about it, we decided to set ourselves a bit of a challenge, initially to do something small but then it became using those little pieces to produce something useful. I found a pattern for a little purse in one of the library books that I had borrowed from the Guild (Susan Briscoe - 21 terrific patchwork bags). Looked easy enough and small enough to just whip up...the purse was constructed via foundation piecing which was easy enough. It was then bound (first time I actually made my own bias binding- thoroughly enjoyed that) and folded and the zipper sewn in by hand, as was the lining. I think I enjoyed it up to the zipper part. Not being that cluey about zippers and bags in general, this was a bit of a struggle, however by then fierce competition had set in and I was determined to finish it.

Here it is...the Fan Purse in glorious batiks (about 9" in diameter)

The Fan Purse - pattern found in Susan Briscoe's book - 21 terrific patchwork bags

Black lining to match the binding

Hand-sewn zipper - I am so impressed!

Simple quilting lines- this could be embellished with some decorative stitching


Used up every little bit of fabric that I had from those batik samples. Pity that I did not take a picture of those pieces...it is amazing what one get get out a few pieces.

I am going to use this as a pencil holder...just the right size. Might just have to do another one. I have got some fat quarters of beautiful Japanese type print.

Linking up to Anything Goes Linky Party at Stitch by Stitch and Let's Bee Social Linky Party.

Karin

Monday, 22 September 2014

WIP: Plus Quilt top

Some progress...finally got the basting done. Always a major job as I am doing it on the floor which is very uncomfortable to say the least.


Now onto the quilting...my favourite part! I am thinking of an allover design, maybe something swirly or maybe an allover flower design. Not sure yet, too many choices

Linking up to Anything Goes Linky Party at Stitch by Stitch

Karin

Monday, 1 September 2014

Batting - Is There A Back and Front?

I knew it!...there is indeed a front and a back to batting. Had read about this before but could never remember how to apply this. As I have some issues with bearding from time to time, I researched this a little bit the other day. Found this great description at the  APQS blog

So started looking at the samples that I had, putting the side that I identified as the right side, i.e. facing your quilt top on the left side of the photo.

Bamboo batting

Cotton batting
 Initially I tried to look for the small needle holes that would be evident from needle punching...not that easy to see in the bamboo batting. According to the APQS blog, the small holes reveal the right side of the batting and you want to have your needle go into the batting in the same way that it was needle punched.

This visual inspection was easier for the cotton pieces that I had, but for the bamboo I struggled. I did read on another blog that you can test this with a sewing machine needle. The needle will go through the right side more easily than the wrong side. Was a bit skeptical of this but when I tried, there was definite resistance when I tried to push the needle through the wrong side as opposed to the right side. So, this will from now on be the method I am using to try to determine which way to place the batting.
I am pretty sure that my recent experiences with bearding had to do with me placing the batting the wrong side around, because I had it one quilt but not the other, probably placing it the right way by coincidence.

Linking up to  Anything Goes Linky Party at Stitch by Stitch

Karin

Monday, 11 August 2014

Chicken Quilt Finish

Finished my little Chicken quilt today

Material: Leftover scraps from other projects most notably the chicken print I bought in 2006/2007. This is the last of the chicken print and as you can see I was not able to fussy-cut the chickens anymore but just had to make do with what was left over.
The sunflower print was bought on impulse some years ago and this turned out just the right project for it. Fitted the little country quilt perfectly in colour and theme.
Size: 39" x 45"
Quilting: Grid design over the center of the quilt, decorative stitch in the sashing, wishbone design in the inner red border and a meander with variegated thread in the outer border
Threads: Aurifil 40/2 for the grid, decorative stitch and the meander in the border. The wishbone design was quilted with red Aurifil 50/2.

Very happy with this...did not have to buy anything new for this! Managed to use up pieces of batting by joining them with some batting tape and also pieced the backing together using horizontal strips of green, sunflower and yellow fabric.


Detail of the grid

Wishbone design in inner border on the reverse


The multicoloured back


On to the next WIP...my Plus quilt.

Linking up to Anything Goes Linky Party at Stitch by Stitch

Karin

Monday, 28 July 2014

On With The Show

Continued on my 99 hexagons but have not much to show for ...completed three and a half rows by now and did manage to get into a bit of a rhythm with it. Just a matter of persistently picking it up.

Also continued on my little Chicken quilt (already forgotten what I am calling this). After much deliberation I returned to my original idea of quilting a grid over the squares. Nothing groundbreaking but I think it fits the simple design.


Yep, happy with this...I did this with the walking foot in the end and my trusted masking tape for guidance. This is why I prefer FMQ...forgot how many loose threads one has to sew in. Thankfully this is not a big quilt! Wondering now whether I should FMQ in the sashing or not...not sure whether this would be too much as I am planning to put a FMQ Swirl in the inner red border.

No idea yet what to do with the sunflower border. Any suggestions?

Linking up to Anything Goes Linky Party at Stitch by Stitch


Karin

Monday, 21 July 2014

99 Hexagaons

It's very cold over here which meant that I could not spent that much time in the sewing room. Somehow the heater does not seem to reach that far and the room is seriously cold...not very conducive to FMQ when you are wearing heavy duty Ugg boots!

So I went into the lounge and continued on my hexagons...

I should call this quilt the $2 quilt. I found two packets of charm squares in the sales for only a couple of dollars some time ago and then I also found some matching bigger pieces for the borders for about $6. This will be a very cheap quilt indeed. Continued to cut out the fabric and glued them around my pre-purchased 2" hexagons.


I then laid out the hexagons...99 in total until I was happy with the distribution of colours. Oops, also noticed that I sometimes did not follow the directional fabric. Given the busy nature of the prints, this should not matter that much. Took a photo on the Ipad as a guide for the layout and have started sewing them together. Slow process...I am in my third row!

Linking up to Anything Goes Linky Party at Stitch by Stitch

Karin

Monday, 7 July 2014

Progress on the Feather Border

First of all...thanks for the many comments on my last post about making my own feather stencil. Very much appreciated! Please make sure though that you are not a No Reply blogger...I had a few comments that I could not reply to.

I am making progress on my Whole Cloth quilt. Bit of a slow progress, but progress it is!

The stencil I made with the Golden Threads Quilting paper works great. As it is made from my own drawing the stitching flows nicely even when some of the chalk lines are becoming faint as I am used to the way that I draw them. This left me with a nice and even looking border and the right size for each plume to do some in-lining with a different thread colour later on. None of this is exact...when quilting along, I do not always follow the line exactly, hence the individual plumes on each side are not exact mirror images of each other. They don't really have to be...what counts here is the overall impression of consistency as I stitched them from the middle out. Very happy with the result and slowly will work my way around the border. 


A bit closer - same quilt under different light
Here are some tips for feather quilting:
- when you are drawing feathers, draw them the way you would stitch them...this will instantly show you when something does not flow right and will make it easier when you are stitching them.
- I have found that taking the plunge and putting feathers in borders is one of the best ways to learn. Even if you only do a small project, stitching feathers all around will mean that you are doing the same shape hundreds of times, over and over again...one of the most effective ways to get the shape imprinted on your brain. 
- I do not watch my stitch length, but concentrate more on the shape. With practice in FMQ you will eventually arrive at a stitch length that is right for you
- not every plume will look great...happens all the time. I don't sweat about it, but just keep going, as it will most likely not stand out at all.
- find your most comfortable way of stitching feathers. I use the backtracking method most of the time. When backtracking along the length of the plume I try to aim to stitch directly next to each stitch...the funny part is as I am aiming for that, I usually end up stitching back directly back over each stitch. In contrast, when I try to concentrate to go back in the same stitch, I do anything but that. If you find backtracking too bothersome, leave a little gap...looks just as good.
- I find it easiest to stitch feathers towards me. In this border though, I started in the center, so when I do the plumes to the right side of the center, this is not practical, as I have most of the bulk under the machine. In that case I start off with stitching the plumes away from me and then move slowly but surely to stitching them sideways. Trial and error works best here and I have accepted that this occasionally will lead to some wonky shapes.
- I often stitch feathers without the gloves... it gives me more control over the stitching
- take it slow and get into a rhythm. Feathers is not something you can hurry along ...I set my machine to the slowest speed and keep the speed fairly constant. I rely a lot on the sound of the machine and usually can hear when my rhythm is not right ( this sounds odd, a bit hard to explain).

Linking up to Anything Goes Linky Party at Stitch by Stitch which is hosted today by Diana from Red Delicious Life
Also linking with Amy's Free Motion Quilting Adventures as she is featuring feathers for the month of July.

Karin

Monday, 23 June 2014

Graph Paper Quilt Along 2

After some frustration with my Whole cloth quilt, I spent some time earlier in the week to cut up a whole lot of country fabric and got a bit excited...it actually did make a dent in the stash.

Using up my stash

Love this dandelion fabric
I left them sorted into their colours, put them in little zipper bags, and with a quilt diagram next to the sewing machine started to sew the squares together. So relaxing and calming...just quietly following the quilt diagram.

Making a start

See that little tool next to the quilt diagram...this is my finger pressing helper. As I went through, I pressed the seams with this gadget, so that I did not have to get up at all. I chain pieced my squares together ...squares of several rows at a time, stopped, then put sections of individual rows together, then the row and so forth.

Not getting up to press the seams with the iron made this a very quick process. As I went along I marked any changes in fabric on my quilt diagram to avoid confusion as I sometimes did not have enough pieces to complete the plus (was not quite that organised in cutting up my stash).


Finished it today

Very happy with the outcome. Just need to sew the rows together now. The quilt will measure about 49" x 55" if I do not attach a border.

Linking up to Anything Goes Monday  over at Stitch by Stitch and the Graph Paper Quilt Along at Fabric Mutt

Until next time

Karin

Monday, 9 June 2014

A FMQ Kind of Day

Continued on my Whole Cloth. In fact, I had completed the whole inner border doing a feather scroll design completely freehand earlier in the week. When it was finished I decided that it was too informal and not consistent enough for the formalised style of the quilt, so I took it all out and started again.Yah, I know...crazy

Here it goes...did do this the whole day yesterday.You can see the compaction that the microstippling produced...this worried me a bit
Sewn in spine guide
Design in pink thread
I had the previous version in white which looked too bright...whatever was I thinking with that blueish border. Anyway I decided to use the pink thread, even though that looked fairly bla...then I covered the pink thread with some gold splays to jazz it up a bit and that did the trick.

Splays gold thread

A bit closer
This design is stitched from the bottom up and involves a fair bit of backtracking. Good thing I love doing that...always a bit of a personal challenge to try to go back in the same holes that you stitched before. Manage this by now about 50% of the time. However, the design is a bit tricky because at my machine the visibility ahead is a bit poor at times. Last time I did this I ended up with sometimes two, and sometimes three plumes because I could not estimate the space ahead. Worked hard this time to avoid this.
The completed design

What do you think?


And then there is the back

I actually think I should start showing my quilts from the back...just love the look of this.

Linking up to Anything Goes Mondays at Stitch by Stitch.

Karin

Monday, 2 June 2014

Anything Goes Linky Party

stitch by stitch


I am thrilled and honored to host Marelize's Anything Goes Mondays Linky Party today. Marelize's blog, Stitch by Stitch, contains some amazingly beautiful work...I particularly like her freemotion quilting that she showcases throughout her blog. I have pretty much participated in the linky from its beginning...as it says, anything goes, which makes it very easy to link up, particularly if you are like me and keep swapping from one project to the next.

Anyway, welcome to my little part of the web. I hope you have a bit of a look around, stay for a while and come back often. I have been quilting since 2006 and blogging for about 2 years. I love all things quilting, however over the years FMQ has become my real passion (obsession!). When I am not quilting, I love to design quilts and have started to put some of my patterns up on Craftsy. You can find my pattern store HERE or just have a quick look at the Craftsy button on the right sidebar.

I am currently in the midst of what I call my stash reduction mission and am working on the following projects:

My Spiderweb block quilt: have over 40 triangles finished and need to make about a 100 more...I am aiming for a bed sized quilt...slightly overwhelming at the moment, but I am determined to just keep going
If you are interested in making one of these, have a look at my tutorial

The little Country quilt: made out of leftover scraps, cut into squares
Ready to be quilted. Waiting for a FMQ ruler that I ordered from the US.

And then there is my FMQ project: this has been on hold for a while after the enormous area of microstippling. Have two more borders to do and am starting to get restless, itching to continue on this project.

And then my husband asked me for a baby quilt for an acquaintance the other day...so I designed this little beauty out of very little fabric (had a few Fat Quarters of some Brights fabric that I won some time ago), still going with my determination not to purchase any new fabric.

This is so cute!


Now it is your turn to share with us what you have been busy with

Rules:
1. Link up ANY recent blog posts, it can be one or more, but PLEASE do not share blog posts you might have linked up in the past.
2. Somewhere in your blog post, you must link back here to my blog, OR grab the Anything Goes button for your sidebar.
3. Try to visit at least a few of the other blogs linked, the whole point of having a party is to connect, share and maybe get a few more followers...remember to leave a comment to let them know you stopped by!

Karin 

Add your link here:


Monday, 19 May 2014

Scrap Happy

I am in my own little world at the moment...still continuing on my scrap reduction mission. Even using up many of my filled bobbins in an attempt to free up a few more bobbins (can't remember what I used taupe thread for but had several bobbins filled with this, so just started piecing with it). I also did do a few more of my spiderweb blocks and while sorting through the endless supply of strips and cut offs, I stumbled across the chicken print. This is about 7 years old...I have made one major quilt out of this, fussy cutting the individual chicken and setting them into a Churn Dash block. After that I made also a table runner...in the end I was left with all these oddly shaped cut offs.


Could not resist and cut the whole lot into squares, then dug deep and found some leftover pieces of the chicken wire fabric, then some left over green squares from above quilt and a few more coordinating prints and so designed this very simple quilt. I know "country" is not that popular at the moment, but I just love it (hence most of my fabric has some sort of country theme).

Apart from the border fabric, all scraps
Had a lot of fun stitching this together while watching some TV...so relaxing! Only took a couple of days, and finished it today. The quilt is small, measuring only about 38"x 45". Finally used up that sunflower print that I once bought on impulse. Very, very bright! Not sure exactly what I will do with this, however know exactly how I am going to quilt it. I send away for a Fine Line Quilter's ruler from Accents in Design that you can FMQ with - want to try this out a bit. Saw this over at Amy's Free Motion Quilting Adventures and thought this was a great tool to have to do some grid work (maybe even stitch-in-the-ditch?).

Linking up to Anything Goes Linky Party at Stitch by Stitch.

Karin

Monday, 12 May 2014

Cheryl's Quilt

Remember Cheryl's quilt? You can read about it HERE . This goes back to last year...bit of a disaster.

I spent quite some time undoing it and then analyzing what the problem might be. Apart from the shocking longarm job for which Cheryl unfortunately paid good money, there were several problems with straightness and how she put it together. I ended up taking the borders off, re-doing the center seam, reinforcing some wonky seams, eliminating one border, fixing up some holes and sewing it back together again. See HERE for a before and after shot.  Unfortunately last year I had to stop at this point due to a health issue and after that other projects somewhat overtook this quilt.


So I finally knuckled down to pin baste Cheryl's quilt ready for quilting this morning.


Was a bit nervous about this as the quilt is not entirely straight and bulges out in the middle a bit...however this turned out well and it is laying very nice and flat

 
So, on with the show...I am ready to FMQ this. Initially I thought I would FMQ some motifs or similar, however looking at it now and re-evaluating, I decided to meander all over it. The reason for this is that I actually only got about an inch and half on two of the sides, so heavy quilting is probably not a good idea as I cannot predict with certainty how much it will shrink (and the batting is wool which has a bit of puff to it).

I am going to use my Sensormatic FMQ foot for this...wanted to have a bit of a play with this foot for a while

It is very unobtrusive and open in the front, so visibility is very good. On the Pfaff 4.2 (as on the Pfaff 4.0) you have a special Sensormatic FMQ setting for this (as opposed to the Springloaded setting). Have not used this that much..at low speed this foot will raise and lower with each stitch to hold the fabric on the stitch plate. At higher speed, this foot starts gliding over the surface of your quilt as you gather speed...so it is ideal to use for designs where you need to have a bit more speed. With more speed of course, you need to be wary to stay in control of your stitching, so this should be interesting to give this a workout. Had a bit of a play this afternoon...good fun.

I am on a mission to finish this by next week...will then need to hunt around for some binding though as Cheryl had cut her binding on the long grain which would have amplified the bulging out of the quilt, so I don't really want to re-attach this.

Anyway, that's all from me today. Linking up to Anything Goes Linky Party at Stitch by Stitch


Karin

Monday, 28 April 2014

Spiderweb Blocks Revisited

I started the Spiderweb blocks last year with the intention to sew them at leisure throughout the year. Did not get that far


Somehow I lost interest half way through the year and nothing much happened on this one. Well, after finishing the Dresden Plate, I suddenly felt the urge to continue with this. Probably due to the amazing amount of scraps that I am accumulating...

Anyway, cranked out a few more quarters of the block. The funny part was that I could not exactly remember how I had done the block and had to look up my own tutorial to refresh my memory...all I could remember was that I used  some interfacing to construct this. This is where the blog becomes very handy.  You can find the instructions  under tutorials on the tabs above. This is one of those blocks that  is great to just whip up when you don't feel like doing anything too taxing but just want to sew a bit. And, needless to say but you must love the scrappy look.

Good effort
Love playing with those blocks...so colourful!
If I continue with a few quarters per month I could get a quilt out of this by the end of the year. Let's see how I go...I got several other projects on the go and in my head and do not often stay on task.

There is  a new pattern I want to try, a new baby quilt to construct, then there is Cheryl's quilt to be basted and quilted, EPP  projects...and so the list goes on

As you can see here, getting side tracked even when photographing blocks...I started playing with the camera:


Talking about photography the other day with my friend, Maxine...here it is...small F value and some tinkering around in the manual setting. Was really happy as I got the background all blurred which was the intention of the exercise.


Linking up to Anything Goes Linky Party at Stitch by Stitch  
and  Darn Crafty Linky Party 


stitch by stitchSew-Many_Ways


Karin

Popular Posts