Showing posts with label Let's Bee Social Linky Party. Show all posts

Wednesday, 1 February 2017

A little baby quilt

The other day I finally cleaned up a bit and went through my stash...OMG...found a lot of things that I had already forgotten about...amongst lots of other things, some baby quilt fabric. Looking at it, I thought that this was a pity to just let go to waste or worse still, use it up for some of my practice runs in FMQ (which I had already done with one part of the fabric). Also found a whole stack of white pre-cut squares that must have been left over from a previous quilt. Perfect opportunity to use my new gadget
If you love chain-piecing as much as I do, you need to get one! This is the thread cutter I got from the Fatquartershop the other day...I got the one where you can exchange the blade once it dulls. Relatively inexpensive, this makes the job of cutting the stack of completed units in a matter of seconds. Really useful gadget.

Anyway, here is the completed quilt top
How cute is this...literally thrown together out of of a few pieces of fabric (should come out at 36"x 42"). Nice little quilt for a boy (the darker fabric has little baseballs on it). Not sure how to quilt it yet...maybe just some lines 1/4" away from the seams to accentuate the squares.

Linking up to Let's Bee Social over at Lorna's Sew Fresh Quilts

Karin

Wednesday, 2 November 2016

Drifting Leaves Quilt

I am working on my Drifting Leaves quilt. This is from the fabric that I won in the Auribuzz Blog Hop. The fabric is by Shannon Brinkley from her Dryad collection. It is absolutely beautiful and in the end I decided to follow her Drifting Leaves pattern which simply sews all the strips together.

For the leaves I ordered some of the Multicolour Print...gorgeous, gorgeous, gorgeous. Had trouble cutting into this, but managed to cut out my 17 leaves.
I am using this as a bit of a practice or re-acquaintance for some of the decorative stitches on the machine. I have another applique project in mind where I do want to use a variety of stitches. So I trialed  several different stitches to secure the leaves onto the fabric. Definitely was very rusty in doing this...some examples:
Filled circles as edge
Blanket stitch
...and close up of the uneven satin type stitch. I liked this one best as you cannot see any hiccups that will invariably happen
Uneven type satin stitch
Used various other options from the choice of stitches, some worked better than others. This time I used my Aurifil thread to do the applique which worked great and looks great as the colours coordinate nicely.
Quilt is now ready for basting
Found some nice dark blue dotty fabric in my never ending stash (the stuff I have got in there is unbelievable!) and put the binding together today.
Linking up to Lorna's Let's Bee Social over at Sew Fresh Quilts

Karin

Wednesday, 22 June 2016

FAL 2016 Second Quarter - Second finish!

Can't believe it...managed to finish off another project for the FAL 2016

2016 FAL

You can find my original goal list for the second quarter HERE


Now this quilt is an old UFO...to be exact this is from 2012 when I participated in Leah Day's weekly FMQ challenge for the entire year.
Quilt Details:
Dimensions: 49in x 58 1/2in
Materials: Cotton fabric; Polyester wadding
Polyester thread used for FMQ designs
28 different FMQ designs which can be found on Leah Day's website


I was new to blogging and thought that this was just what I needed to consolidate my emerging FMQ skills. We were given weekly designs to stitch out and linked up every Wednesday to show off how we went and to ask questions. This was a lot of fun and I did learn so much from this QAL. Looking at the weekly stitching tasks I decided after a few months or so to throw a quilt together to stitch my designs on. I think some quilters at the time did their samples as a Quilt-As-You-Go project, however for me it made more sense to have a quilt ready that I just could pull out from week to week to stitch my designs on.

I had some 20 tone-on-tone fat quarters just perfect for the quilt and just chucked this together with a coordinating sashing and a border and...voila, I was ready to go every week! This was an enormous time saver for me and also a neat and tidy option for all those designs. I literally covered the entire quilt with FMQ designs...when I had run out of space in the squares, I moved my designs into the sashing and finally also covered the whole border with those wiggly lines (forgot now what that design was called). I was impressed when it was finished...however, somehow this ended up rolled up in the cupboard. All it needed was a binding...no idea why I did not complete this. Needless to say, I did not have any coordinating fabric left and had to purchase some binding fabric for this to finish it off.
How pretty is the Matrix design in the bottom left corner

This was the nicest thing to finish off. As I was sewing the binding on, I admired my somewhat wonky handiwork from years ago...I literally could feel the transition that I must have made at that point...from being overly perfectionist and fearful to stuff up a quilt to just allowing myself to go for it and stitch your heart out. I used white thread (Polyester because Leah is a bit of a rebel) for the most part and it often involved backtracking along the ditch...definitely did not hit the ditch consistently and have all these white little mishaps all over the place. I could see the hesitation at times in the design, but I could also see the absolute joy in the stitching to be free from this ridiculous fear of stuffing things up.

I beautified my binding a bit for this quilt (see previous post) with some decorative stitching just for something a bit different and this was the perfect opportunity to give that a try. That turned out fantastic and I am really happy with the end result...the quilt looks great...interesting...a bit crazy...and definitely less than perfect, but there is something really satisfying about having finished this quilt.
Linking up to Let's Bee Social over at Sewfreshquilts

and also

Linking up to the FAL2016 - Second Quarter Linky Party over at She Can Quilt

Karin

Wednesday, 1 June 2016

Mandala

So I finally started on my Mandala.

Bought some Bella Solids fabric and ended up with the same colour that I usually choose... a sort of burnt orange. Took me ages to select, there are just too many choices. Whether this was the best choice to make for this project remains to be seen. I marked the fabric using my light box and the trusted blue water soluble marker. Was not as bad as I thought and I even managed to not mess it up too much...except for the grid. For the live of me, can never get the orientation  of the grid right first time around, so need to re-mark this when I get to it.

My thread choices seemed great. Used the new Aurifil thread from the Shannon Brinkley Dryad box. Chose a nice watermelon colour (#5002) as my base and added some accent colours (#2975 and #6728). For the center I chose a brilliant blue (#2725). Not sure about the result as yet...at the moment I am thinking that I should have selected stronger colours, but we shall see...bit hard to tell as you go along.
Funny (not) thing happened when I started stitching this...the machine did not behave itself and it felt as if I was having two left feet. The speed was doing something funny, i.e. I did not seem to be able to get into any sort of rhythm. I kept looking at the stitches and everything seemed fine. The back also seemed fine except after a while I kept noticing a few 'fuzzy' stitches. Weird! The other thing I noticed was that I was absolutely not getting any body in the quilting...even weirder as I was using the same cotton batting that I had used for my other Wholecloth. Thinking that it had to do with me somehow I continued and put the inner frame down...
When it was time to change the needle, I realised what happened...I had taken the wrong needle and was stitching with a 60/8 needle. Duh! Now looking a bit closer at the stitches in the back I could see what the machine was doing...given the needle was a tad too small for the 50/2 thread it did 'nick' the thread every now and then while forming the loop on the back creating this somewhat fuzzy appearance. Overall though, I had done really well considering that I  had stitched this with the wrong needle.
The perfectionist in me (of course) needed to fix this, so today I re-stitched the inner frame and yes, with the right needle I now had the right amount of structure or puff in the piece. So obviously the whole tension was not right with the smaller needle even though it looked perfectly alright from the front.
Anyway, so this is what I have been up to...
My white Wholecloth is nearly finished...taking a bit of a break from it...looking very pretty draped over the table
When these two are finished I really need to clean up my sewing room...it is a complete mess.

Linking up to Let's Bee Social over at Lorna's blog.

Karin

Wednesday, 9 March 2016

WIP: A Thousand Pyramids

Struggling to get going on anything much today...have my must do/should do list and struggled to focus in on anything. So I did some more chain-piecing of my WIP: A Thousand Pyramids.

As this project has absolutely no planning to it, I went on EQ7 to look at some approximate sizes. I am a bit undecided on how big I should make this quilt. For the time being I am aiming for a large single bed size. Spent several hours then, mucking around with one of my other quilts on EQ7, trying to decide what design to quilt over it!

This is how far I got today
Does not look like much but the amount of units I already have is getting slightly overwhelming. I am sewing them together in units of 4, alternating dark and light tones. As you can see there is a dark triangle in the middle that obviously has a darker value than I thought. I worked out today that I will need 18 units across and approximately 10.5 rows down...some 180 units of 4 triangles and then some more triangles to fill in the sides.

I have about 70 units so far...long way to go! As you can see I am just winging it, alternating making lighter and darker units without any real plan to it...I think I might start to sew the units together into rows to make this more manageable as I go along.

Apart from that I was going to mark my Wholecloth today, but now have run out of time...I continue to get side tracked with different projects and ideas. For example, our guild has put out a challenge to produce Mandalas by July so I have been looking into this...frustrating plus...for the life of me, I cannot draw them properly and going on the Internet is a nightmare as there are millions of ideas. Decided today that I will continue on my Wholecloth as originally planned and not participate in anything else I see. As for the Mandala...will re-visit this and start with a wreath and build some borders around it. As I am going to FMQ the Mandala I will have to keep it simple and pay attention to the open areas, I think...need to play around a little bit more with that.

Very frustrating day...probably does not help that it is humid and sticky in this neck of the woods.

Linking up to Let's Bee Social over at Lorna's blog


Karin

Wednesday, 17 February 2016

WIP: Cranes in Flight

Well, things don't always work out the way you wanted...spent some time unpicking this week.

This is my third project for the FAL2016. I acquired this panel at the last quilt show and thought it would make a nice wall hanging.

Tried my new Ultimate Background stencils from Cindy Needham that I got for Christmas. For the sky part of the wall hanging I used the Twisted Grid (Papa size) placed on the vertical which gave me a nice amount of movement.
This turned out really nice, although I am still debating whether I should have used one size down (Mama size). I could have stitched this out with the walking foot, however after doing one line with the walking foot, I decided that this was too much hassle  in terms of stopping and starting and shifting your project slightly...so I freemotion quilted this, getting some very intense practice in stitching a steady line. However, I did enjoy this and it looks fabulous.

While I had secured some of the other parts of the project already by simply stitching around it, I had not secured it properly towards the bottom. Don't know what happened...maybe too eager to try out my grids...anyway, I did a whole section of clam shells only to find that I had pushed some puff upwards and the clam shells towards the top were too puffy and almost leading to pleads...

So today, I re-stitched that section after having secured the bottom with some quilted lines...problem fixed, however I must say, stitching them out in black on a black background was a bit crazy...I had major problems seeing where I was going at times and some of my clams turned out a tad wonky (not that you can see that at all)
I must say, I thought that I would enjoy this Panel more than I actually do...while I enjoy trying out the grids, I do not enjoy following the design and find it quite restricting and a little bit boring. Never mind, now that I have started this, it will be done. I did enjoy putting in some clams into the trees (are they trees?)...I loosely followed the printed design, but there was enough room for a bit of creativity and it did give those trees much more depths.

I might try one more grid on the side but the rest will be some background quilting, I think...much more enjoyable.

Linking up to Let's Bee Social over at Lorna's Sew Fresh Quilts


Karin

Wednesday, 10 February 2016

Second Finish for the FAL2016

This took a while, but here it is...the completed Tumbling Blocks baby quilt
This is my second finish for the FAL 2016

Details of the quilt:

Size: 41in x 53in
Fabric: Main fabric is an Ann Kelle design (Urban Zoologie) for Robert Kaufmann fabrics
Threads used: Gutermann for construction and straight line quilting; Invisible Monofilament thread for SID; Aurifil 50/2 for other FMQ designs
Finish: straight line quilting across the cubes with loop design in the feature fabric; continuous heart design in the inner border and more loops in the outer border.
Binding: Left over strips of fabric used which gives the whole quilt a bit of a lift

Particularly proud of:  Y-seam construction

Backing: found the perfect colour match


This is the second finish for the FAL 2016. My original goal list appeared HERE.

2016 Finish-A-Long

Linking up to Eleven Garden Quilts for the FAL2016 Quarter One Link-up.

Also linked up to Let's Bee Social over at Sew Fresh Quilts.

Onto the next project!

Karin

Wednesday, 20 January 2016

Quilt Top Finished

My  baby quilt top is finished...this is the first of the quilts I nominated for the FAL 2016 to complete by the end of March.
Finished quilt top measuring approx. 52inx44in
I was thinking that the end result, while lovely, certainly does not correspond to the effort that goes into constructing one of these using the Y-seam technique. On the whole, it took me about 4 weeks to make my way through the Y-seams. I did find making the individual tumbling blocks easy and also managed putting the blocks into individual rows fairly quickly. The fiddly bit is really putting the rows together. If you want to have a bit of a look how I did construct this, please see my tutorials about Y-seams Part 1 and Part 2.

I am already thinking about the next one
Have this cute 'bug' fabric (bought several years ago) that I matched up with some simple tone-on-tone fabric. I think I might try out the strip piecing method for that one and see how I like the end result, i.e. will that seam across the top diamond really bother me that much? We'll see...

Not sure yet how I am going to quilt my Hippo quilt...whether allover design or just echoing around the diamonds and a bit of a loopy design in the borders.

Well, next job will be the basting which I really hate, so I am going to leave that for the weekend when it is hopefully a bit cooler.

Have not been over to Lorna's for some time (check out her Ugly Christmas Sweater QAL), so I am linking up to Let's Bee Social #108

Happy Quilting!

Karin

Wednesday, 19 August 2015

Progress on Pillow

Still working away on my pillow for the August 2015 FMQ Challenge at Quiltshopgal

This is the 8th pillow for this year...I am determined to keep up with the monthly challenges and so far have not missed a month. This has meant that I have not produced quite as much as I would have liked this year due to having to interrupt what I am doing to get going on the next pillow. However, I  am treating this challenge as an opportunity to learn and I would highly recommend these online challenges to all of those who have an interest in FMQ. Even though I am quite good at FMQ I get so much out of this ...being introduced to new experts, new designs, having to plan around designs, practicing grids, filling in odd spaces, blasted zippers, trying out new threads etc.  I particularly like this challenge, as Darlene from Quiltshopgal is giving different options each month so that there is something for everybody, experienced or just starting out. If you are reading this and just starting out you might want to have a look at this challenge...the link up for the completed pillows is open now until the end of the month.

Anyway, worked away on the front of the pillow, filling in the last panel of my little design.

Now this was not that easy and required some additional planning as I was unfamiliar with Angela Walters flower filler. Started off and had to stop for a while, drawing on paper to try to figure out how to quilt this. I have Angela Walters Craftsy class ' Small Changes, Big Variety'. When watching this I noticed that Angela Walters quilts her feather shapes different to me. I will quilt towards me, starting the feather on the curvature - while I can also go backwards, I always start with the curvature. Angela Walters can do them starting on the other side and going backwards...quite amazing! Now I tried this, but my brain could not cope, so I had to stick to my way of doing the feathers and have a bit of a think about which side I was going to end up on and which side I actually needed to be at. This took a little bit more planning than usual and I drew lots of A4 pages with various variations of the design.

Here is the end result
 Was very happy with this as all this drawing enabled me to actually get a really good hang of the larger feather filler...in the end I was able to fill a whole A4 page just with that and it looked fabulous. For this piece though I returned to the flower filler. I think that flower filler looks better when it is done with a blend in thread so you focus on texture. I started off a bit small but the flowers towards the top were spaced a bit nicer...all great learning.

Then I tackled the back. Decided to use my apple core shape (KimBradleydesigns 4.5")...finally using some of the many templates lying around here. When I attended a workshop with Kim Bradley a couple of years ago, this was one of the designs we practiced.
Very versatile as you can use the walking foot to do this...however, I was too lazy to reset my machine and freemotionquilted the lines which went just as quickly, if not quicker.

 Decided to continue with the swirl theme and filled every alternate shape. Hilarious...in every shape I was trying to come up with a particular way of doing it and every single one is quilted differently.

This was good fun...now I just have to put it altogether and put a zipper in. Very productive day.

Linking up to Let's Bee Social Linky Party to have a look what the rest of the quilting world is up to.

Karin

Wednesday, 20 May 2015

Am I killing my quilt?

Honest opinions sought...

Started the FMQ of my Field Guide quilt. After some prolonged pondering on the matter, decided on an overall design as the quilt itself actually looks quite busy.

Choose a fairly common design which I found in Christine Maraccini's book 'Machine Quilting Solutions'  under the name of Heat Wave pattern. I think this design runs under various names.

There is really no trying out the design for a bit to see what it looks like and then maybe changing your mind (although I have done this before)...you either go for it or not. I decided to give it a go, seeing that the quilt would not be a heirloom but just a humble lap quilt to put over your knees in winter.

So, made a start and  did not really stop until I had quilted about half of it. Needed to concentrate to get into the swing of things, but also because I have a slightly more puffy batting this time and was in danger of creating puckers when coming too close with the individual hooks.

Well, here it is
Is it just me or have I quilted my quilt away? This photo was taken in front of the window, so I got a really good look at the texture.

Next photo taken in a different room with the texture not quite as prominent.
This is better, but now I am a bit worried...although not much I am going to do about it at this late stage...will continue with it and hope for the best.

The pattern looks quite nice close up, but yes, very textured.

Hmm...not sure

Linking up to Let's Bee Social over at Lorna's blog SewFreshQuilts

Karin

Wednesday, 21 January 2015

WIP: A Field Guide

Not very exciting...spent some hours chain piecing the squares of my Charm square quilt the other day


Then today rushed a few blocks through


Yep, that never works...noticed that the little square in the 3 bottom blocks is not straight. So obviously need to be a bit more careful and will have 3 blocks to re-do. What a hassle!

Still not sure whether I like this or not...may well turn out to be the biggest flop, however, the fabric is cut and the units are ready to be pieced...too late to change my mind.

Linking up to Let's Bee Social over at Lorna's and also to WIP Wednesday at Freshly Pieced.

Until next time

Karin

Wednesday, 5 November 2014

WIP: 99 hexagons

As soon as I started it I realized that this was going to take a long time. I decided to mark the curves...while I can stitch curves down a seam I cannot keep that consistent or near enough and if you suffer my perfectionism it does matter. So, yes, I am marking them lightly, going down one side and coming back up the other side, stitching the flower as I come across the black hexagons. This is quite a bit of fun but not quite as fast I had hoped for. Well, never mind...it is a small quilt and should be done within the week.

This is quite a busy little quilt and the only thing that is really noticeable is going to be those flowers in the black hexagons.


Until next time...hopefully with the quilting of the hexagons completed.

Karin

Wednesday, 22 October 2014

The Challenge

My friend and I have been going to our Guild meetings over the last few months. Not entirely sure why I have never gone before - laziness comes to mind. Anyway, the meetings have been a lot of fun.

At the first meeting they had a presentation about batiks which was very interesting and informative. The shop that presented was the Whyte House Gallery which is located in Victor Habor. At the end of the talk the presenter handed out some samples for people who had never worked with batik to take away...just a few slithers of fabric. Each got about 3 - 4 pieces of approximately 4" x 6" of beautiful batik.

Looking at this fabric and talking about it, we decided to set ourselves a bit of a challenge, initially to do something small but then it became using those little pieces to produce something useful. I found a pattern for a little purse in one of the library books that I had borrowed from the Guild (Susan Briscoe - 21 terrific patchwork bags). Looked easy enough and small enough to just whip up...the purse was constructed via foundation piecing which was easy enough. It was then bound (first time I actually made my own bias binding- thoroughly enjoyed that) and folded and the zipper sewn in by hand, as was the lining. I think I enjoyed it up to the zipper part. Not being that cluey about zippers and bags in general, this was a bit of a struggle, however by then fierce competition had set in and I was determined to finish it.

Here it is...the Fan Purse in glorious batiks (about 9" in diameter)

The Fan Purse - pattern found in Susan Briscoe's book - 21 terrific patchwork bags

Black lining to match the binding

Hand-sewn zipper - I am so impressed!

Simple quilting lines- this could be embellished with some decorative stitching


Used up every little bit of fabric that I had from those batik samples. Pity that I did not take a picture of those pieces...it is amazing what one get get out a few pieces.

I am going to use this as a pencil holder...just the right size. Might just have to do another one. I have got some fat quarters of beautiful Japanese type print.

Linking up to Anything Goes Linky Party at Stitch by Stitch and Let's Bee Social Linky Party.

Karin

Wednesday, 8 October 2014

Plus Quilt Finished

Decided on an overall meander


I have read some interesting points about the meander design lately. Many people find it quite boring and I have been a bit amazed to read that some people think it is difficult to achieve on a DSM. I reckon almost any design can be done on a DSM, depending how much practice and determination you want to put in. I agree that meandering or stippling is not a beginner design...far from it. You need to be able to speed up and slow down while at the same time concentrating on where you are going to produce a consistently visually pleasing design. Not a simple feat by any means, however with practice it can be done.

I like my overall meander at about 1/2" scale which requires some concentration as you have to keep your hands a little bit farther apart when quilting. As I have been FMQ for a while, I have no problems with the design...even if I loose concentration I usually can wiggle my way out of spots. Boring...yes, but I like the texture the stipple produces over an entire quilt. The quilt top, while quilted allover, still has that soft fluffy feel to it. And bonus...it is a really fast design...I manage a good quarter of the quilt in one sitting, so when I just want to finish off a quilt this is my go to design.

The other point is that you have to look at the quilt top itself. I saw a Plus quilt at the Machine Quilting Festival the other day that had feathers quilted allover...while it looked nice and soft (as the feathers were big) you could not actually see the great feather work done due to the scrappy nature of the quilt. Similarly, I thought initially that I might do swirls allover, but again this would not really be seen due to the design, hence I opted for the meander which was ultimately faster to do.

Maybe if I do another one, I might try the swirl to see the difference in texture.

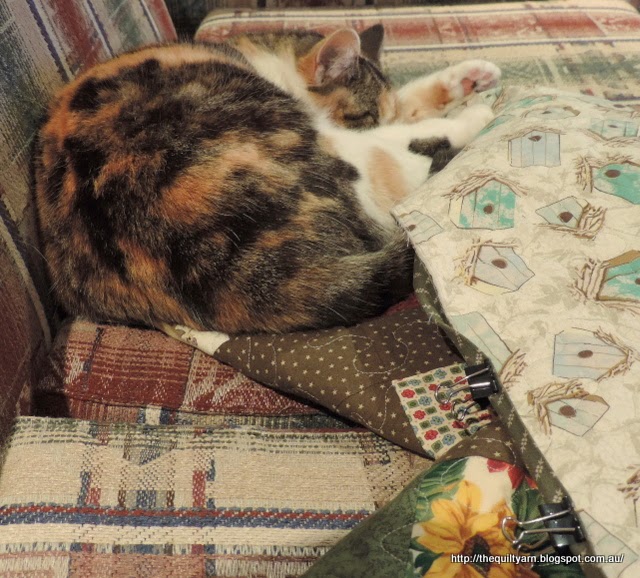
Anyway, here is a cute picture of the resident cat while I was trying to slip stitch the binding in place:

Fast asleep, so my binding had to wait...


Karin

Wednesday, 3 September 2014

Progress on 99 Hexagons

Well, happy to report that I finished the center of my 99 hexagon quilt. My youngest daughter celebrated her 18th birthday the other day, so I spent most of the night in the front room with my hexagons trying to escape the noise but also having a bit of an eye on the front door.

Got heaps done and before I knew it had stitched the last of the hexagons. Very happy with the result. Now only had to read back over my posts re EPP from last year (or was it the year before?) to work out how exactly I tackled the paper removal and squaring up. This is where the blog becomes very handy...only have done that one other EPP project before so I was winging it a bit.


and a look at the back...


If you are interested in the other EPP, have a look HERE  ...I talked about that one for ages!

Continued on with my starching. Again I had difficulties getting the paper out, obviously used too much glue. In the end I had to wet the whole thing down (as the glue is water soluble) and that did the trick. This took me ages and looked like a right old mess but thanks to the starching it all turned out alright. As with my last EPP project I did stitch into the seam allowance around the edges at times. This is a hassle as you have to let the seams out around the edges to square it up. Not much I could do about this and I am hoping that the border around the hexagons will hide some of those little puckers.

This is how far I got today...squared up and ready for the inner border.


Looking good! Can't believe I have got that many hexagons in there...the whole piece is only 33" long, so I am looking at a very smallish quilt here, probably just coming in around 41"x 45".

Linking up to Lorna's Let's Bee Social Linky Party


Karin

Wednesday, 14 May 2014

Cheryl's quilt - Update

Well, my idea of using my Sensormatic FMQ foot was an epic fail. Had I thought about it a bit more, it would have been obvious that this was not the right foot to use. Had a bit of a 'duh' moment ...

Anyway I started off and the foot was gliding over the quilt until it hit the first major intersection where several seams meet. Could not negotiate this, so I altered the pivot height to 1 and then to 2...more mucking around. Finally I set it to 3 to get over all those humps and bumps, but then the thread started to break a couple of times. When I thought about it, this made sense...this foot does not raise and lower with every stitch when going fast and while going over an even surface this is fine, but with Cheryl's quilt there were issues of bulk at the intersections and also some bulging out over certain areas...this was not going to work with this foot.  As I lowered the speed to avoid the thread breaking, it started pushing the fabric too much for my liking. Not sure whether these problems were just due to this quilt or whether this is a problem in general. 

After one row of pain, I switched over to the Dynamic FMQ foot and off I went. I quilted half the quilt in 5 hours...no thread breakages and no issues with the bulk. I must say, stippling remains one of my favourite designs. I know that it probably is a bit boring but for this quilt I was really grateful that I chose this design.  I never noticed this before but stippling is the design to go to when you want to quilt out some problems. I was able to adjust my meander as I needed to get rid of some bulk, turning in the opposite direction to pull the fabric down a bit, then going for some sharp turns to even it out a bit. Or, on occasions when I could see some suspicious fullness coming up, I just made my meanders a bit bigger and more generous...I was very impressed with how well this worked. I quilted the top fairly densely to cover the seams, as Cheryl had sewn the seams with a wider stitch which had become precariously loose in some parts.  Also managed to go over some holes, so this baby is not going to come undone.
Action!

About 1/2inch scale meander

Several hours later
Linking up to Let's Bee Social Over at Lorna's Sew Fresh Quilts

Karin

Monday, 21 April 2014

Dresden Plate Table Runner Finished!

It is quiet in my corner of the world. I have been working away on the DP table runner. The quilting was somewhat frustrating. I really do not enjoy quilting with the walking foot. While it works well, I do not like the constant turning and wrangling with the project at hand. That is where FMQ is so handy as you can go any direction you want. With the walking foot and the turning I had some extra puff in the middle block where I must have pulled too hard towards the seam of the block. Not a big issue though, as it is hardly visible. Nevertheless, for this one I thought it was safer to use the walking foot when outlining the shapes for consistency sake (except for those circles in the middle and ditch quilting around the Dresden). This turned out really nice, I think.


The detail of the outline quilting


I stitched some lines in the border which proved a bit difficult...again had some pulling of the fabric. Then I decided to try out Susie's Magic Binding tutorial demonstrated on 52 Quilts in 52 Weeks: All About Aunt Marti. As you can see, not a lot of forward planning on this piece. This binding was sewn on from the back and then machine stitched to the front (in-the-ditch of that little flange). This was very interesting to do...I was not confident at all that I would be able to machine stitch the binding on straight. To my surprise, this worked really well...all I needed was lots and lots of pins to hold it all in place. Given that this was my first time of doing this method, the stitching in the ditch was a bit challenging, however I soon got the hang of this with using one of the pins to gently hold the binding straight. Overall, I was impressed.

What I was not impressed with was my lack of forward planning. Given that I had quilted straight lines around the border, the flange then highlighted that they were not straight (compared to the line of the flange), especially around the corners...this is very noticeable but nothing much I can do about this now. I reckon if I was to do this binding again, I definitely would not be quilting lines in the border...just in case. Can't trust myself to get things straight lately.

Anyway...this binding looks nice on the runner...it is fairly big and chunky though...I like this for a runner, but I am not sure I like this for a quilt.  Might try a different method that I have seen where the little flange is sewn on first and the binding is attached as per normal. This would give you the flange without the bulk.  Well, all good learning though.
Karin


Wednesday, 26 March 2014

Dresden Plate Table Runner

Working steadily on my projects and finished the Dresden plate quilt top (almost!).  There is method to my madness. I am trying to finish a number of things to get ready for a FMQ marathon. Would be great if I had two machines where I could swap between piecing and FMQ without having to switch over the machine all the time.

Anyway, as so often with these spontaneous type of projects, I ran out of border fabric just on the last top part of the outer border. Obviously did not plan this through very well, so I had to get some more of the red fabric the other day.  Good thing too as I had no binding fabric for this piece whatsoever.


 So here is part of the table runner


This looks great even though it is a bit plain. For a moment I thought that I might add another little border  or do something else a bit more decorative but in the end I decided to just put the plain red border around it. I reckon it is enough...

PS. Got the last  70cm off the bolt when I went to the shop...lucky I went when I did.

Linking up to WIP Wednesday at Freshly Pieced and Let's Bee Social at Sew Fresh Quilts.

Karin

Popular Posts