
Such a pretty quilt and nicely straight. So I decided to do an edge to edge design over it. If you never looked into this check out the designs at Urban Elementz...so many choices and I am not sure whether I mentioned this before but there is also a whole section of some 50 plus designs that you can use for free. Really appreciate this.
For this design though I chose a panto that I had bought from Urban Elementz - the self print Cloud Nine Design from Patricia E. Ritter. I think that is the third design that I purchased from Patricia E. Ritter. Coincidence or maybe her design appeal to me because of their openness (for my purpose I do need the design to be a bit more open).
I have mentioned in previous blog posts (e.g. HERE and HERE) how exactly I go about doing this on a sitdown longarm machine. I use Golden Threads paper to trace rows of the design. this time though I wanted this to go all a bit quicker and I used 8 sheets of Golden Threads paper and stitched the traced design through that rather than tracing off the design 8 times.

A brief look at what this looks like stitched through

I remove the paper as I go along, except for the last bit which I need for the alignment of the next row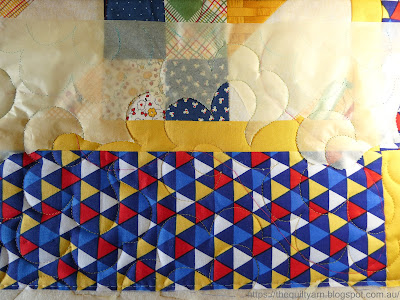 I have done this design before so it went rather quickly. However, this time I did a bit of a stuff up in row 3...it was getting close to dinner time and I was hurrying along placing a row onto the quilt ready to go for the next day. When I started it again the next day, my natural perfectionism was a life saver. I made a very sloppy petal about 2 swirls in and decided to take it out...only to realise when turning to the back that I had aligned my row on the previous already stitched one, so I had 2 swirls stitched twice! I was happy that I discovered it and proceeded to take my stitching out which is something you can absolutely do with the paper, however you have to be super careful. The paper is wafer thin and rips easily. Complicating whas the fact that I had stitched my design through the 8 layers with a very large needle which made the paper even more likely to just split. After I removed all the stiches, put my frazzled paper in place


In general I follow the lines as best as I can however this particular design is stitched with a little bit of speed...I can imagine that on a longarm on the frame you would really lean into that which also happens to a lesser extent on the sitdown, so lines are not always followed precisely. I have learned not to worry about that too much, however I do make sure that I hit the points correctly as when I align the next row, I can be assured that they are in the right place. In addition I check how my row aligns against the pieced seam lines...not measuring, however having a bit of a look whether I am still straight and whether design elements hit the same spot as I go along. Works absolutely perfectly every single time.
The quilt looks just lovely


Altogether I used 9 rows to quilt this. Had to trace one more design to finish off and must say I do prefer to stitch on the drawn line rather than those little dot lines, however it was much quicker of course, using the stitched through rows.
So satisfying.
Karin


Beautiful quilting! I wouldn't have guessed that you had a slight slip either!--TerryK@OnGoingProjects
ReplyDeleteHey Karin. Is there a pattern for this quilt? I'm not seeing it in your shop. I'm looking for just a few quick ones to make for charity and if this happens to be charm-pack friendly, I think it would work nicely!
ReplyDelete