It's busy enough, so I just put a sashing and border around it. Very cute! Felt like an allover design and started looking at edge-to-edge designs at Urban Elementz. Of course I found something straight away...could not resist.
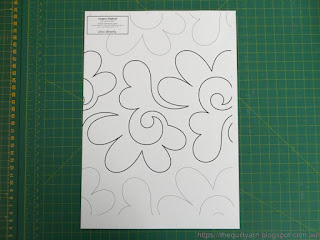
A new design from Hermione Agee called Lorien's Festival. It is a 6.5in wide pattern which is a good size for doing it on the sitdown longarm. When looking for designs that I can do on the Bernina Q20 I do look for designs that are nice and open given that I am quilting it using Golden Threads paper which will have to come out when finished. While I do not mind taking the paper out it is obviously easier to have bigger shapes that come out readily and with relatively little effort. When you purchase the pattern you download this one page and then print as many as you require sticking them together with tape to make a row.When quilting this it is definitely an advantage to have a lot of space
As you can see I can spread out my quilt over the entire surface quilting it going from left to right without having to crunch up anything. The paper is secured with 'sticky dots' and also some pins so that there is no shifting. Can you do this on a DSM? I think you can, however it would necessitate you having a flat surface and you would need to quilt it vertically because of the orientation of the DSM having the majority of your quilt in your lap as you start. Now I have to admit I have never tried this, however I would imagine that that is quite fiddly (mind you, not impossible). Having said that though I do think you can quilt smaller pieces like table runners and borders with this method without any problems.The design was easy to stitch out
I do trace every row, however you can trace just one row and then put up to eight rows behind it and stitch through the paper without thread to get multiple rows stenciled. I have done this before and it works ok, however I prefer to trace every row. While tedious and by the eights or ninths row you are absolutely sick of it, it does prepare you well for the quilting as the design starts to commit to muscle memory which makes for better results. This design in particular flowed really well and it took no time at all to get the hang of it. In stitching this you follow the lines however you will never be totally spot on. My hands are about as big as the design, so when quilting within the span of your hand you swing out at times as you gather speed. The trick with this is in the alignment of the rows. I rarely align on the row that I stitched. While I do look how I stitched the row and align my points as best as I can, the alignment happens on the faint bottom row. When I get a new row, that bottom row has to align perfectly with the row to be stitched which will ensure that you keep your design nice and straight as you make your way down the quilt. Love doing this. While a bit more work intensive I find this very relaxing. Don't have to think much, just follow the lines, then I sit there quietly taking some of the paper out after each row, leaving the bottom row in place for the next row. Quilting the row literally takes only a few minutes. I use the stitch regulator of the Bernina Q20 for this task, so my stitches always look fabulous which makes for very relaxed stitching.
Finished this yesterday...I did spread this over two days mainly because of the tracing of the design. Usually I trace two or three rows, then quilt them, and then trace again.
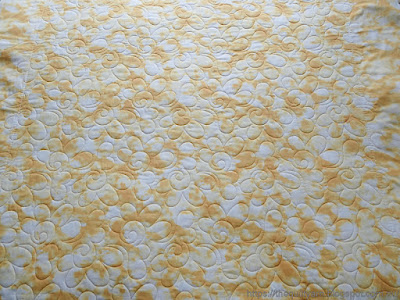
Turned out lovely...a busy little quilt for busy little people.
Always like looking at the back
Now I just have to do the binding...have a fun striped fabric that I might use and then this quilt will go into the Etsy shop.
On to the next project...
Karin


Simply wonderful! The quilting is the perfect accent to the panel design.--TerryK@OnGoingProjects
ReplyDeleteThanks Terry
Delete