Showing posts with label Ruler Quilting. Show all posts

Thursday, 10 April 2025

Progress Report

Well, the AMQF has come and gone. Four days of all things quilting. I went every single day...not exactly how I had it all planned out but with having to drop off my quilt and picking it up, retail hall and one class it just turned out that way.

My quilt looked nice on the black background. It won third place and got a beautiful yellow ribbon. Loved it!
Got to do one class with Bethanne Nemesh 'From A to Zen' which was very good (as usual) and a group of us got talking to her after the class. Was able to have a very close look at some of the quilts she had brought over, including some class samples of the classes that I had done previously online. This was a bit special, I must say.

I did allocate a whole morning to exploring longarm frames and machines...have been thinking about this for a while by now and before I went to the show I did a fair amount of research into the topic in order to be a bit prepared. As so often happens when consulting the internet, I got quite confused with all the different choices (and we don't have that much choice in Australia!). Anyway, I was wondering how difficult it would be to get used to quilting on a frame versus on the sitdown machine...in previous quilt shows I have had a few moments here and there on various machines, but nothing ever quite seriously. So this time I really had a very good look and try on some machines to see how difficult it would be for me to maybe make that switch.

Must say that I got a bit side tracked in my research, lured by the cost of various set ups. As I really would want to do edge-to-edge quilting I started looking at computerized set ups which is insanely expensive. I would absolutely love to have a set up like this but am reluctant to give up my sit down machine. So I started looking at cheaper set ups and was able to test these at the show. Not to mention the brands but what I thought was a great deal (longarm, frame plus computer) felt absolutely horrendous to stitch on. Tried a higher model of the same brand which was better but that would mean that I would again hit over $20000 if I wanted a computerized set up. In the end I went to the Bernina stand. One try on the Bernina Q20 on the frame and I was sold...it was like day and night. I know my machine and I obviously think it is a good machine but the difference in operation on the frame compared to others was astounding. The machine was extremely light and easy to manoeuvre and I was able to stitch basic meandering patterns in about 5 minutes. Obviously I would need more practice to do the fine detailed quilting that I am used to but at least I was able to ascertain that I would be able to make that transition after a bit of practice. I had a really great time with the sales person...she even let me try some rulers which was also quite easy going. Talked through all the options, different frames, accessories needed etc., marvelled at the quality of the frames and this helped me greatly to get my thinking straight. I have got the machine and now that I know that I could make that transition with a bit of practice, this really opened it up for some decision-making in the future. All I would need is a frame and the space for it...the computer that comes with the Bernina is out...just too costly. Unfortunately I cannot justify that expense ($24000 for the computer system alone) as I am not intending to set up a business. However went away really quite happy after having done all the research and reassured myself that indeed this would be an option for me, now it is just a matter of time and space. Will have to wait a while...we are planning some renovations over the latter part of the year and various other things are happening. But there is no hurry, I love my sitdown Bernina and when the time is right I just plonk my machine on a frame rather than looking at getting an additional machine of a different brand. 

After this little adventure I have started back on the charity quilts. Managed to pin and baste two quilts in one hit

Really felt like some ruler quilting and started today after having spent a day stitching -in-the-ditch.
As this is a charity quilt I only ditched the major seams otherwise I would have had to spent another day just ditching. The intersections of this quilt were horrendous...at times like little hard pebbles. Also think that the fabrics used in this quilt are quite old or maybe the quilt top is quite old. Everything felt a bit more movable. In order to secure all this I decided to quilt a simple line design, semi-continuous depending on whether I remembered where to go next. Would have liked to do an individual motif in the white squares, however that would have taken forever. This way I literally zoomed along finishing half of the quilt in one go today. I stitched the curves with the Pro Echo curve no 6 which made a nice deep curve in the coloured squares and was also the right size for the white squares. Looks quite nice and will hold this all together. Also tried a different thread today...Mettler Silk Finish 50wt...no problem at all, stitched very nicely, but then again my machine stitches nicely with any thread, just a matter of getting the tension adjustment right.

So, that's where I am at...next on the agenda is some piecing of a sweet little baby quilt.

Karin

Saturday, 27 July 2024

Playing with Rulers

I like to push the boundaries a bit with my sitdown longarm, i.e. see what else I can do on there and how difficult (or not) is it to push my quilt through the machine with the latest ideas I have. Given that I have a draw full of rulers I am always looking for new ideas to use my rulers to complete allover designs.

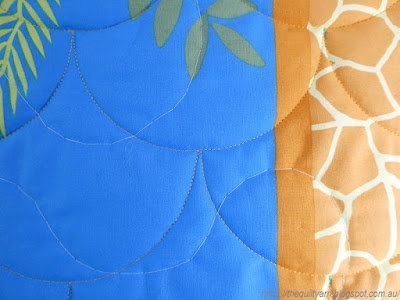
I recently picked up a panel quilt from the charity group I am involved in. The panel is "Elsa" from Frozen. The quilt is a little bit bigger than the usual baby quilt and measures approx. 47in x 55in. In the past I have often finished those types of quilts with clamshells using the HQ Clamshell ruler. Fun to do and relatively quick. For this one though that would have been too small and I needed another idea. Looked through my draw and decided to use one of Amanda Murphy's circle rulers to do a big Orange Peel design over the quilt.

I picked the 7in circle and started...literally regretted my choice straight away. The 7in ruler fits my whole hand. Thinking I would just go around and around I thought that this would be quick and easy. Wrong! The ruler shifted of course with the movement of the quilt. As you have to backtrack over one part of the circle as you move along that became quite difficult, particularly starting off with the batting making everything more wobbly and moveable. I struggled big time...

Solution: those little rubbery draw liners. Cut myself two pieces off and placed them under the ruler for every circle I did.
So much for quickly quilting this out, but at least my backtracking worked out nicely. The size of the ruler made it challenging to move along, but as I now was committed to finishing this off, I had to think this through a bit better. An added challenge was the wool batting. It does give you a fair amount of loft, so I had to concentrate and go slowly to ensure my hopping foot stayed on the side of the ruler. The way I quilted around the ruler involved shifting my hands constantly to hold the ruler next to the foot steady while at the same time adjusting the quilt a number of times as it was always shifting sideways as I went around the ruler. All this while holding the ruler in exactly the same place to get the backtracking right.

Must say I was not confident that this would work. A few rows in I measured where I was up to in relation to the bottom edge. I was pretty sure that my circles were not straight across and that I had lost my way. To my surprise I was spot on...same distance on both sides. This was encouraging!
Gave it a bit of a visual...not too bad. Not perfect by any means but overall looked quite good. Every now and then the shape in the middle of the circle looked a bit off center but that had to do with me not always hitting the exact point where the circles meet. I let go of worrying about that because there was just too much going on in terms of stitching, holding the quilt, avoiding drag and keeping the ruler steady.
Stitching along...

As per usual half way through I turned the quilt around and quilted the circles towards me. Struggled with the drag of the quilt at that point and also thought that my circles were really going out of alignment. Turning the quilt at that point is always good as you now pushing it in the opposite direction and those inaccuracies are starting to disappear.

Was very curious how I would go approaching the top of the quilt and prepared myself for an uneven finish. But, lo and behold...more or less finished evenly across the top. That was a bit surprising seeing the pushing and shoving I had to do... 
Took the basting out and had a close look but cannot take a photo at the moment as it is evening over here and the shots would come out too dark. Will post a shot of the finished quilt in another post. 

Overall happy with my efforts...looks fairly consistent even though my circles shifted slightly to the left but I don't think that that is noticeable once the binding is on as it is only by about a quarter inch.

Might try this again on a smaller quilt using the smaller 5in circle.
 
Karin

Thursday, 24 August 2023

To Do Tuesday #34

My list from last week:
- baste one of the scrap quilts on the machine and start the quilting. Will do a Baptist Fan design over it, so that will take a bit of time but I am really looking forward to it.✅
- clean up the sewing room a bit. Following the last few weeks with working on several projects, it is rather messy and I do need uncluttered space around me when quilting.✅
- construct another hanging sleeve for a wall hanging that has been sitting behind my sewing machine for the last two years at least (can you believe it?).✅
- finish off my beanie!✅

Wow, a first...done everything on my list!

I actually finished my scrap quilt ready to be gifted this weekend.
Did a Baptist Fan design over it with my new Baptist Fan Rulers from Michael Quilts. Absolute pleasure to do. Will do another post in the next few days on how I went about it in case people are interested in how to do this with a bigger sized quilt on a sitdown longarm machine. Took photos this time of the whole process as I went through.
Back to the quilt...entirely made out of scraps and if you are following along the first to be completed. Have another bigger one that needs to be finished off. I used my last piece of batting from a roll I had purchased a couple of years ago...just fit, which was very lucky.

Pieced the backing together using some bigger pieces from my stash.
Particularly like this...shows of the quilting really nicely and is such a great colour. Finished it off with a dark blue binding with little stars on it which suits the overall look of this quilt. So, an entirely 'free' quilt!

Close up of the quilting
Also finished my hanging sleeve for a wall hanging which has sat around for the last 2 years at least.
That took a grand total of about an hour and a half...can't believe I left it for so long! For the time being I hung it behind the sewing machine as I am struggling to find a free wall to display it properly.

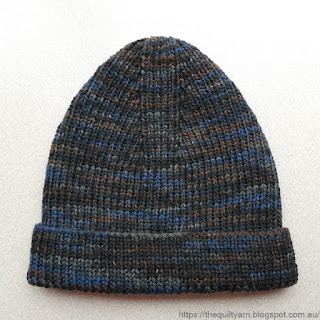
And last, not least, finished my latest beanie (gifted to my daughter).
Great beanie pattern from Nimble Needles. Also felt like a freebie as this wool was purchased years ago. Don't even know what the idea behind it was.
 
Also sewed on the binding to my table runner, so overall felt very productive this last week.

For the remainder of the week, I am planning to 
- handstitch the binding to the table runner to finish that off.
- pin and baste my other scrap quilt ready to be quilted, and
- probably just relax a bit (strained one of my shoulders a bit and will need to go a bit easy on the quilting for a moment)

Linking up to To Do Tuesday #34 over at Quilt Schmilt and Midweek Makers at Quilt Fabrication.

Karin

Tuesday, 2 August 2022

Finishing off some Panels

Found two more panels in my stash which I am currently finishing off. Went through some of my fabric and needless to say, I got way too much fabric stuffed in every corner of the room. Finishing off the two panels I thought that I would get rid of meters of backing and use up some additional fabric for the binding. However as I am also looking at a new pattern I promptly ended up at the fabric store purchasing meters of fabric (colours that I did not have in my stash), so in fact I ended up with the same (if not more) amount of fabric in the cupboard. Can't win...

I am quilting the trusted clamshell design again on the panels. Really like the design for baby quilts and for me it is the most time efficient design to quickly quilt out. This time though I made it a bit bigger for the first panel as the panel has larger characters on it and I thought it would look a bit better if I went up by an inch.

For this I used Amanda Murphy's 5in circle template. Was interested to see how this would work at that size and also how I would go with not having the 'stopper' that is on the Multi Clamshell ruler.
The wadding for this panel is 60/40 wool/polyester and the whole thing felt really puffy and light weight when I basted it. Wondered how that would go with a bigger clamshell.
First few rows went without a hitch. I actually did not miss the stopping notch that the Multi Clamshell ruler has. As this circle is bigger I had to anyway quilt half of it, then change my grip to quilt the other half. Don't think there was one stop where I went over. The fluffiness of this gave me some issues though as the whole thing was extremely movable as I went along. I again used a drawing 5in circle to always mark my mid point of each clam after I finished a row to ensure that my row continued to be straight and in line with the one underneath.
Inaccuracies do creep in as you go along however. For me it usually happens when I need to turn the quilt and quilt the clams the other way. I don't worry much about it though as this is not noticable and you can fudge your way through as I have done in the photo below...a bit of a side step to get back to how it should be. Not ideal, but does the trick and unless you go looking for it, will not feature at all.
Coming to the end of a panel is always interesting as you then can see how accurate (or not) your rows have been. Was pleasantly surprised with this one as the last row of clams was 'spot on'.
Finished this in a couple of hours and looks quite lovely in that size.
The quilt feels light and fluffy...will put the binding on tomorrow and then it's onto the next one. And that's it...no more panels in the cupboard and the next quilt show is months away, so theoretically no  opportunity to purchase any more panels unless I go specifically looking for it. Don't know what it is with me and those cutesy panels.

Linking up to the To Do Tuesday Link Up by Texas Quilt Gal. As this is my first link up I do not have a list from last week...
For next Tuesday I would like to have the following things finished:
📌Attach binding to the above quilt and hand sew to back
📌Quilt the second panel and attach binding
📌If time allows, complete one more block of my Elizabeth Hartmann wall hanging

Karin

Saturday, 18 September 2021

Trialing A Cloud Design

Working on my next panel...Have it cut to size and was preparing a backing in order to baste this up but then discovered that my backing had tiny holes right across the middle in regular intervals right across the length of the entire piece. Only bought this yesterday, so it had not been lying around here. Looks like there was a label attached or something and that may have just been ripped off the bolt. Was not impressed.

So had to find another piece, wash it and was left with some time on my hands.

Decided to trial a cloud design with the Handiquilter Multi Clamshell ruler. Thought that this could look quite nice over a baby quilt. For this, I did mark a grid out as there is no way I can orient myself over two rows without having any reference points.

First tried the 3in clamshell. This comes out as 3in x 6in, so rather largish (the fabric is dark brown, however would  not photograph as dark brown as it is pretty overcast today and my sewing room is pretty dark...looks like I took a black and white photo)

...then tried the 2in clamshell
This is most likely the size that I will go with. Works well with the grid marked in and like the clamshell design... on a sitdown longarm or DSM, is a very forgiving design. Inaccuracies do creep in, but with the reference lines, I was able to do some fudging here and there and stay on track. 

Might give that a go on the next panel.

Karin

Thursday, 5 August 2021

A Year of Stars with Natalia Bonner

How quick does the month go by...we had 1 week of lockdown in between which was somewhat unsettling. Had a few appointments booked in which all needed to be re-scheduled, however in the scheme of things not really a big deal (just felt like it when it happened). We have come out ok in the lockdown, unfortunately the same cannot be said for other parts of Australia.

I have lost the plot a bit in terms of this quiltalong as I already have finished the entire quilt (just need to attach the binding). Very hard to remember to post the individual blocks at the beginning of the month as I have moved on to other things. 
So, a year long quiltalong obviously does not work for me...too long and drawn out. I recently saw that Natalia is holding another 9 Patch quiltalong. You can find the information HERE. Anybody wanting to get into ruler work, I can highly recommend her workshops. Thoroughly enjoyed the first 9 Patch quiltalong. The quilt was easy to construct and the designs were really interesting.

Anyway, here is the Midnight Star block for the month of August for the Year of Stars quiltalong.

Happy quilting and stay safe everyone.

Karin

Monday, 6 July 2020

Process Stuff

I re-did my practice sample of  the Lily Line 3 ruler that I recently acquired from Bethanne Nemesh Lily Line series.
Came out much better second time around.


Still cannot tell you exactly how I shifted the ruler over to achieve the echo...a bit hard to describe. You carefully shift the ruler over to hit the stitching line while at the same time keeping the ruler against the sewing foot. A lot of looking and checking how you will stitch the echo and I was very surprised that it worked effortlessly the next time and looked identical. Then I also tried the curling feather again and it worked just as great as it did the first time.

Time to try this out on a real project. Our local Handiquilter group runs monthly challenges. This month we are supposed to stitch down a doilie, embellishing it, filling the spaces etc...so I decided to frame this with the Lily Line 3 ruler.

It is one thing to play around with this ruler and to actually apply it to a project. It is not difficult but I had to do a fair amount of planning and deciding how I wanted this to look like. As the ruler has so many options it took me a while to decide which section at what angle I wanted to use. Couple this with being the world's messiest marker, it became quite interesting. I decided to draw the first section in with one of those drawing disks to see what that would look like. Of course I changed my mind a couple of times and had to draw over it again and so it went, however I got there in the end.

In terms of marking, I again marked the ruler and the quilt where I wanted to start off and aligned it at a second point against the diagonal cross line, again making a tick on the ruler at that point. This gave me that heart-shaped arrangement. Then I used a different section of the ruler to branch out towards the outer center. I had a tick mark where I wanted this to stop so the curls would be identical on either side. In terms of alignment this was easy as I aligned it to the vertical crosshair line. The only problem I had was with the branching off. While I made a mark on the ruler, this did not always work for me and I ended up eye balling this point. In retrospect, I should have measured the point from the crosshair line if I wanted it to be a 100% correct.
As I did not want to stuff this up, I drew the first two sections with one of those drawing disks against the ruler as I did not feel like unpicking anything and wanted to get it right the first time.  As I went along, I was able to do it without prior drawing and felt confident enough to just rely on my marks on the ruler and the drawn crosshair lines. Worked like a dream!
Really like this frame and will fill it up with feathers as I do not feel like doing a lot of tiny background fill on this piece. Still have the middle section of the doilie to fill.
Not sure how this will turn out...might be too feathery. I am not used to stitching with coordinating thread...looks all a bit messy. Never mind, now I am committed and will continue with this and see what this looks like when finished. Almost think that the frame should have been further away maybe or the feathers maybe smaller.
Great learning though and a lot of fun to do!

Karin

Tuesday, 2 June 2020

Let's Do Some Ruler Work Linky Party Canned

Hi all

I had a good look at the linky party stats and have decided to close it. It just is not gaining traction, irrespective of whether I advertise it or not. On average it has about 50-100 views on the blog and a high number of people who look at it through instagram, which is great but it does not translate into action. So, maybe I was wrong and the topic is just too specific for people to participate...not sure about that. Could also be that there is just too much going on in cyber space and people are busy with other things. Who knows.

I did want to thank people who have participated over the last few months. It's been an absolute pleasure to read the posts and look at their ruler work. I have really enjoyed this and been inspired by the posts. I am still glad that I have tried this as I have learned a fair bit in the process and would be very comfortable to run a linky again. Maybe inspiration strikes again and I can come up with a more general theme...

Well, back to talking about rulers though. I have had Bethanne Nemesh' Lily Line rulers for about a year by now. Was very excited when I got them, had watched some videos on how to use them, but when I tried to use them it was not that easy. Bethanne makes it look very easy but somehow that did not translate to me. So, they ended up in the drawer for a while.
Lily Line Ruler 1 & 2

Bethanne has been running live videos on FB for the last couple of weeks and while I missed the live sessions I started to watch them (you can find them HERE) on her blog. It finally clicked what I had been doing wrong in terms of using them...I think I was mixing up making marks to align the ruler, i.e. making marks on the quilt and then inconsistently shifting for the 1/4in offset, not marking the ruler correctly etc. While I had seen her use them in her videos before, I think when I used them I got really confused and usually ended up with slightly non-symmetrical shapes. Over the last few days I have been watching the FB videos intently and also gave the last session a bit of a whirl, carefully setting up my marks exactly the way she described it in the videos and 'bingo', it worked like a dream. The videos are excellent not just for learning on how to use those rulers but also on where you might want to use them and how you go about doing this. Really enjoying them. Bethanne is of course a total pro (I had the pleasure of doing a class with her a few years back on feather quilting) and it will take me a long while to get comfortable with the use of these rulers, let alone producing anything remotely as intricate as she does, however I hate to buy things and then not using it. Used correctly, these rulers can save you a lot of time.

Here is my sample
The Sample

Approx. Alignment of Ruler

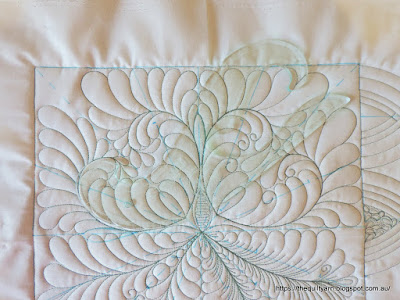
Don't look too closely at the quilting...this was to test whether I could achieve symmetry freehand, just using a few dots to align the ruler. The top part (the two hearts) was following her example of a block motif that would be repeated over the four quadrants. This came out great, I would just have to do the feathers a bit more carefully...a lovely design for a block. I think all it took was two little dots on the quilt and one mark on the ruler. The two shapes underneath was me trying to use a different part of the ruler, starting from the center out. Interestingly, as soon as I tried to 'wing' it a bit (the left bottom shape), I mucked up the alignment and the feathers were noticeably longer on one side. I did the same shape again, this time going back to making marks on the quilt and ruler and aligning the ruler with the precision hole on one line and it turned out perfect. Lesson learned!
 
So, I made a bit of a pledge to myself to continue to practice with them, trying out different shapes and parts of the rulers that I could use in my wholecloth quilts. Next to practice is Amish Feather curls in borders...love the look of them. Must say, also eyeing out Lily Line 3 now 😏

Karin

Popular Posts