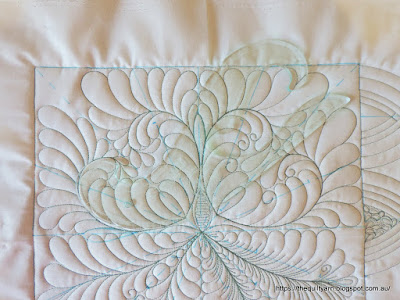
Showing posts with label Bethanne Nemesh. Show all posts

Friday, 3 December 2021

Practicing and Learning

It has been a full on few weeks. I have literally been quilting non-stop, finishing some projects, quilting some charity quilts (one more to go) and doing the online workshop with Bethanne Nemesh.

Must say that Bethanne's workshop is fantastic...very structured and organised and very intense which I love, of course.

I have been practicing on and off as time allowed. Here are some of the things that I have stitched out over the last two weeks.

More of the curls

A couple of wreaths


Love this last one (no idea why the colour is different...it's the same fabric taken at the same moment) and planning to do it again a bit more pronounced and neater around the outside.

And then today I stitched out an Amish feather spray which looks incredibly involved but was not too bad at all. My only issue was making my feathers a bit larger than usual to fill up the enormous space I had around me. Was really pleased with it though as this is stitched freehand and on a practice piece which I am always a bit more sloppy on. Would feel very comfortable stitching this out on a quilt.
This is only a small selection of the practice that I have done. I did practice a number of other things but that is just more of the same. So happy to be back to feather quilting and being able to straighten out some bad habits and learn some of the finer points of quilting feathers.

This month will be wholecloth quilting...I think there is a wall hanging we can do and then there is my design I finally and definitely want to stitch out. Given that Christmas is around the corner this will probably take me right through to January. Very exciting and very motivating...not sure how I will fit all this in as there are a number of other little things that need finishing.

Karin

Tuesday, 9 November 2021

Feather Online Course with Bethanne Nemesh

The online course with Bethanne Nemesh has started. Had our first session and it was fabulous...very organised, structured and very intense. My head was somewhat spinning afterwards and I was thinking ...OMG, this is just the first lesson! The level of detail was outstanding and it was helpful for the beginner and more advanced quilter alike. Absolutely loved the detailed explanations, hints and tricks to improve my feathering. I did not watch the live session as that would have meant getting up in the middle of the night and to my delight when I watched in on FB the next day, it displayed quite alright. Bethanne also puts the session on another more stable platform where you can watch it in sections at your leisure. Had a look at that today and like it, as it breaks it up into manageable chunks, just right if you want to re-look at something in more detail.

Then came practice in my own time. Did a couple of hours yesterday and today, really taking my time and preserving my shoulder which has been playing up a bit again of late. Also taking this to practice my machine speed on the Bernina Q20, as I want to do another Whole Cloth over December. With all the quilting in the last few months (and actually since I have had this machine) I have spent little time on focussing on speed, as I was doing mainly ruler work or sweeping meandering which you do with a bit more speed. Over the last 2 days I found a really comfortable speed to work with and also decided not to do the feathers in regulation, but rather stay in manual. Found the rhythm and speed where I could just concentrate on getting some of the other elements right.

This is going to be very helpful, I am so glad that I enrolled in this as I got a few things to work on.

My practice so far...rows of feathers

  ...and branching out into more elaborate arrangements
You probably wonder what on earth does she need to focus on?...I am a self taught quilter and learned feathers over time. They do look alright but doing it the one way that I know how to also means I find it incredibly hard to deviate from it. For example I have never used the bump back feather very much but learnt to backtrack over the entire length of my feather with some precision (I have almost made this a sport). This is great, but not always the best feather to use. At times then I have mixed the two, sometimes doing my way and throwing in a bump back feather...not very satisfying as you get out of rhythm really bad and I am not that good at the bump back feathers. Muscle memory is a great thing, but can also work against you as I have found out over time. It is incredibly hard to force yourself to deviate from the way you have always done it. I definitely need to loosen up and challenge my muscle memory. This is going to be so interesting! Already when I was doing the practice I noticed that I did not enjoy the bump back feathers that much...seemed like an incredibly laborious chore...as soon as I switched over to my way, I was in my element, happy to continue and enjoying the stitching. There is that real unconscious sabotage going on. Today I did mainly the bump back feather and actually started to enjoy myself a bit...it flowed all a bit easier and looked quite good.
There is already some other detail I am noticing that I need to concentrate on...this is going to be so helpful and challenging and as it runs for the next 4 months I am sure it will iron out some of those issues that I have identified for myself and other things that I do not know yet.

Also, really happy to get back to the feathers...it's been too long.

Karin

Wednesday, 27 October 2021

Excited Plus!

I am getting a bit excited over here. I have enrolled in Bethanne Nemesh' online Freehand Feather Fiesta class which will start on 6th of November.

I have done one of Bethanne's classes in person some years ago - Feather Faster and completed this wall hanging after the class. The class was a drawing class and the wall hanging was suggested as a follow up. Still hanging proudly in our family room.
Apart from this I stitched out a sample of the various feathers she talked about...


...and that was it! From then on I continued on my familiar way of doing feathers, maybe incorporating tiny elements here and there but not really applying what I had learned at all. I found it extraordinarily difficult to loosen up my more formal feathers.

The current online class will go until March 2022 and is promising to be jam-packed. There will be some repetition for me as the Feather Faster concepts are incorporated in the class but I thought that this is a bonus in terms of cementing what I am learning. I will do that Birds on the Wire wall hanging again (she posted some lovely hand-dyed fabric) and have a look how my feathering is changing (hopefully).

Very excited about this as Bethanne is an excellent teacher. I am still using one of the hints she gave me in the drawing class to prevent my feathers from 'falling over'...very simple but so effective. Also have watched several of her FB videos that you can find on her web site. Always full of very useful tips and information.

As I have been mainly writing patterns and quilting away to get some quilts done, I sat down to do a bit of a feather doodle the other day. Wanted to empty a bobbin and also resurrect my somewhat rusty feather skills.

Yep, still good and ready to go...just reading through some of the class material has given me a few new and very exciting ideas about wholecloth quilts that I would like to try. Plan is to start a wholecloth in December (one that has been sitting around for a few years as a design waiting to be stitched out) and hopefully producing another more elaborate one in the new year. Can't wait!

Karin

Saturday, 11 July 2020

Little Doilie Project Finished

This was a lot of fun to do...it’s the first time I tried this and must say, I really enjoyed this. Got the doilie from the local Op shop for a dollar and placed it in place with spraybasting. Not quite round, but close enough.
I ran out of ideas for the delicate border of the doilie, so left that alone. If I had stitched that down I think it would have turned out too flat. Could not resist though and hyperquilted a little bit in the feathers, then decided that that was enough.
If you have read my previous posts, I used Bethanne Nemesh’ Lily Line ruler 3 for the frame around the doilie. The frame turned a bit into an overall background fill, but I like it. The ruler was an incredible time saver and the design was easy to execute (once I had decided on which parts of the ruler I was going to use). Fantastic tool!

Had a few issues with my tension for the pebbles on the new Capri. Lots of flatlining and cursing. I used Aurifil 50/2 for the quilting and similar to the Sweet 16, the thread behaved quite fiddly. I recently purchased the horizontal spool holder and ended up putting the almost empty spool on that, this time threading the thread straight down rather than looping the thread around the thread guide (as you are
supposed to do)...and to my utter surprise, no more tension issues! Have long suspected that the fiddliness of the aurifil thread has to do with the thread path rather than the tension setting. Will do some more testing around this...tried it the other day with a different colour thread, but with the spool on the ‘normal’ thread mast, again threading the thread straight down the thread guide and again had much better tension. Go figure...

Karin

Tuesday, 2 June 2020

Let's Do Some Ruler Work Linky Party Canned

Hi all

I had a good look at the linky party stats and have decided to close it. It just is not gaining traction, irrespective of whether I advertise it or not. On average it has about 50-100 views on the blog and a high number of people who look at it through instagram, which is great but it does not translate into action. So, maybe I was wrong and the topic is just too specific for people to participate...not sure about that. Could also be that there is just too much going on in cyber space and people are busy with other things. Who knows.

I did want to thank people who have participated over the last few months. It's been an absolute pleasure to read the posts and look at their ruler work. I have really enjoyed this and been inspired by the posts. I am still glad that I have tried this as I have learned a fair bit in the process and would be very comfortable to run a linky again. Maybe inspiration strikes again and I can come up with a more general theme...

Well, back to talking about rulers though. I have had Bethanne Nemesh' Lily Line rulers for about a year by now. Was very excited when I got them, had watched some videos on how to use them, but when I tried to use them it was not that easy. Bethanne makes it look very easy but somehow that did not translate to me. So, they ended up in the drawer for a while.
Lily Line Ruler 1 & 2

Bethanne has been running live videos on FB for the last couple of weeks and while I missed the live sessions I started to watch them (you can find them HERE) on her blog. It finally clicked what I had been doing wrong in terms of using them...I think I was mixing up making marks to align the ruler, i.e. making marks on the quilt and then inconsistently shifting for the 1/4in offset, not marking the ruler correctly etc. While I had seen her use them in her videos before, I think when I used them I got really confused and usually ended up with slightly non-symmetrical shapes. Over the last few days I have been watching the FB videos intently and also gave the last session a bit of a whirl, carefully setting up my marks exactly the way she described it in the videos and 'bingo', it worked like a dream. The videos are excellent not just for learning on how to use those rulers but also on where you might want to use them and how you go about doing this. Really enjoying them. Bethanne is of course a total pro (I had the pleasure of doing a class with her a few years back on feather quilting) and it will take me a long while to get comfortable with the use of these rulers, let alone producing anything remotely as intricate as she does, however I hate to buy things and then not using it. Used correctly, these rulers can save you a lot of time.

Here is my sample
The Sample

Approx. Alignment of Ruler

Don't look too closely at the quilting...this was to test whether I could achieve symmetry freehand, just using a few dots to align the ruler. The top part (the two hearts) was following her example of a block motif that would be repeated over the four quadrants. This came out great, I would just have to do the feathers a bit more carefully...a lovely design for a block. I think all it took was two little dots on the quilt and one mark on the ruler. The two shapes underneath was me trying to use a different part of the ruler, starting from the center out. Interestingly, as soon as I tried to 'wing' it a bit (the left bottom shape), I mucked up the alignment and the feathers were noticeably longer on one side. I did the same shape again, this time going back to making marks on the quilt and ruler and aligning the ruler with the precision hole on one line and it turned out perfect. Lesson learned!
 
So, I made a bit of a pledge to myself to continue to practice with them, trying out different shapes and parts of the rulers that I could use in my wholecloth quilts. Next to practice is Amish Feather curls in borders...love the look of them. Must say, also eyeing out Lily Line 3 now 😏

Karin

Monday, 20 March 2017

Second Finish for the FAL 2017 First Quarter

My second finish for the Finish Along 2017 is done.  My original goal list can be found HERE.  You can read all about the FAL2017 by clicking on the button below


I am so pleased with my progress. Did not think I would finish another quilt before the deadline was up!

This wall hanging was started last year following a class with Bethanne Nemesh called 'Feather Faster'. I really enjoyed this class even though it was just basically drawing out feathers, but we were left with 'homework' in the form of this cute little wall hanging to try out some of the feathers. This was great fun but took a while to complete as I had started to densely fill in the background. Underestimated this a bit.

But here it is 'Birds On a Wire', designed by Bethanne Nemesh

Close up

Texture Galore

Yes, went a bit overboard with the background fillers but the texture is amazing! Also discovered that by outlining the bottom feathers with the lighter orange thread, it really made it pop...should have done this also in the  feathers above with some white thread...that would have been good.  Well, live and learn...😺

The wall hanging measures 32" x 28" and is exclusively quilted with Aurifil 50/2 thread. Needless to say this was a lot of fun!

Linking up to the Finish Along 2017 over at Eleven Gardens Quilts for the Quarter 1 Link Up

Karin

Sunday, 4 December 2016

Feather Faster Wall hanging

Making good progress on my Feather Faster wall hanging. What a great practice piece! Learned so much from stitching this out. As mentioned before this wall hanging came from a class called Feather Faster that I did earlier this year with Bethanne Nemesh. In her class Bethanne taught us her method of producing gorgeous, free flowing, no marking feathers that are easier and faster to execute.
I was very curious about this and stitched out one of my more formal feathers first. I am a self taught quilter and have come to like the backtracking method (in comparison to the bumpback feathering technique). I find that backtracking is most useful as I can tidy up my feathers as I am backtracking...however I have become so used to it that I found Bethanne's method quite challenging.

So here is my first more formal feather
You can see how painfully orderly I am. Given the backtracking, this feather is dense and formal as I am only slightly changing shape and size. This is my muscle memory in action...I always stitch them like this and they do look very similar.

I threw in another challenge into this...to only mark the spine and stitch the feathers out without any assistance. To my surprise, this worked very well. Usually I will draw in a few feathers at the start and then stop after a while to draw a few others just to keep the shape and size a bit consistent, but obviously I have done this so often that it just happens anyway now.

Bethanne's method...this is me trying to loosen up in the second feather...not that easy

While I had some different shapes in there, I struggled with not to backtrack and even that is still looking fairly orderly

Third feather was getting better but the real change came right down in the last one. The bottom feather is much more relaxed. Really enjoyed stitching that out and felt that I really had gotten the hang of this. Was able to be a bit more freeflowing and also discovered that Bethanne's method allowed me to make slightly larger feathers. Very useful!
Also really liked Bethanne's way of stitching the curl with her Feather Faster method. In the beginning, I did make myself a bit of an outline what I wanted to stitch, but did not need this in the next few...found that this works really nicely with those curls and leaf shapes and turns out beautiful, no matter what you stitch. Much easier than the formal feather curl
Only got some filling in to do in between the lines and then I can attach my birds.

Karin

Wednesday, 23 November 2016

Lines Can Be Tricky

Started on my Bethanne Nemesh wall hanging. First step was to stitch blocks of wavy lines across the little quilt top (approx. 33in x 21.5in).

Easier said than done. I can imagine this to be effortless on a longarm machine...you just glide your machine over and you are done! Well, not so with a DSM. The machine is right in front of my nose, so even having a nice flat set up is of no great help as I cannot see beyond the machine. And while this would work for just one line, it would be difficult for several lines next to each other, as I just would not be able to see. Should maybe practice this.

So I looked in my tool box...what could I use to make the job easier? Remembered that I have the Sensormatic Echo foot
Gave that a go...and discovered that I am very much out of practice with this foot. In order to get it to glide across the surface, you need to have some speed, so on the lowest speed setting you need to depress the foot pedal all the way down (while at the same time watching where you are going) in order to get the gliding motion. Not used to that at all! Usually I start my stitching slow and gather speed as required. While you can also do this with this foot, when you are very slow it makes this annoying clunking sound...very irritating! Anyway, I did manage to get a grip on that and completed my first block of lines, only to realise that this was much too even (even with varying the width). This is actually not what I wanted for this quilt top.

So back to marking some lines on the top...I did this very loosely with an air erasable pen on the lighter fabric and some soap on the darker fabric, changed my foot back to the 6D Dynamic  Freemotion foot and stitched them out following my lines more or less. Afterwards I was thinking that I probably should have done this in the first place. You can see where I used the echo foot on the third block of lines...nice, but just too orderly.

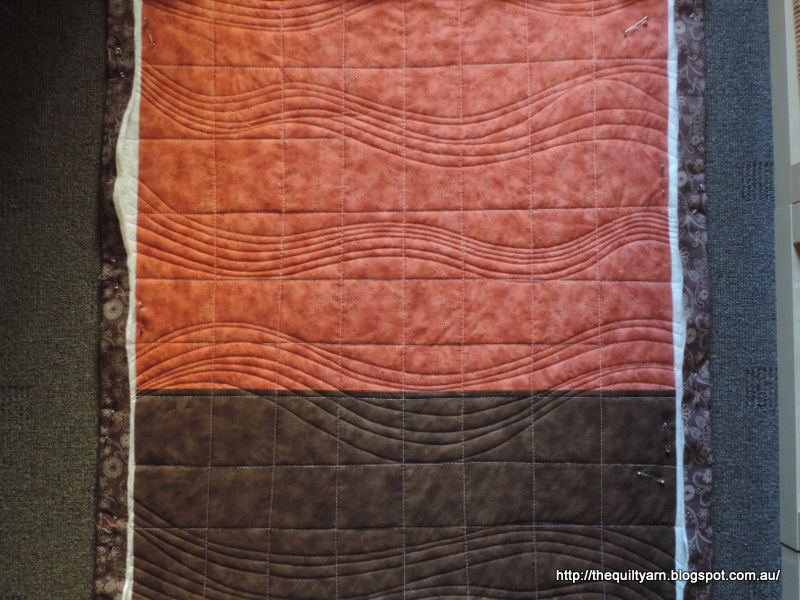
Lines are done
As you can see there are some open spaces in the lines blocks...these will be filled with some FMQ later on. The spaces between the lines blocks will now be filled with some feathers a la Bethanne Nemesh, i.e. spineless, freeflowing, different types of feathers. This will be interesting. I think I might begin with a 'normal' type of feather first and then do the last three following Bethanne Nemesh method, weaving in different feather shapes as I go along.

Need to settle on a thread colour next...would like to use something light, maybe even different colours across the lot. Unsure...too many choices, as usual.

Linking up to Let's Bee Social over at Lorna's Sew Fresh Quilts

Karin

Thursday, 1 September 2016

Great class with Bethanne Nemesh

I did a lovely class with Bethanne Nemesh at the Australian Machine Quilting Festival called 'Feather Faster'.
This was 'only' a drawing class demonstrating the no backtracking, no marking, fast way of creating beautiful feathers for your quilt.
Some of my drawings
I stitched this out when I came home in the evening which was really fun to do.

Particularly liked the lacy feather above...this was almost like stitching against your grain, after having learned to backtrack neatly and obsessively on your stitched line, you just stitch over your previous stitching...felt really weird, but to my surprise I really liked that look.

Bethanne spent a bit of time talking about the various ways of drawing/stitching feathers and I did pick up a few tips on how to prevent certain pitfalls like the feathers almost falling over or coming too close to the spine...very helpful. She is a really great teacher and spent a bit of time paying attention to individual quilters in the class who had particular questions or just struggled with the drawings and there was a lot of information packed into this 2 hr class. Highly recommended!
We also got a pattern for a little wall hanging that will showcase the different feathers...I think I will do this next to have a sample of all the different ideas to put up on the wall in my sewing room.

As for my other quilts, particularly with the approaching FAL2016...I think for this quarter I have failed miserably...only finished one project!

Karin

Popular Posts