Wednesday, 30 January 2013

WIP #3 - Baby Quilt

WIP #3:
Well...finally made a start on my baby quilt.  I am really excited about this as I have been wanting to do this quilt since last year. even bought the fabric last year. I have done this quilt before but wanted to make it again in different fabric and a little bit bigger as well (cot size)

Bit of a hold up as I realized  that the blue fabric had "for home use only". This annoyed me to no end. As I am thinking of putting this pattern on Craftsy I thought I better not use it so bought a very similar blue dotty fabric which does not carry that restriction.

Felt very productive, as I managed to do all the cutting and write down a basic outline of how I want to write up the pattern. This will be a very easy and quick-to-do quilt, involving basic strip piecing.


Bit of a peek at the blocks...so cute, the zebras will be hopping all over the place.


Managed to chain piece a fair number of blocks already. This is super easy to do and should come together quickly.

Linking up to WIP at Freshly Pieced.

Until next time

Karin

Monday, 28 January 2013

Anything Goes - Quilt & Sew Linky Party

Marelize from Stitch by Stitch is holding a weekly Linky Party.  Check it out...find her button for 'Anything Goes - Quilt & Sew Linky Party' on the side bar or simply use the link provided.

I have been trying to sew together a Spool block as part of the Blockbase Sew Along over at the EQ blog 'Behind the mouse'. This Sew Along has been running for a while and has been a great experience in terms of seeing the colour arrangements other quilters use for the same block.

For this week the block to make is #1407a of Barbara Brackman's Encyclopedia of Pieced Quilt Patterns, the Spool. This certainly is an exercise in sharpening your sewing skills. I have done inset seams before, but this is a while ago...obviously slightly overconfident, I pieced the first portion of the block together (there are 4 spools in the block)


Complete fail...this is the pressed version and as you can see it is completely out of shape and there is something wrong with the measurements. So, my winging it, just did not work...so much for confidence.

Today, I had another look and discovered that my measurements were out by at least 1/8" and I also had to do some reading up on inset seams to refresh my memory.

Second attempt turned out much better


1/4 of the Spool block


 Thought it might be helpful to show the pressing of the seams. Not sure whether this is correct, but the seams seemed to fall this way and the portion of the 1/4 block turned out nice and straight. My block will be 8 1/2in, so this is 4 1/2in square.


Have a great week.

Karin

UFO Sunday- An Arrangement of Small Pieces

I have a few UFOs left over from last year.

UFO Sundays on the Free Motion Quilting ProjectInstead of working on them I dragged out some blocks that had ended up in the UFO block pile and decided to sew them up. I started on these blocks early last year, having visions of making a bed sized quilt out of them.  I  experimented with the block in terms of its construction as I did not want to foundation piece it and made a few trial versions of the block...not exactly sure what happened next, but I think I decided the fabric was just not right, at least not for a whole quilt.

I love this block. It is called 'An Arrangement of Small Pieces'  and traces back to the The Kansas City Star (1928-1960). Such an unassuming little block that offers so many possibilities. I still have an idea for a quilt in my head (and on EQ7) but have not yet found the fabric for it.  I think this will be a case of  knowing it is the right fabric when I see it. Have a look  at the tutorial I wrote last year if you want to have a bit of a look on how to make this block.

I thought that the blocks, while not strictly matching in colour arrangement, could look nice together on a white background to make into a table runner. That way, they are not forgotten in that pile and I can use this to practice my FMQ in the border...I am thinking feathers all around to soften the strong geometric look.

This is how far I got in just a few hours ...ready to baste! (might have to have a look at my other blocks in the UFO block pile ...there are probably a few small projects in there). Table runners are such excellent practice pieces for FMQ.

Apologies re photo... This could be better. Somehow I just could not get a better shot and the white fabric on a white background made it look a bit "bla" (so I edited the grey surround in).


Linking up to Leah Day's UFO Sunday on the Freemotion Quilting Project.


Until next time

Karin

Saturday, 26 January 2013

FMQ-McTavishing


Finally...

I have been piecing since Christmas (non-stop) and have 2 items ready for basting...while I was doing that, I nearly stopped half way through to continue to FMQ. Had to be really firm with myself to keep on task. Have another project that needs finishing before I can devote my time to FMQ again. Don't you love those self imposed targets!

Really, two sewing machines would be great, then you could hop in between. Mind you, I would still have the same problem in that I would be drawn to FMQ rather than the piecing. Bit of a dilemma at times.

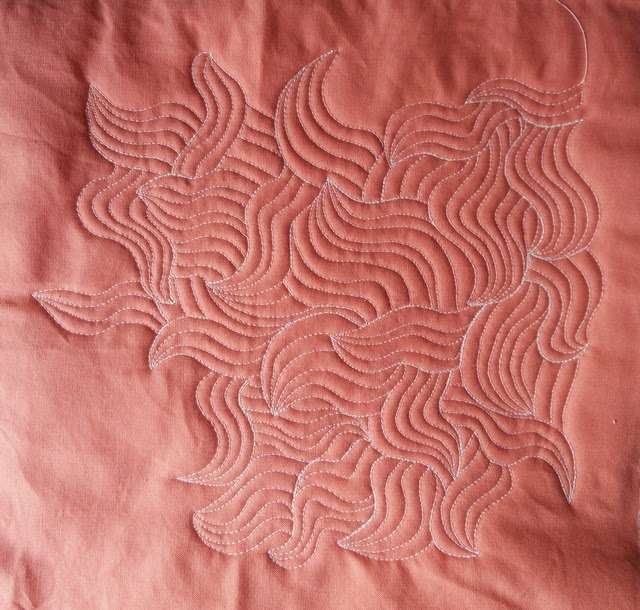
Anyway, had to have a play and tried McTavishing after watching Leah's video. Not that easy actually in terms of working out where to go next. Love the texture though and am thinking about where I could incorporate this design im my projects.

Back to piecing...

Linking up to Freemotion Quilting Friday on the Freemotion Quilting Project.


Karin

Wednesday, 23 January 2013

WIP #1- The Colour Adventure

WIP #1:

Late last week: Making good progress. Blocks are finished and ready to sewn together:


I was unsure whether to leave the paper in when I was sewing it together, however trialling this I found that this was too tricky in terms of getting the points to meet. So, I took part of the paper out as I went along. This worked fine, however, steep learning curve here...I should have secured my thread when sewing on the lines of the foundation and actually also used a smaller stitch length (I used stitch length 2, I think I should have done 1.5).

So, removing the paper was like walking on egg shells...I had to be super careful not to rip my stiches out. Had some very tense moments there, but got through it. Must say, I do not like working with paper foundations and have found a new sense of admiration for people who piece entire bed quilts like this. On a positive note, the pressing of the seams was not nearly as difficult as I originally thought.

Well, this is how far I got this week...Funny, I thought I had it all planned out in terms of what this was going to look like,  but then things change. Overall I was not a 100% happy with it as the merging points are fairly bulky (even after trimming them a bit)  and will make FMQ over it very tricky. Also made the points a bit wonky. Colour wise a solid black border would have probably been better but once the purple border was on I did not want to take it off again due to the fragile nature of the seams. The purple border idea followed my thinking that I would just use this as a FMQ project and for that reason wanted a 2" border to put a swirly design in there. Decided to just finish it off and be done with it. I will probably put a mix of colours around as the binding. The photo does not really do it justice...in real life it is very intense to look at...probably one of the more unsettling quilts I have done. Still trying to work out whether I like it or not.


However I am getting a bit excited about the next stage...FMQ. Almost having withdrawal symptoms as I have not FMQ for the entire month. Can't wait...have definite ideas for this one which no doubt will change as I go along...like I said at the beginning...this should be interesting.

Linking up to WIP Wednesday at Freshly Pieced to have a look what others are up to.

Until next time

Karin

Saturday, 19 January 2013

Blockbase Sew Along #7

This is Blockbase Sew Along #7 and the block for this week is Thunder and Lightening (#1774).


I foundation pieced this block to keep it to 8", as all my other blocks are that size. Also thought it would be quicker...ha, ha, maybe not. Without fail, I did not have all of the areas covered, struggled with orientation of the fabric to be flipped  over (the whole reverse thinking does my head in) and usually once or twice, cut off the fabric that I had just sewn on...given that I am working on a foundation pieced project at the moment you would think that I would get better at it, but somehow my brain really struggles with foundation piecing.

Anyway, have a look at all the blocks at the Blockbase Sew Along over at the EQ blog 'Behind the Mouse' ...it is really interesting to see the one block in different colour combinations and how this changes its appearance.

Until next time

Karin

Wednesday, 16 January 2013

WIP #2- Spider Web Quilt

WIP #2: Spider web quilt

Done some more research on the Spider web block and different ways of construction. In order for this to be a simple 'on the side' project, it has to be something where there is a minimum amount of calculations, measuring or concentration...all I want to do is use up my alarming amount of scraps.

Well, I already used the first method which involves sewing the strings on to a muslin foundation. That works fine, but made the block a bit heavy for my liking.

Another way would be to use paper as a foundation. If you want to read up on that method, you could head over to Bonnie Hunter's website for instructions. Another great site was Quilting Bee Blocks as it  provided instructions as well as links to the various ways of constructing the block.

Well, here is my way, a bit of a combination of methods. I am using very thin interfacing as the base to work from. I like working with interfacing as it is lightweight but strong enough to act as a foundation. I leave the interfacing in the block upon completion; again, this is for convenience, as I do not want to sit and remove paper foundation. I cut a square of interfacing exactly 9 3/8" and then cut it on the diagonal for a 12" block (finished size).


Next, I made myself a template. Now this was the only time I put a lot of concentration into getting it exactly right. This template is for a finished 12" block. Head for the links above if you want to see how you can make your own template.


Align the template with the interfacing and draw two lines for the kite shape. The template includes the seam allowance.

Line up a piece of your chosen kite shape fabric RS up exactly with the line and place the next strip WS up on top of it and sew a 1/4"seam. Flip over and finger press or use a iron on low heat to set the seam (you don't want hot, as it will distort the interfacing behind it).


Next, turn your triangle over so that you are looking at the interfacing and fold over the interfacing on the drawn line on the other side of your kite shape. Align your ruler on the fold and draw a line on the fabric of your kite shape.


Cut along this line and flip the piece over again, and align your next strip of fabric to the cut kite shape.


 Now here is the beauty...if you did draw (and cut) your line a bit off where it actually should have been  when drawing alongside the folded over interfacing, you will see it, as your kite shape is also drawn onto the interfacing (using the template) and the interfacing is see through, so you can see it from both sides and hence can make minor adjustments (i.e. line up your strip with the line drawn on the interfacing).

(Alternatively, at this point, you could have treated this as a foundation and just stitched 1/4"off the drawn line on the back of the piece, i.e. sewing on the interfacing).

Sew in place using a 1/4"seam allowance, flip over, press and then continue to attach strips to either side of the centre kite shape.


This is what you will end up with


 Now all that is left is to trim off all the excess fabric to create the triangle, using the interfacing as your guide.


Iron the seam allowances open when assembling the block (I use a mini iron to open them up and then press the block from the RS)
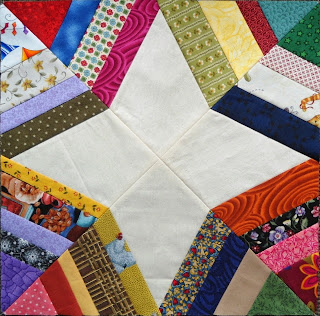


I achieved excellent accuracy with this method, my points match absolutely beautifully and I was able to streamline the process without having to use paper, cut out the kite shape or measure each piece individually. Added bonus, my blocks are very stable due to the interfacing being left in place, however not as heavy as when I used the Muslin as a foundation.

With that sorted out, I am looking forward to just continuing with those blocks over the rest of the year until I have enough for a bed size quilt. 


Karin

Popular Posts