Monday, 15 June 2020

Noah's Ark Quilt

I am onto the next project, the Noah's Ark Quilt made by the mother of a friend of mine.  When I first saw this quilt, I thought it was so darn cute and deserved some TLC. This applique quilt would have been a lot of work to put together. It was purchased as a pattern many moons ago and was finished just recently. I started this last week thinking that this is going to take me a very long time, but to my surprise it is coming along much faster than I thought.
The space I have on the HQ Capri 18 makes this a joy to quilt. I have got a lot of room with the side extensions which take the bulk of the heaviness of the quilt. I finished outlining the Noah's block in no time at all. The only hassle was that I used different colours of Invisafil to do the outlining for the most unobtrusive look to further enhance the bold shapes, but the worst is over now. Many of the other animals I can outline with the off white thread.

There are a few issues with this quilt...it is not entirely straight and I have got some fullness in some of the blocks, hence I am starting from the middle out to take in some of the fullness.
 
The elephant in particular has an alarming amount of background fabric in there. Initially I thought that I would do loops in the background but I am now thinking that I maybe will do a mix of meander and loops. I have found in the past that meandering is a good filler if you want to shift some fullness around. Mind you, as I go along I find that I am changing my original ideas so this might change still. At the moment I am still doing the outlining of all the shapes after having finished all the ditch quilting. Found another block today that has excess background fabric in there and will have to think carefully about the filler's scale to make this less obvious. 
Look at the giraffe...how cute is that!

I am really enjoying this as I do not usually do a lot of applique, so this is a real novelty. In terms of finishing it off I am thinking of using Aurifil 50/2 to fill the background areas and some minor embellishments in the bigger blocks to even out the quilting. Some of the sashings can be quilted down with simple Ribbon Candy which will distract from slightly not so straight seams. The idea will be to just notice the texture. However, I am also mindful not to 'over-quilt' this as I do not think that it needs it. The cuteness will speak for itself. Will even be able to do some ruler work in those yellow scallop sashings by using the Multi Clamshell ruler to emphasize the shapes (at least that is the idea at present). Not sure about the border yet, maybe a simple line design or just some wavy lines. We shall see...

Very curious on how this will turn out.

Karin

Saturday, 13 June 2020

Lily Line Rulers

I recently decided to practice more with these rulers. I have been watching Bethanne Nemesh' Facebook videos (you can find them on her blog White Arbor Quilting) on how to use the rulers. While I had them for over a year, I must say, they were sitting in the 'too hard' draw...I was forever getting muddled up and could not get my head around how to utilise these two rulers. Watching the videos has been great and it finally clicked where I had been going wrong. So, I am following along and practising some of the designs that Bethanne demonstrated in those videos. Last week I did some block designs and this week I tackled border designs.

Here is my sample
The first row is what Bethanne discussed in her video, i.e. how to make the shape with the top feather in place using the LilyLine ruler 1. That worked really well for me, except for making a 1/4in echo. For the life of me I cannot get that exactly right. The problem is that you have to make the echo on the inside which means just shifting the ruler over and trying to get an accurate 1/4in line. Definitely will need more practice on that.
The second row is me trying out something for a wholecloth I am working on with the exact space that I have to fill. Not sure whether I like it...I think I need a tighter curve for that space. Nevertheless making the curve with the ruler worked well.
This is what my ruler started to look like
I am now following Bethanne's method of marking the ruler religiously. Even if I think that I will remember what line I used on the ruler, I will now draw it on, because as soon as I turn the ruler, I have forgotten! With those marks on the ruler (they come off with isopropyl alcohol) and additional dots on the quilt you cannot really go wrong (other than the ruler shifting, of course).
Row 3 is my preferred shape. This time I was going to put the echo on the outside using the stitched line to align the ruler. However, my section of the ruler that I used was not long enough to allow this to happen, so I had to echo on the inside again. Again, I struggled, although the middle one was looking quite good. A little bit better aligned and it would have been right. Row 4 then I did a flatter curve and the last row is the end of the Lily Line 2 ruler making 2 1/2in shapes in a smaller border.

Lily Line 2 is the fat ruler on the right with that funny S curve at the end. 


This was good fun...next on the agenda are some feather curls in a border and trying out some frames around motifs.

Karin

Thursday, 11 June 2020

Heartfelt Wholecloth

The Heartfelt Wholecloth designed by Kelly Ashton for the Handiquilter Ruler of the Month Club 5 is finished!
Turned out really nice even though I am missing one of the borders as my piece of silk was just not big enough. The quilt comes out at 41in x42in, just a bit smaller than its original.
However, I have some chalk marks left in the silk which I could not erase...just will not come out, in fact I think I made it worse by rubbing them, so I am thinking that I have to wash this beast. Not ideal, but seeing that this was a bit of an experiment on how I would go with the silk, I may as well do it. Wish me luck! 
I have taken heaps of pictures today in preparation for this maybe not working out so great. At least I have some photos then of what this looked like. Would I do it again on silk...hmm, maybe not. Stitching on the silk was a pleasure, but the marking is a real problem as you do need the registration lines. In this wholecloth I had to have lines in each of the corners of the hexagon and they had to stay throughout the stitching of the design as all subsequent sections from the center out are based on those lines. I did those lines with the Quilters Choice Chalk pencil as I knew they would not disappear with handling the wholecloth. In between I also used the Bohin Chalk pencil and the Sewline ceramic pencil, both of which disapeared with handling (which is good, but not useful for the registration lines). In retrospect I think I should have used something like the Frixon pen for those important lines...that would have just lifted with heat and the dark fabric would have not shown the residue, I think. Well, as much as I love the look of silk, this has been really tricky, but at least I know now what I can use and what to avoid.

Linking up to Midweek Makers over at Quilt Fabrication.

Karin

Saturday, 6 June 2020

Heartfelt Wholecloth Progress

Nearing the end of my Heartfelt Wholecloth quilt. This quilt was designed by Kelly Ashton and can be found on the Handiquilter website under the Ruler of the Month Club information.

Only the four corners left
This has been an extraordinary intense workout of all 6 rulers of the Ruler of the Month Club 5 and was an excellent opportunity to get further acquainted with the Capri 18. There are a number of things that I tried on this wholecloth making use of some of the new features, i.e.

- stitch regulation: I used stitch regulation for the the frames of this wholecloth. Making longer straight lines has by now become quite easy to do and I used the Precision mode for this task. As I have become more comfortable with the stitch regulation, I did also use it in some of the smaller designs as well (like all those tiny 1/8in lines, the Flying Geese shapes and the diamonds)). As this was mainly for practice, I did some designs starting off in stitch regulation, however then went back to Manual when this was easier. For example, for some strange reason I found doing the smallish ribbon candy in the last border quite comfortable in Cruise mode on a particular setting where I felt that the machine and I were in sync, however when I tried to do the smaller swirls this did no longer apply. While I could stitch the swirls in Cruise mode, it felt jerky and somewhat uncoordinated. In this instance I went back to Manual, as this was just easier and looked better. A lot more practice needed for stitching some of the smaller designs, although I am equally as happy to just stitch them out using Manual mode . It really is a matter of finding out what feels comfortable for you at what setting and fine tuning this a bit.
- Play/Pause button: I love this feature and have used this on this wholecloth when doing microstippling and pebbling. It allowed me to just concentrate on the movement of my hands, focusing in on the design without starting to slow down or speed up, just keeping the sewing speed at a nice steady speed. Very handy for that sort of work.

Very happy with how things are progressing and looking forward to the next wholecloth. 

Karin

Tuesday, 2 June 2020

Let's Do Some Ruler Work Linky Party Canned

Hi all

I had a good look at the linky party stats and have decided to close it. It just is not gaining traction, irrespective of whether I advertise it or not. On average it has about 50-100 views on the blog and a high number of people who look at it through instagram, which is great but it does not translate into action. So, maybe I was wrong and the topic is just too specific for people to participate...not sure about that. Could also be that there is just too much going on in cyber space and people are busy with other things. Who knows.

I did want to thank people who have participated over the last few months. It's been an absolute pleasure to read the posts and look at their ruler work. I have really enjoyed this and been inspired by the posts. I am still glad that I have tried this as I have learned a fair bit in the process and would be very comfortable to run a linky again. Maybe inspiration strikes again and I can come up with a more general theme...

Well, back to talking about rulers though. I have had Bethanne Nemesh' Lily Line rulers for about a year by now. Was very excited when I got them, had watched some videos on how to use them, but when I tried to use them it was not that easy. Bethanne makes it look very easy but somehow that did not translate to me. So, they ended up in the drawer for a while.
Lily Line Ruler 1 & 2

Bethanne has been running live videos on FB for the last couple of weeks and while I missed the live sessions I started to watch them (you can find them HERE) on her blog. It finally clicked what I had been doing wrong in terms of using them...I think I was mixing up making marks to align the ruler, i.e. making marks on the quilt and then inconsistently shifting for the 1/4in offset, not marking the ruler correctly etc. While I had seen her use them in her videos before, I think when I used them I got really confused and usually ended up with slightly non-symmetrical shapes. Over the last few days I have been watching the FB videos intently and also gave the last session a bit of a whirl, carefully setting up my marks exactly the way she described it in the videos and 'bingo', it worked like a dream. The videos are excellent not just for learning on how to use those rulers but also on where you might want to use them and how you go about doing this. Really enjoying them. Bethanne is of course a total pro (I had the pleasure of doing a class with her a few years back on feather quilting) and it will take me a long while to get comfortable with the use of these rulers, let alone producing anything remotely as intricate as she does, however I hate to buy things and then not using it. Used correctly, these rulers can save you a lot of time.

Here is my sample
The Sample

Approx. Alignment of Ruler

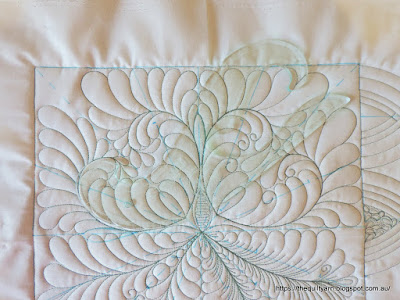
Don't look too closely at the quilting...this was to test whether I could achieve symmetry freehand, just using a few dots to align the ruler. The top part (the two hearts) was following her example of a block motif that would be repeated over the four quadrants. This came out great, I would just have to do the feathers a bit more carefully...a lovely design for a block. I think all it took was two little dots on the quilt and one mark on the ruler. The two shapes underneath was me trying to use a different part of the ruler, starting from the center out. Interestingly, as soon as I tried to 'wing' it a bit (the left bottom shape), I mucked up the alignment and the feathers were noticeably longer on one side. I did the same shape again, this time going back to making marks on the quilt and ruler and aligning the ruler with the precision hole on one line and it turned out perfect. Lesson learned!
 
So, I made a bit of a pledge to myself to continue to practice with them, trying out different shapes and parts of the rulers that I could use in my wholecloth quilts. Next to practice is Amish Feather curls in borders...love the look of them. Must say, also eyeing out Lily Line 3 now 😏

Karin

Popular Posts