Showing posts with label 1000 Pyramids. Show all posts

Thursday, 30 August 2018

Onwards and Upwards

My 1000 Pyramid quilt is finished...I am currently sewing on the binding.

This was a very long and arduous journey. I think that I started this project about 2 years ago and it was always in danger of becoming an UFO.  In case you were wondering how I handled the bulk I have got photos showing the way it was situated at varying stages.
Initially I quilted away from me with the bulk sitting to the side.

As I advanced, the bulk became harder to handle and I had to switch things around quilting either sideways and in the end towards me. 
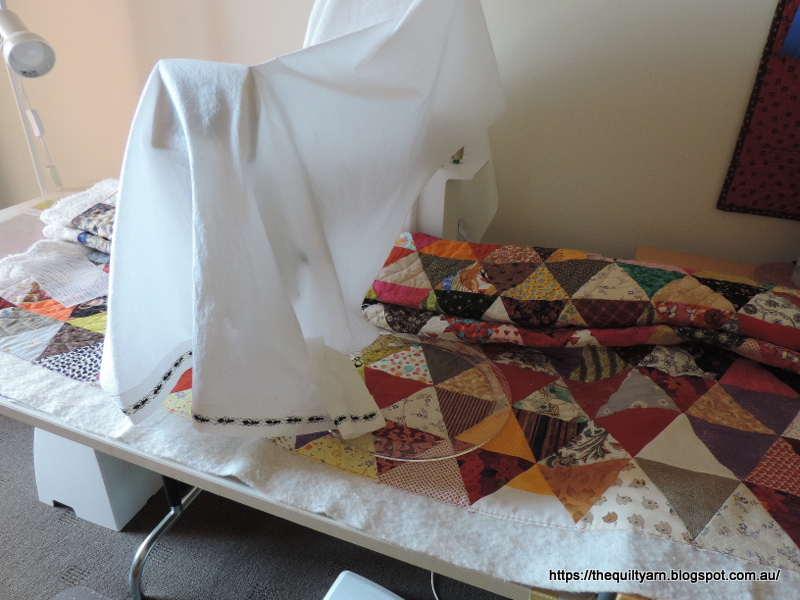
You can see that I also had it more folded in the back...as I went along and came towards half way folding it in an accordion style proved to be the best way to keep the quilt from dragging as the whole lot had become more firm and harder to handle. Some quilters use a suspension system for their bigger projects...obviously a good idea, however I have never looked into this because I do not usually do big quilts like that.

Well, this was a bit of an adventure and I am over the moon that it is done. One more photo to come of the quilt all finished with the binding and that is it.

After this, I treated myself to a new Accuquilt die. When my little wholecloth quilt recently won first prize in the quilt show, I got a gift voucher to my favourite sewing shop. I took my time in deciding what to get as I wanted to spend it on something useful, so I started to look at the Accuquilt dies. I have got quite a number of dies, however have in recent times decided to get dies that make my life easier. So, rather than going for those really pretty and amazing 'one-off' dies, I am now tending to buy those that I will use all the time. Had not looked at the strip dies before because they are a bit expensive, however with the voucher was able to get myself a rather huge strip die. 

3, 2 1/2in strips on the die. Nowadays they have an added feature of having angled guides marked on the die, so that you can cut squares and diamonds at varying degrees. Bonus!

Used this on my binding strips for this quilt...needed a total of 9, 2 1/2in strips.
This was so easy and quick, just putting it through three times and done...I am always surprised at the absolute accuracy. Totally straight and perfect!
Should have invested in this years ago.


Karin

Friday, 17 August 2018

1000 Pyramids Quilt

I am not posting a lot because I am still working on the 'blasted' 1000 Pyramid quilt, This was not one of my brighter ideas...taking forever and is actually quite hard as I have a lot of bulk to contend with as the quilt is very large. On the plus side, I am surprised how easy it is to push a large quilt through the throat space of the HQ Sweet 16. Had I chosen an allover design, I would have had this finished in a flash.

This is how much I have got left
Does not look a lot but there are about 5 rows left to do on that quilt. Each row takes me about an evening to complete, so not really that bad, except that motivation is by now down to zero.

Even though consistency is sadly lacking a bit it looks quite nice and is definitely the right design for this rather colourful quilt
I don't think I will do this again in a hurry, however after this I can confidently say that trailing off a ruler is a thing of the past...definitely got that down pad and also have been able to speed up a bit so that it is going slightly faster. The biggest issue has been the alignment of the rulers with all the bulk around me and the holding of the ruler. Overall, happy with the result though, just need to get some discipline happening now to actually finish this off!

Karin

Friday, 27 July 2018

What a Crazy Idea

So I am about half way through my 1000 Pyramid Quilt quilting a Baptist Fan design all over it.
I did trial this on a lap sized quilt before that and it worked really well. Given the size of this quilt I was a bit hesitant, however started it and am obviously committed to it by now. I am using the Handiquilter Circle Ring Set to do this. Wow, what a hassle! It is absolutely do-able as you can see, but consistency went out of the window by the second row because the alignment is just a bit difficult having the quilt scrunched up on all sides.  In thinking about this, this made a lot of sense to me because you are shifting, scrunching, moving etc...there is no way one would get this exact, so I concentrated on getting this approximately right because it does not really make a difference. Worked out a system of alignment that allowed me to more or less eyeball the alignment of the ruler (the HQ rings got a very handy 1/4in line ruled on there and some straight lines that helped a lot. I do mark in a straight line after each row of fans and then also mark in vertical lines at the widths of the fans, but overall just going for approximates.

Must say that this is a bit of a handful and requires a bit of patience. This quilt will go in the spare room so I am not too fussed really how consistent this turns out and I will probably not try this again on such a big quilt, however for a smaller lap size quilt this is definitely a great design to do on the Sweet 16.

Apart from this I am trying to work out what to next, problem is I am having too many ideas...

Karin

Sunday, 8 July 2018

Process

I made a start on my 1000 Pyramid quilt...

Once I basted this thing, I went over it with the basting stitch of the HQ Sweet 16 in a broad meander pattern.
You can see how I stuffed the whole quilt to the left of the machine...not rolled up, just bunched together in a big bundle. Once that was done, I went around the edges with the Versa Tool, still using the basting stitch
That is one thing I have used from the beginning with this machine, saving me heaps of time in terms of going around the edges of a quilt and I am used to doing this with the Versa Tool (has these little notches which I line up so that it stitches about 1/8in from the edge).

Then came the Baptist Fans...could not resist trying this, although I was still not convinced that this would work
Starting off...
...and having 2 rows done
Hard to see, even though I am using a 40/2 wt Aurifil thread. The scrappiness of the quilt just soaks it up. This is a good thing as consistency is a bit lacking, however overall it looks really good. I am making the fans slightly bigger, i.e. 5.75in instead of 5.5in (my largest ring gives me an 11in circle) so that the fans do not land on the seams. This is where the HQ Echo foot became really handy
This is the 1/2in Echo Foot. Looks a bit intimidating, but I must say I almost find it easier to stitch with this. Have not once trailed off and find it easy to work with. Took me a while to work out a workable process for quilting the fans, i.e.
- placed the quilt in a bundle to the left and then moved the bundle under the machine to the right onto the next table as I went along
- had a chair next to me with all the rulers and bitses, as the quilt kept pushing things off the table
- did temporary marks on the quilt of 5.75in width and height so that I would roughly stay on track

Overall, a half ring set would probably be better in terms of holding and aligning the rulers, however I am obviously not going to buy yet another ruler set just for this. I bought the circle set specifically to do circles of various diameters and this set is particularly handy as you can ride on the inside for some of the sizes. 

We will see how this progresses. For now, all is well...will be very interesting to see how I am going to manage this as I am getting more to the middle.

Karin

Tuesday, 3 July 2018

Taming The Beast

I finally knuckled down and attacked the basting of my 1000 Pyramids quilt. Was unsure exactly how I would do this, i.e. whether to spray baste or to pin paste. This quilt turned out a bit big, approx. 66in x 87in! I have done spray basting before and like it but have little room to do it and also was not a friend of the mess that it created around the basted piece (i.e. had to wash the floor twice as all that sticky stuff was spread out all over the place as I got it on my socks).

Anyway, decided against the spray basting as I am also not sure how I will quilt this and thought that it would be good to get a sense of how heavy and unruly this quilt was going to be.

So I followed my trusted 'crawling around the floor' method (yep, paid for that the next day with a very sore back).
Lucky, I was by myself as there was no space left to walk around anywhere. I pin basted it very tightly as I did not want to risk any shifting or distortion as I am not going to stitch-in-the-ditch (that much I know).
I then took it to the HQ Sweet 16 and had some fun using the inbuild basting stitch (at 1/2 sec) and noodled around the pins, taking about half of them out as I went along. This went surprisingly fast and secured the quilt even more. The handling was not as bad as I thought it would be as I do have a fair amount of space around me, i.e. one extension to the left and on the right I have my cutting table, so it was just a matter of laying it out properly.

Still don't know exactly what to do...am tempted to try to do the Baptist fan with the rulers...would look lovely on that but just not sure whether this would become too difficult given it's size.

Linking up to Quilting Is More Fun Than Housework 'Oh Scrap Linky'


Wednesday, 16 May 2018

1000 Pyramids Quilt Top Finished

I finally knuckled down to finish the 1000 Pyramids quilt top. Not sure what I was thinking when I started this...definitely were not thinking of all those points you had to match!

I did purchase an Accuquilt Equilateral Triangle Die last at the last quilt show or maybe even the one before that.
Don't know about you but I get a bit frustrated if I do not use what I purchase...over the years I have accumulated a lot of stuff, so I bought this with the 1000 Pyramids in mind. I thought ...great, I can get rid of all my scraps and I do love scrap quilts and their riot of colour.

So I started and pretty quickly realised that I had a lot (!) of points to match. I am not the greatest piecer and even with those little notches in the die I struggled somewhat as you are dealing with bias edges. So, I began to drag my feet and this project definitely was in danger of becoming yet another UFO. Also made it really big to cover the King Single bed in the spare room which meant that when I picked it up again the other day I had a good eight double rows to do. What happens to me with UFOs is that I forget how I exactly thought this through in terms of ironing the rows and as I had several starts and stops, I had the rows going in all sorts of directions! What a hassle!

I decided not to sweat the small imperfections at the points or the mismatched seams and started again to just get this done. It went pretty quickly, mind you, I was dreading to sew the rows together. As I expected the matching of the points got very tricky over the entire width of the rows as I had ironed seams sometimes left and sometimes right...no idea what I was thinking. Anyway, I struggled along and about half way through I started using my glue stick for paper piecing to line up the points. What a great little trick!...I aligned my points, put a tiny dot of glue on the point in the 1/4in seam allowance and then pinned the rest. This worked fantastically...not perfect but a lot neater than some of my other rows. Given that I have handled the pieces for well over a year, some of the bias was definitely mis-shapen and getting the point stuck down with glue really helped with the alignment.

It is absolutely huge, coming in at about 66.5inx87in. Will nicely cover the bed but I am a bit worried re the quilting. Just sewing this together, I could feel the weight of all the material, so even without batting this is already heavy. Not sure how I am going to do this...pinning this will make this very heavy, I think. Also was looking at this today and thought that I have absolutely no idea on how to quilt this other than that it would have to be some sort of overall design. Was thinking of maybe doing Baptist fans with the rulers, however even with the Sweet 16 I would have over 2 m of pinned quilt in front of me starting at the bottom. Not sure this would work. Have my HQ group on the weekend and will have a bit of a talk about how people go about quilting this size. If all fails I can always do just wavy lines down the length.

Anyway, very pleased I finished this top!

Linking up to SEW FRESH Quilts for the Let's Bee Social Weekly Link Up

Karin

Wednesday, 4 October 2017

Multitasking

I am out of quilt tops to quilt on...hence I am continuing on my 1000 Pyramid quilt. Wow, what was I thinking...there are so many points to match! Given my tendency for sloppiness in piecing this is going to be very painful.

Have done 2 rows so far, aiming for a King Single size. We shall see...

You would think that a scrappy quilt like this would make a bit of a dent in the stash, but I have to say I have hardly noticed the difference. What I did notice though was that I have an extraordinary amount of red fabric in the pyramids...just about every pyramid has some sort of red tone in there. Constructing the pyramids is good fun as you can chain piece along. Particularly love my new gadget...the Cutting Gizmo
Makes separating the chain pieced units very fast.

While I was doing this and looking at my stash in general (I really need to do something about this!), I found a stack of orphan blocks...I think they were from an EQ7 quilt along some years ago of which I dropped out after a few months. The blocks were very intricate and many were paper pieced. You would think that they were all nice and straight, but 'no' they were anything but straight...found some nice grey fabric to go with it (the fabric was from a Jelly Roll from Moda which I think was called 30s Playtime) and put some sashing around it, fudging a fair bit to get some straightness happening.
Love those blocks. This will not be exact and the piecing is somewhat wonky in parts but it will be great to practice some more intense ruler quilting on. I am planning to put a 4 in border around it in the grey fabric and also try out my new Waves ruler on that to put some feathers in. This should be fun.

Apart from that I have been searching the internet for a bit of an interesting pattern for Charm squares. I got a packet of Charm squares (Meadow Bloom by April Rosenthal) from the Fat Quarter shop last year to make into a baby quilt...as they had a special going at the time I also got a packet of 2 1/2in squares of the same range to go with it, not thinking much about how to combine this...
Found some simple ideas on the Internet and after a lot of math was able to combine some ideas on the EQ 7 program and come up with a way to use both the 5in squares and the 2 1/2in squares. Nothing spectacular...just squares to keep it simple. Currently waiting for my order of an 4 1/2in finished Accuquilt die to cut out some additional fabric to go with it. Figured that I often use this size and while I could cut it, I do like the efficiency of the cutter. Takes no time to cut out a whole stack of squares and you are ready to go.

So, hopefully in a couple of weeks I will have 3 new quilt tops to play with.

I am dropping in to Esther's Quilt Blog  who hosts WIPs on Wednesday

Karin

Popular Posts