Showing posts with label Camden Bowl. Show all posts

Sunday, 19 May 2019

2019 Finish-A-Long: Second Finish for Second Quarter

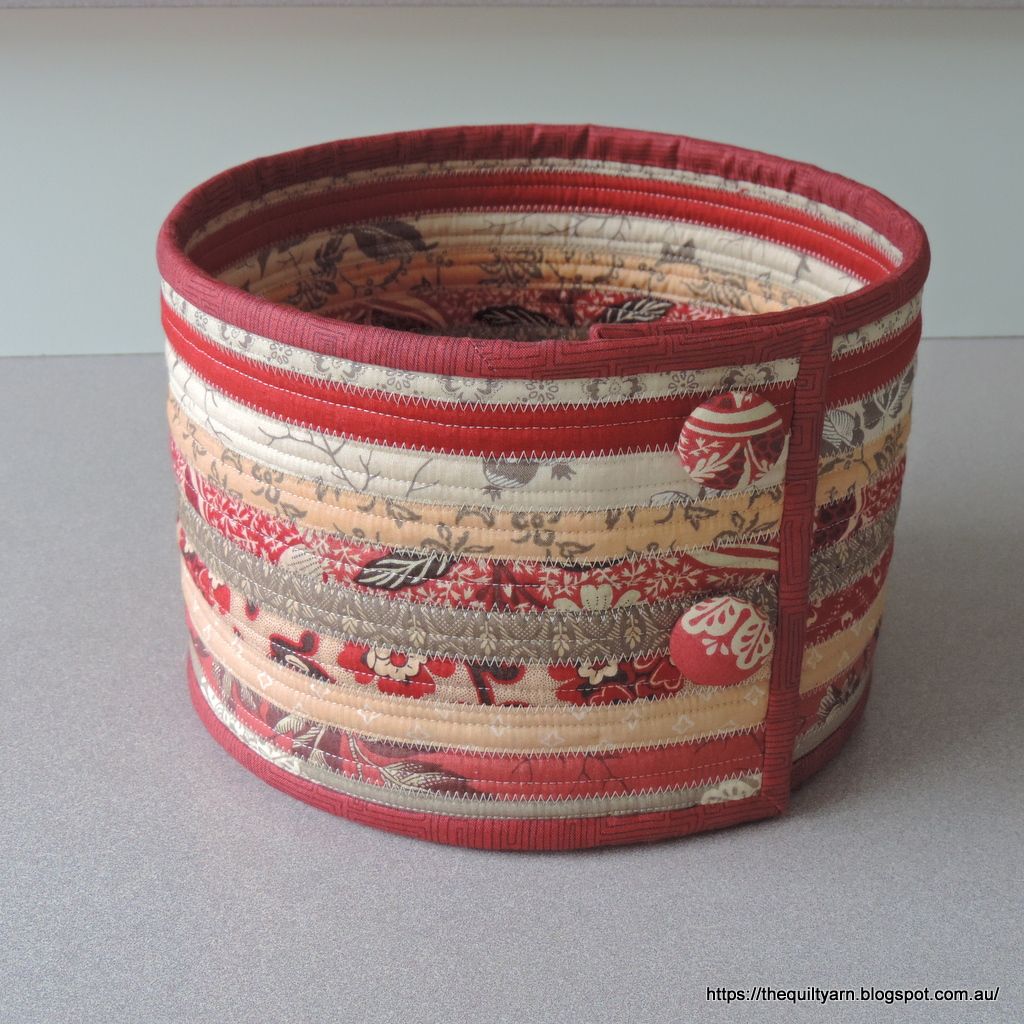
My second finish for the 2019 Finish-A-Long: The Camden Bowl.

You can find my list of proposed finishes for the 2019 Finish-A-Long HERE.

Approx. 8 1/2in by 6in high
How cute is this! I constructed the bowl from leftovers from a jelly roll of French General fabric (and still got bitses and pieces left over!). The pattern for this bowl comes from Aunties Two, however I just loosely followed a YouTube video from Mom and Pop's Quilt Shop. Working on this, I realised that the bottom is done somewhat different in the original pattern...they insert some stiffening into the bottom which would have been better. While looking around, found some more helpful videos (see HERE and HERE) that explained the bottom and how to sew all this together. So this bowl has some flaws but still looks pretty great. Very enjoyable little weekend project.

Please visit Leanne's blog She Can Quilt for more information on the Finish-A-Long. You will find  detail on how this link up works and also find the list of bloggers who are hosting this great event. The Link up for the Second Quarter Quarter Finishes is on July1st.

What will I use this for?
Great  bowl for keeping your knitting handy.

Karin

Wednesday, 15 May 2019

2019 Finish-A-Long: Camden Bowl

I have been talking about the Camden Bowl in previous posts and finally made a start. The idea came from leftovers that I had from the Moda French General fabric range. I have been holding on to this fabric for years. Out of the original jelly roll, I made a bag, a Dresden Plate table runner and still had some strips leftover!

First I made the bottom...for this I used a piece that I am obviously also saving for something...how ridiculous! Cut it up and used it. In order to make the centre nice and stiff I used this as a bit of a workout on the Sweet 16 with my circle rulers, then bound it and put it aside.


The sewing of the strips was good fun...
I used pre-cut batting strips (Mathilda's Rainbow batting 2"). This made the strips very solid and I am actually thinking that this would make an excellent bathroom mat, if I could find something that would make the bottom non-slip. In terms of process, you take your 2 1/2in strip, put the batting on and then fold it in on itself towards the middle. You then sew along the edge and when you have two of them, you sew them together with a zig-zag stitch, then add the next two and so forth. For Pfaff owners....this is where the Start/Stop button becomes very handy...
Just make sure that you set your speed to 'slow', otherwise the machine will take off like a rocket and give you a hell of a fright. At the slow speed this leaves your hands free to ensure that you zig-zag along the middle in a straight manner which is important in terms of not bowing your piece out of shape.

This is how far I got
Bottom done, panel done and binding prepared! I used 10 strips  rather than the 8 strips that the lady in the video had used. Felt that the whole thing should be a bit higher. As you can see the panel will overlap, once attached to the bottom and then will be adorned with some decorative buttons, ribbons or similar. 

The original pattern is from Aunties Two however I am just loosely following a YouTube video from Mom and Pop Quilt Shop. I did  get my daughter to get me the bag pattern (called Bali bag) from Aunties Two for Mother's Day though as there is no way I could just 'wing it' and construct a bag. Will have to closely follow the pattern. Looks like good fun though.

Linking up to Oh Scrap! 

Karin

Tuesday, 23 April 2019

Project - The Camden Bowl


This video from Mom and Pop Quilt Shop is fabulous! On my list to make...

Karin

Wednesday, 3 April 2019

Another Baby Quilt!

This must be the year for babies...I am in need of another baby quilt! I only got baby girl quilts that are already finished, so I was looking for a very quick project that I could just throw together. Initially I was looking for a panel, but could not find anything that I really liked. When I was at a recent quilt show, I discovered a packet of fabric, already cut up into 6 1/2in strips. Bought that and cut it up into squares and just mixed some applique hearts with it. 

Presto...done!
Very blue and cutesy.  Planning on doing a clamshell design over it that I can stitch out with the HQ Versa tool. Prepared everything ready for basting today, so this should be finished in the next 2 weeks. 
Apart from that, dragging my feet. Still have to put my quilt show entry in...currently sewing on the binding and will then get on to all the paper work. I have had some time off work, but now have gone back to my regular working hours. This was supposed to be leading into retirement, however as I have found out, I am just not ready. So, it's back to work for me for a while...not sure, how long, but I am confident I will know when it's time to quit for good.

Today I also got side tracked again...I am just so distractible. Have been searching the internet for a while for tutorials on jelly roll rugs and rugs that are made by braiding fabric strips. Today I came across a really nice You Tube video called 'Weekend Project - The Camden Bowl' by Mom and Pop Quilt Shop. I have seen this fabric bowl at my local sewing shop before...it follows the same principles as the jelly roll rugs, so I started watching this. The woman in the video is hilarious...I laughed out loud a couple of times...very humorous and thoroughly enjoyable! She made it look quite easy and her casual way of putting things together really appealed to me, so I got straight into this and tried it out.

First attempt at just getting the method down...very enjoyable indeed!
yep, I got hooked straight away, so I will try this out in the next few weeks. Still have some leftover jelly roll from French General, so I will use those strips for this to make the bowl. Like the idea of using bits and pieces of leftover batting and fabric. Also have seen bags made out of this and will need to investigate this further as even this little piece that I constructed is unbelievably sturdy, hence really useful for bags. I am also thinking that I may not need a lining if I use this for a bag, but we shall see. 
 
Karin
Popular Posts