Thursday, 24 March 2022

Finished Owl Quilt

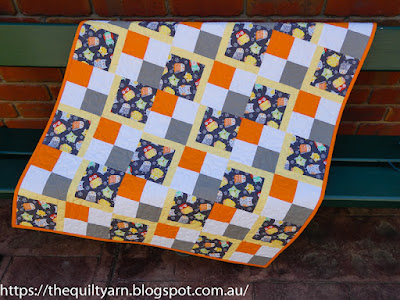
Finished my little owl quilt. 


The quilt comes to 36.5in x 48.5in and is quilted with an edge-to-edge allover design from Urban Elementz (see also last blog post). 


Very happy with how this turned out...it's vibrant, cheerful and interesting to look at, despite its simplicity. Lots of fun to put together and I am happy to report that the owl fabric is finally all used up (not that that made any dent in the ever growing stash).
The quilt will shortly go into my Etsy shop for sale, just need to work on some photos and details for the listing.

For now, I am linking up with Quilt Fabrication for the Midweek Makers Linky Party #324

Karin

Tuesday, 15 March 2022

Edge To Edge Quilting On a Sit Down Longarm

Finished putting my little owl quilt together and was wondering about how to quilt it. Did not feel like stitching-in-the-ditch (never really feel like that ), but was also bored with my range of allover meandering designs. Thought about just stippling over it, but felt that this was too boring. While I can do other allover designs, did not feel like concentrating that hard to do one of those more complex designs.

Well, after a lot of to and fro, decided to do an edge to edge design over it. You have to wonder though because that meant a lot more work, but somehow that is exactly what I felt like. Something more interesting that would keep me amused for a few days.

I love edge to edge designs and if I had a longarm on a frame I would probably do this all the time. The range and variety of designs that you can get is just amazing and they do look really good. For this little quilt I bought a new design from Urban Elementz called Cloud Nine -Petite by Patricia E. Ritter...easy peasy, just pay up and then you can download the design to print on your home printer. The only thing you really have to worry about doing it on a sitdown machine is to choose a fairly simple design, so that removing the paper does not become too much of a hassle.

I have done edge to edge designs on a sitdown longarm before...fairly work intensive as you have to trace the design to be put on the quilt and then quilt over it being left with removing the paper. I use Golden Threads paper for this which makes that part fairly easy, however it is still a lot of work doing it row by row. I trace the design on the paper using a blue water soluble pen as I do not want any unwanted marks on the quilt from a pencil or similar.

Starting off...there is the row of the Cloud Nine design


This photo was taken after the first few rows...you still can see remnants of the yellow Golden Threads paper (the blue meander thread is my basting - I do baste all my quilts before quilting). I do take out the paper as I go, however leave the majority of the last row for alignment of the next row. This quilt made alignment a bit easy because of the seams which I could check against every now and then to keep the rows as straight as possible. I could have saved myself some time in just tracing one row and then stitching through layers of paper with no thread in the machine to create multiple copies, however I prefer to trace the rows. That way I get used to the thread path which makes the quilting easier. You probably wonder how I attach the paper to the quilt...some people spraybaste the paper onto the quilt, which means you have to wash your quilt upon completion. I found a better solution for myself. I use inexpensive sticky glue dots...they stick to the paper well and hold it in place. They come off the fabric easily (when you remove the paper they stick to the paper) without leaving any residue behind. I do attach the upper side of the paper with pins, however that is the only spot that I use pins, because it is very easy to overlook pins when overlapping the rows which means you could inadvertently stitch over a pin (yep, learned the hard way). 

This did not take that long at all. I did 8.5 rows in total and am seriously happy with how this turned out. Love the design which just flowed well and was very easy to stitch out. Made even better with the Bernina Q20 stitch regulator which gave me some beautifully uniform stitches and very nice points. In fact, quilting a row was done in a couple of minutes as I could go reasonably fast, not having to worry about stitch length or anything. 

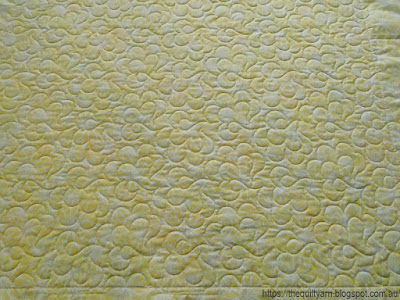
Next photo is a bit dark and the design looks a bit busy this way. I used a shaded orange Aurifil 50/2wt thread with hues of orange, orange-yellow and a lighter colour. It blends in just beautifully and all you see is the texture of the design.


Thrilled with how this turned out. Really like this design, so easy to stitch out and gives the most beautiful texture.

Karin

Thursday, 10 March 2022

All About Colour

Working on a new pattern.

I had this owl print for a while. Liked the cute animal characters on there and also thought that it would be easy to match colours to it. Well, it was not...took me a while to work out what to do with this. Every now and then I took it out, thought about it, tried a few different things and put it away. Did not want this to come out too dark and too bold. The fabric proved rather difficult as you have the dark grey mixed with the pale coloured owls.

So I started with the pattern and decided to lighten it up with the pale yellow sashings around the owls. That was a winner. Then it was back to the drawing board of EQ8 trying different surrounding colours. In the end I decided on orange and grey, however did not have the right shades in my stash. In fact, was quite unsure about the shading. Had a lighter grey in my stash which looked positively awful in this arrangement. Again, put it away for a while...

Then one of these days I was at the fabric shop (without the owl fabric) and was just looking around and picked the orange on impulse. I knew I needed an orange that was not fully saturated but also not so light that it looked washed out. It needed to pop a bit to make this into a bright and cheerful quilt. In addition I felt I needed a lighter grey that matched the grey of one of the owls on the fabric to pull it all together, but had little hope of matching this without the fabric at hand. Bought the orange and grey anyway and was preparing myself for a mismatch.

Well, the planets did align that day and when I came home, it was absolutely perfect and the new pattern was ready to go.

Really like this colour combination and cannot believe how long it took to get there.

Have the quilt top finished, just need to baste and quilt, then it's onto writing the pattern up. This should look really nice. Still a bit undecided whether to add a border or not, but will sit on that for a moment or two.

Karin

Saturday, 5 March 2022

More Curvy Quilting

The Breaking Boundaries online class with Bethanne Nemesh has started. She did a review of the improvisational quilting and added another project to the list.

This little quilt was incredibly easy to put together and super fast. Took me about half a day. My blocks came out at 12in which makes this a nice size for a little wall hanging. I deliberately chose the brown fabric with the light and and yellowish addition to match our surroundings in the family room. This will look great.
My curves were a bit gentler than what they were supposed to be as this piece was to practice deeper curves. Somehow mine ended up pretty gentle but I just liked the look of that.

I think I will do another one with more dramatic curves to practice this a bit more. One thing I really like about the improvisational quilts so far is that it 'eats' up a lot of fabric as the blocks are bigger and your starting point is usually a larger size. The brown fabric in this project had been lying around for years, so this was a great little project to just use this up.

Looking forward to the quilting of all those curved quilt tops.

Karin

Thursday, 3 March 2022

New Listing in Etsy Shop

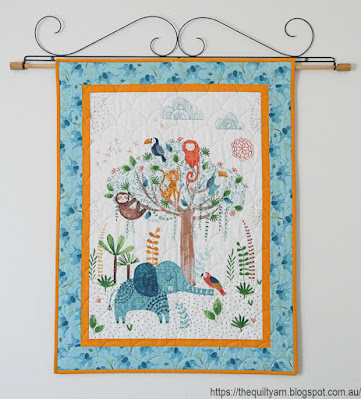
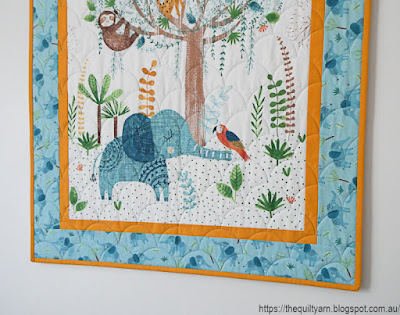
Finished another cute panel with an allover clamshell design. Absolutely love doing this and always comes out really nice. 

For this quilt I used a quality 60/40 wool/polyester blend wadding which gives this quilt just that little bit more loft. Feels nice and snuggly and given its make up will be good for frquent washing.

The quilt measures 30-3/4in x 40-1/4in, a lovely size for a drag along blanket or a playtime floor quilt.


My clamshells

I quilted the clamshells with light blue Aurifil 50/2 thread on top and a coordinating beige Aurifil thread in the bobbin. Looks great...very happy with it.

This was supposed to be the last panel for a while...however, have been to the fabric shop since then and ended up coming home with another two panels. Quite ridiculous really! To my defence, one of them made sense...it is one I recently sold and when I saw it there again, I thought that this would be great to just make it again, as I can then just copy most of the information already in existence from the previous listing. Time saver, I thought! However, then I saw another cute panel and took that as well. Hopeless, truly.

Karin

Popular Posts